Rokeby Museum
Rokeby Museum Distance Drawing Course — Week 5: Self-Critique

WEEK 1 | WEEK 2 | WEEK 3 | WEEK 4 | WEEK 5 | WEEK 6
Inspired by Rachael Robinson Elmer (1878–1919) and taught by Courtney Clinton, Rokeby Artist in Residence
Hello Students!
Allison Gregory here, Education and Interpretation Fellow at Rokeby Museum. So far, our distance drawing course has brought you an artist’s perspective on art history and drawing through the writing of Courtney Clinton, Ernest Knaufft, and, of course, Rachael Robinson Elmer. This week I would like to bring in a different perspective.
I am an art historian and museum educator. Before Rokeby Museum, I was an education intern at the Norman Rockwell Museum and an educator at Olana State Historic Site.
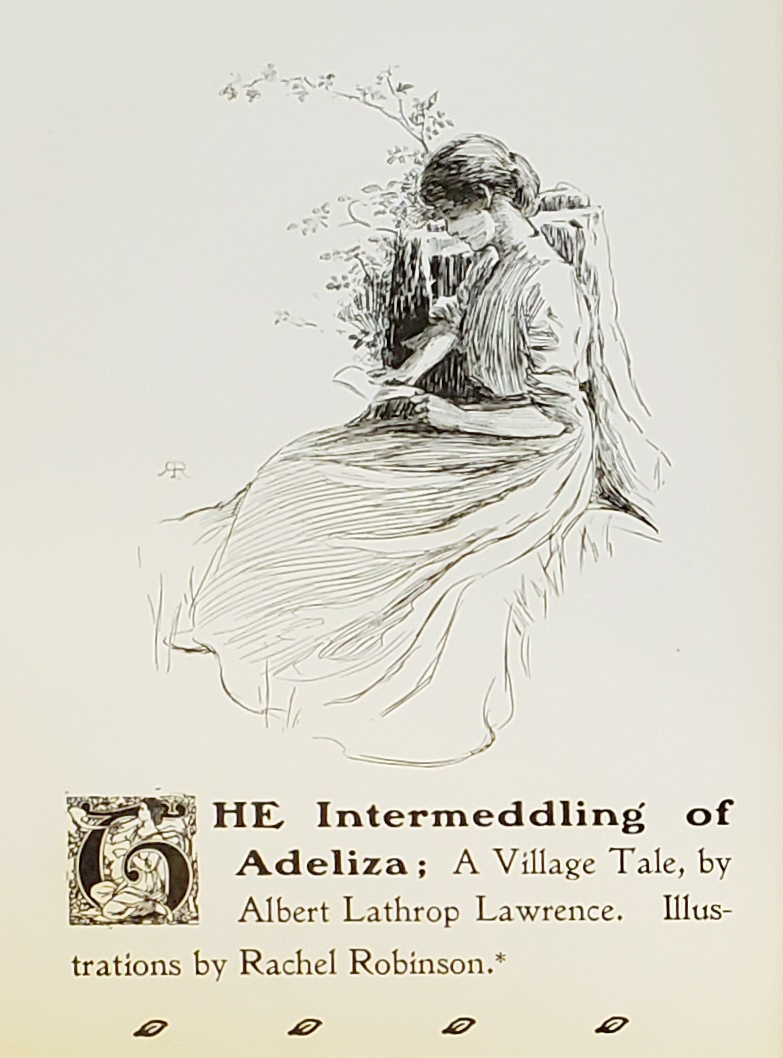
For this week’s blog, I have been researching Gabrielle Jackson (1861–?), a successful children’s book author from the turn of the 20th century who collaborated with Rachael in 1907. Unfortunately there aren’t many legal records or secondary sources about her. I managed to discover her parents, husband, and daughter through United States Census records and a few disparate newspaper articles. Although she was a well-known and successful author, with 43 books published, in her day, she seems to have been forgotten by history. Until now!
As we saw last week, thanks to the illustrative art of Charles Dana Gibson (1867–1944), women gained new ground at the start of the twentieth century. His illustrations beautifully capture the social change of this period, but wouldn’t it be more valuable to hear about it from the women who lived this moment?
Without these voices, we lose the perspective of the “New Woman;” the women who made the suffrage movement possible and who quietly worked outside of the home as far back as 1870. I want to hear Gabrielle’s perspective on being an author in a male-dominated field, collaborating with artists like Rachael, and growing up after the Civil War and into the modern era.
When we publish our final lesson on October 5th, that doesn’t mean that we will say goodbye to Rachael and never think about her again. As an extension of this project, and inspired by the feminist Wikipedia editathon movement, I will be adding information about Rachael (and her collaborators) to her Wikipedia page. In a small way, I want to help broaden our understanding of history.
Now, let’s get back to our story! Take it away Courtney!
Thanks Allison! Courtney Clinton, Rokeby Museum Artist in Residence, here. I wanted Allison to start off today’s blog because she has been an important collaborator on this project. Not only does she contribute to the project through her research and writing, she also brings a different view point.
In today’s blog we will explore this idea of perspective through the working relationship of Rachael and Gabrielle, a children’s book author. In my lesson we will talk about the importance of looking at your drawing from a different angle and I will share tricks so that you can effectively self-critique your art when a second set of eyes isn’t possible.
Exploring the Museum’s Collection
At the turn of the century, Rachael moved permanently to New York City. Being in New York opened up new opportunities for Rachael to work as a professional artist. Rachael quickly established herself as an illustrator for books and magazines. During this period she worked with a variety of different publishing companies including The Youth’s Companion, Harper & Brothers, and St. Nicholas Magazine.
“Harper & Brothers”, now the distinguished “HarperCollins Publishers”, was already an important book publisher in Rachael’s time. The publishing company recognised artistic talent and worked with leading illustrators including Winslow Homer (1836–1910), Frederic Remington (1861–1909), and Howard Pyle (1853–1911).
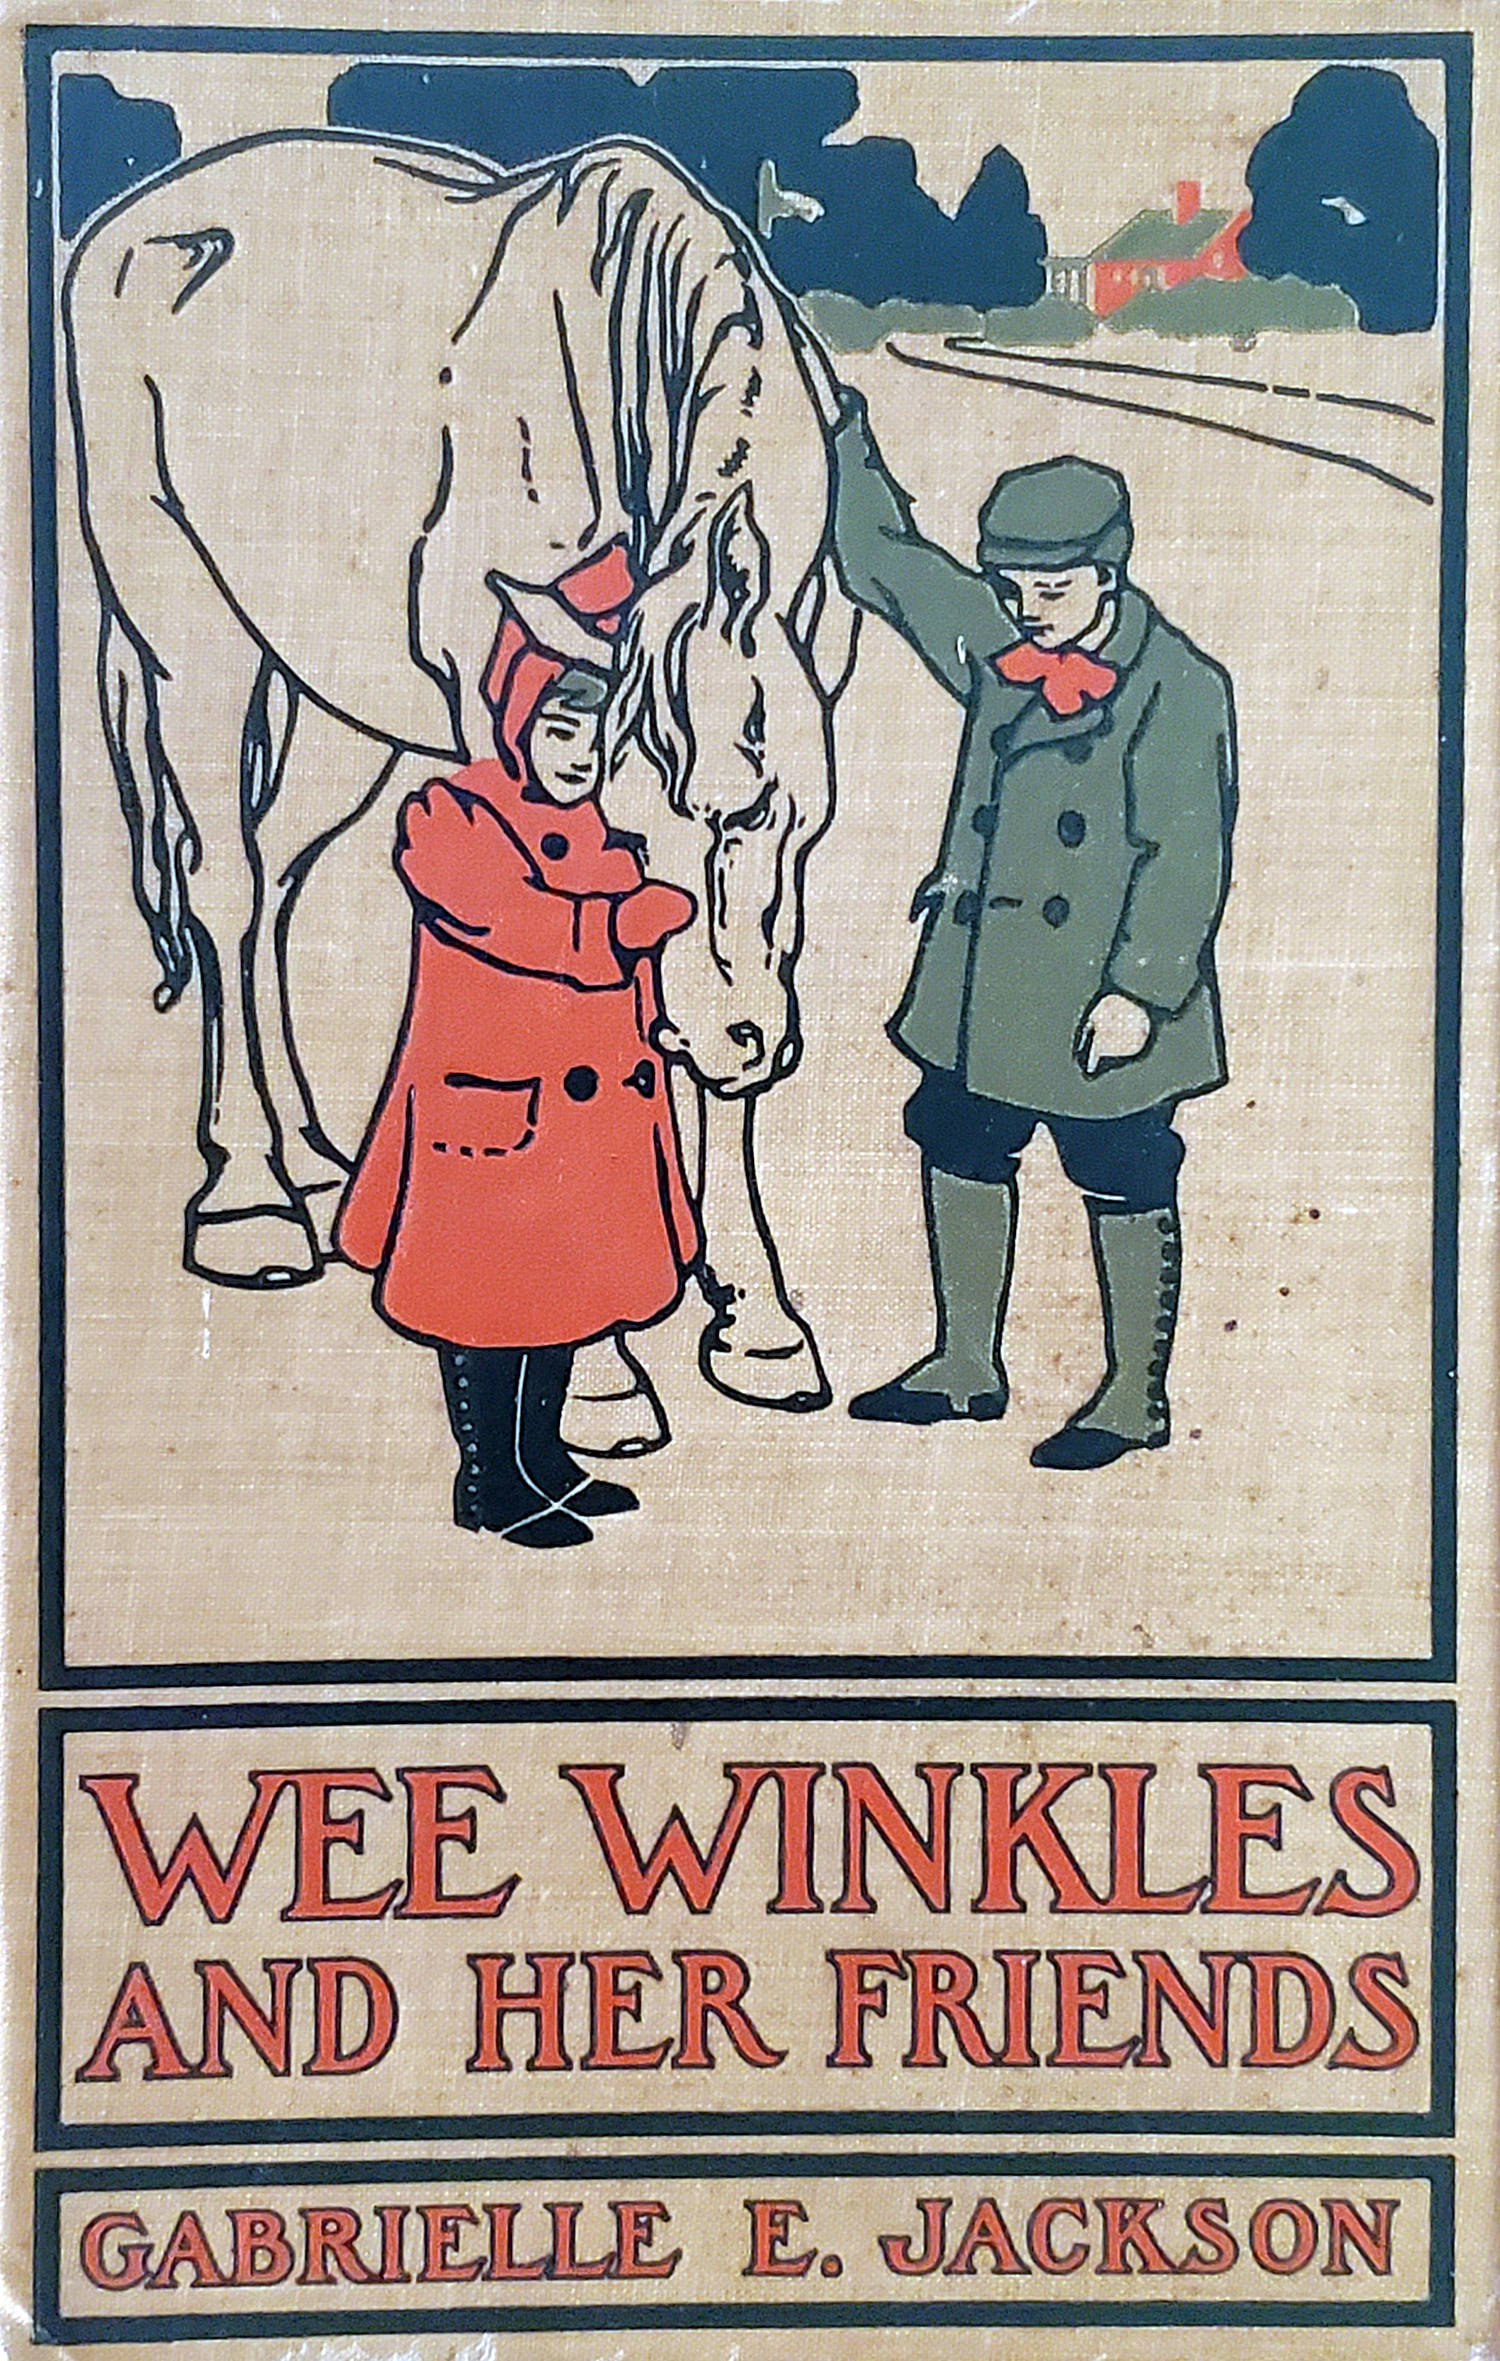
In January of 1907, the “Harper and Brothers” editor Joseph W. Harper contacted Rachael about illustrating a book from the popular series “Wee Winkles” by Gabrielle Jackson.
Mrs. Jackson writes me that she will be here at 9:15 Friday morning and she will be pleased to meet you then and discuss the illustrations for Wee Winkles. I trust you will find it convenient to keep the appointment.
— Joseph W. Harper to Rachael Robinson Elmer, January 23, 1907, Box 31, Folder 12, Harper Brothers
The “Wee Winkles” author, Gabrielle, was born in New York City. She got her start as an author by writing stories for her daughter. Her first story was published by the editor of St. Nicholas, Mary Mapes Dodge (1831–1905). Gabrielle built on this success and became a well established children’s author by 1905.
“Wee Winkles” was a book series written in the early 1900s. The popular children’s series followed the adventures of a little girl nicknamed Wee Winkles, her brother Wideawake, and Mama and Papa who made up a loving and close-knit family. Readers met kind and helping characters along the way. The books taught young readers the importance of being kind and empathetic.
A Visual Perspective
Rachael was asked to make eight illustrations for the book, Wee Winkles and Her Friends (1907), including the cover illustration. It was an important commission for Rachael and paid quite handsomely, a hundred and twenty-five dollars (which translates to about three thousand dollars today!).
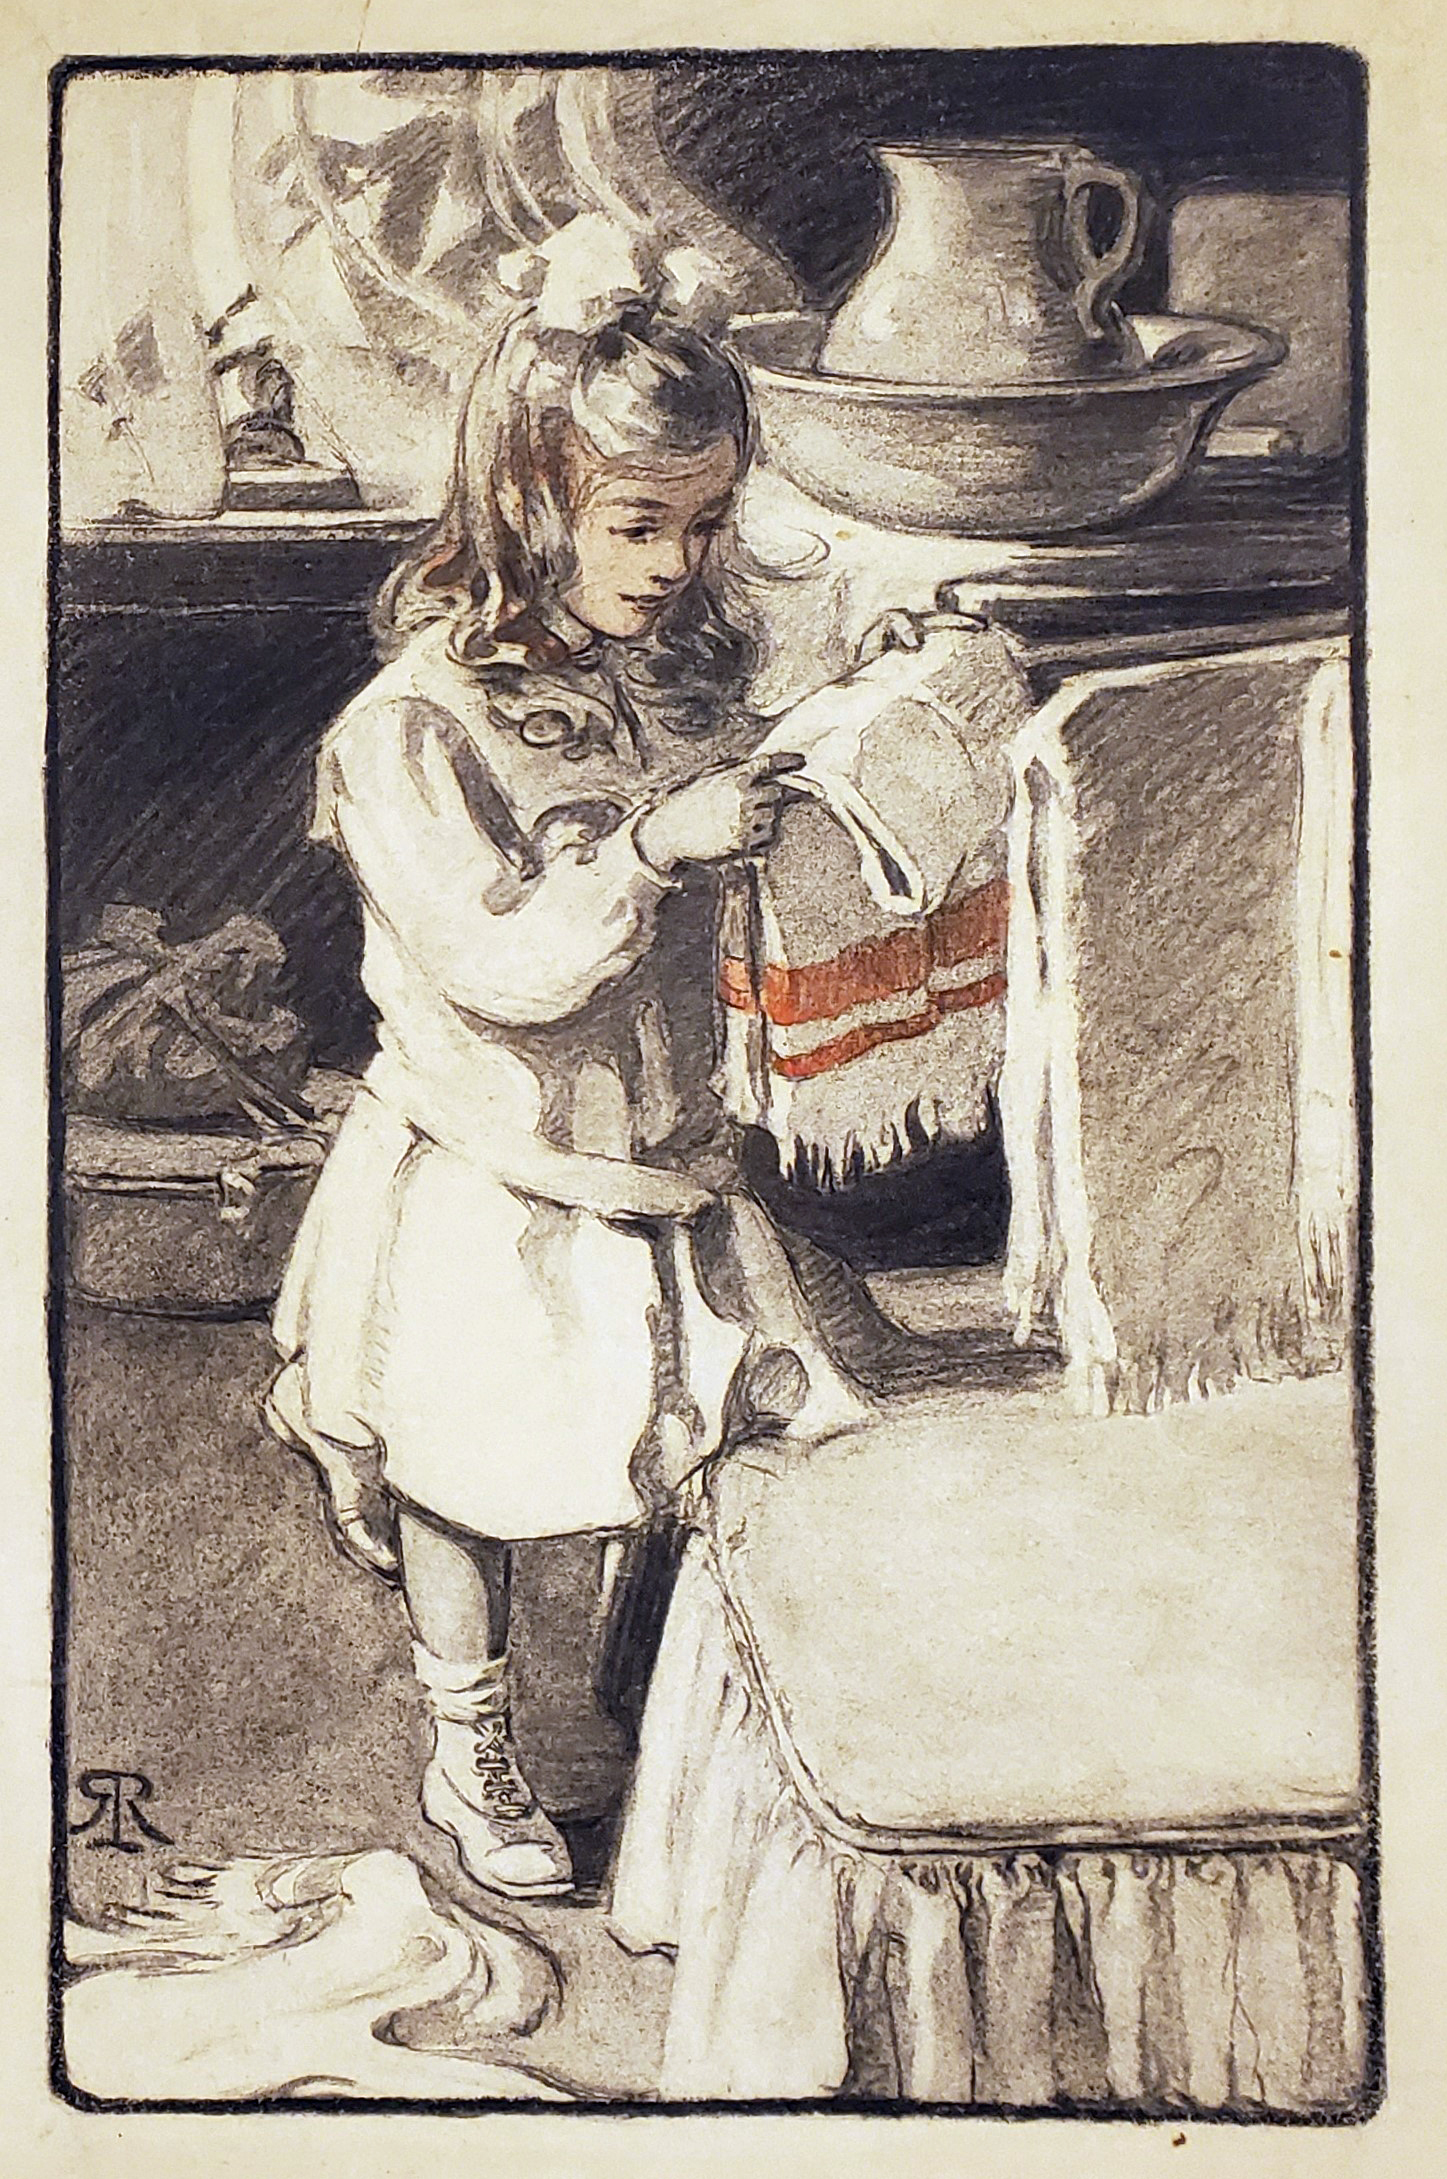
Although she was only given a week to make her illustrations, Rachael went to great lengths to find models and costumes and made preliminary sketches to help inform and give detail to her images. Rachael described her illustration process in a letter to her sister Mary Robinson Perkins (1884–1931).

In the morning I went to All Angel’s Parish house to see Lucy’s children and pick out some models. Picked out a dear little girl and a nice boy, and arranged to have them over next Saturday.
— Rachael Robinson Elmer to Mary Robinson Perkins, January 29, 1907, Box 32, Folder 12
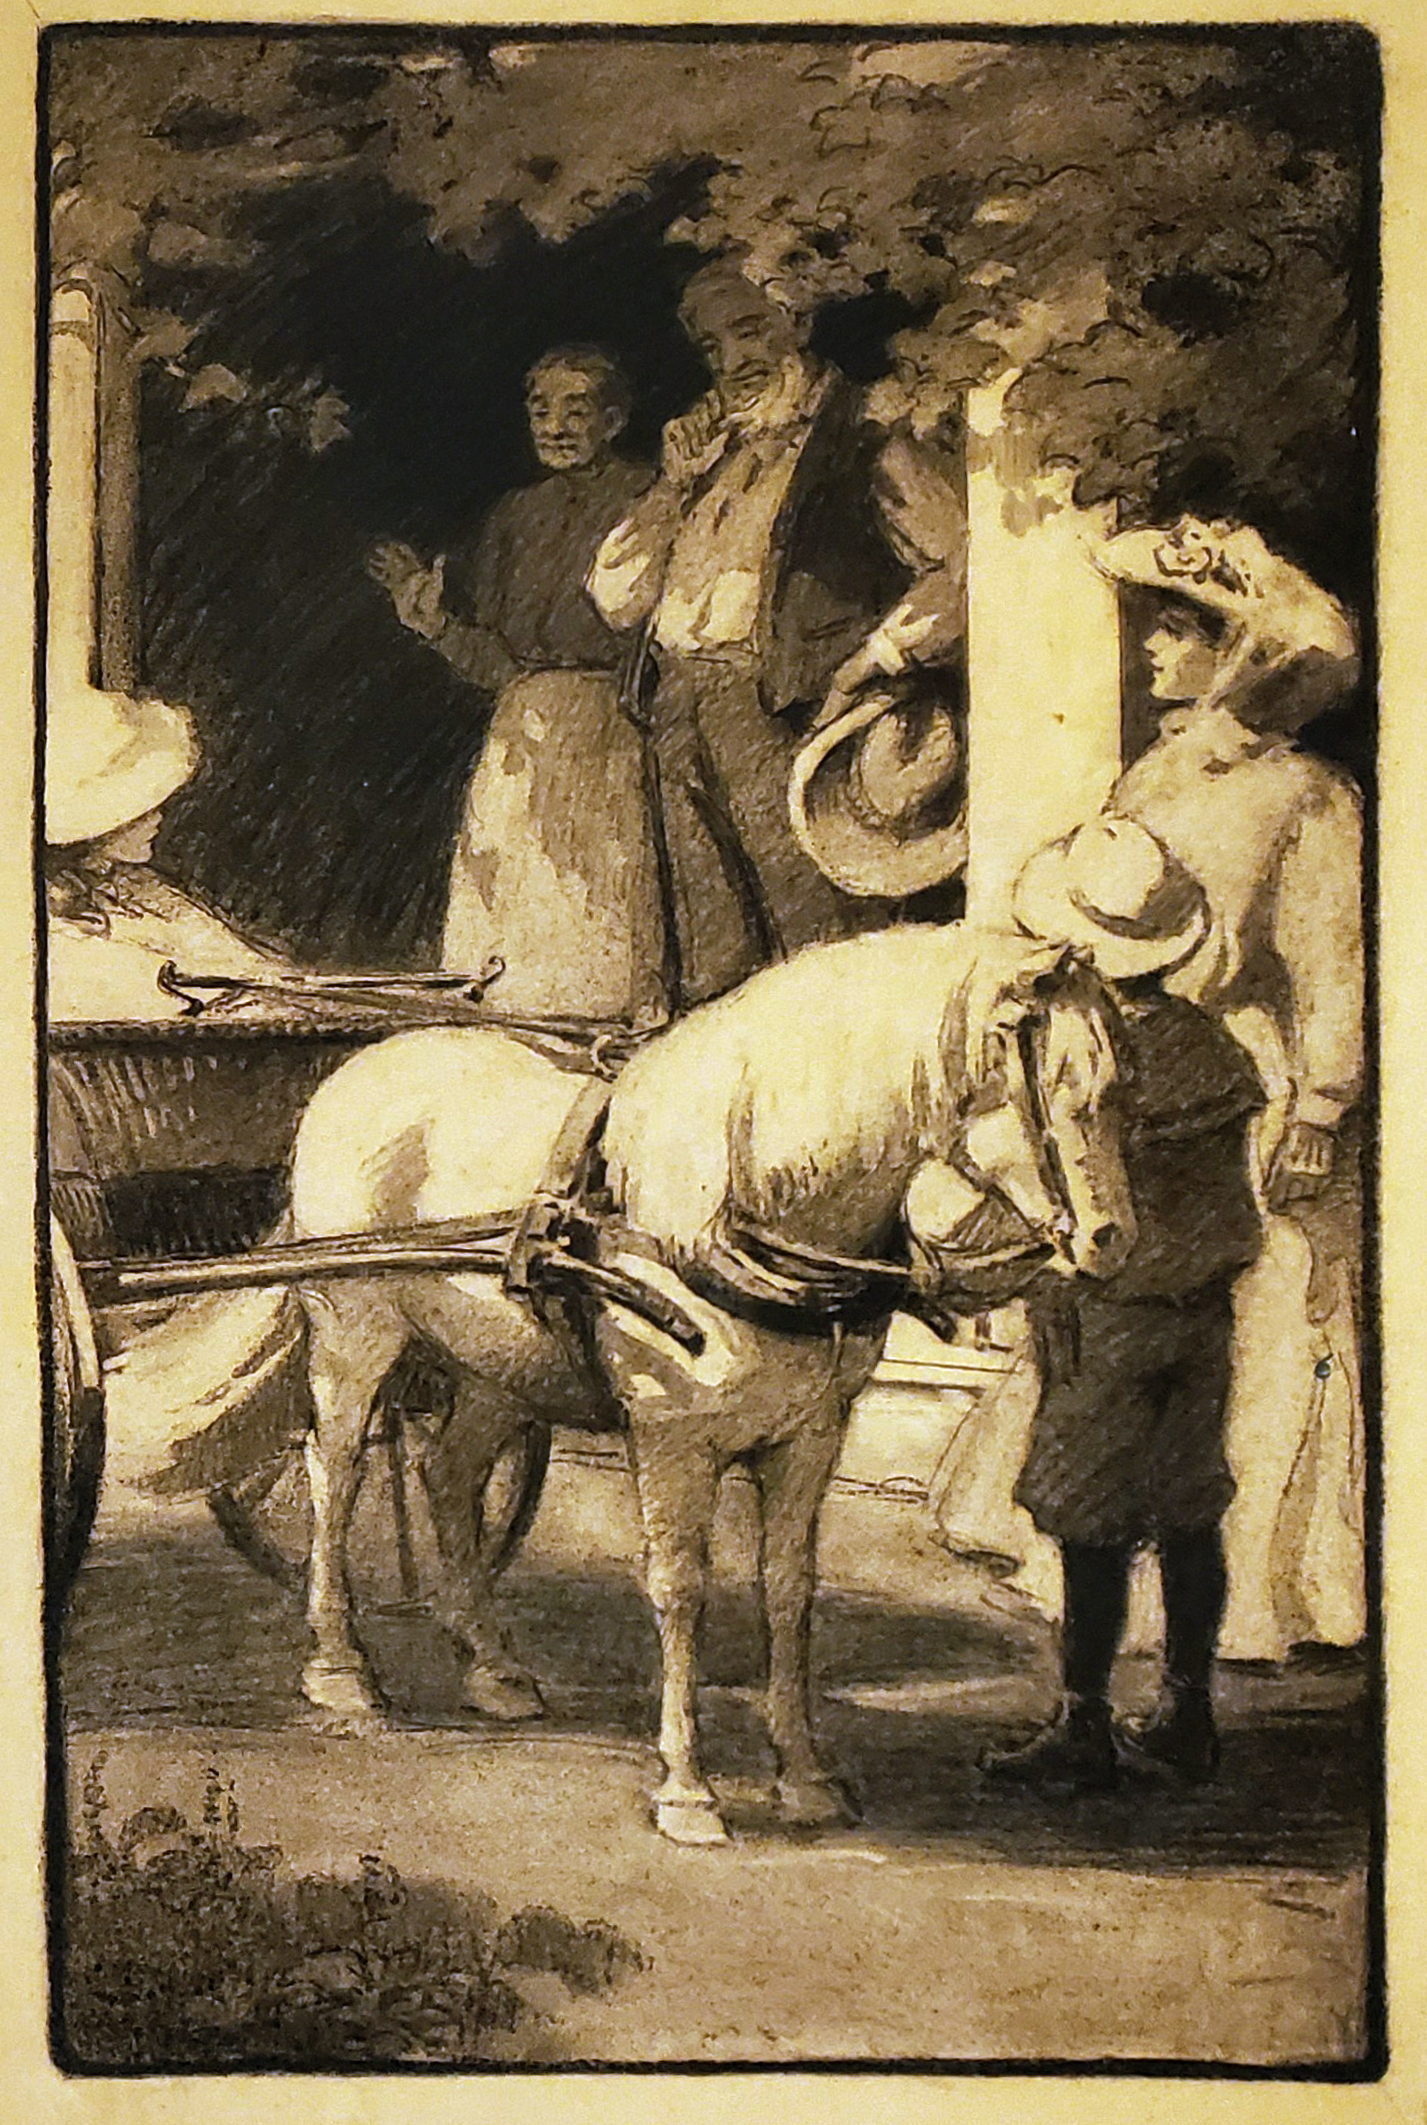
Then I hunted up the nearest engine house and barely walked in and asked to make sketches of the horses – the grand white mustached chief gave me the freedom of the place, and had a fire-man hold one of the horses, and feed him sugar. In fact I felt quite embarrassed with so much courtesy and attention.
— Rachael Robinson Elmer to Mary Robinson Perkins, January 29, 1907, Box 32, Folder 12

To make sure that she had captured the author’s intention, Rachael presented a series of composition sketches to Gabrielle at their initial meeting.
I took down the composition sketches I had made for the eight illustrations and Mrs. Jackson and I talked them over and she expressed her preferences in various matters and I got her ideas in regard with pictures.
— Rachael Robinson Elmer to Mary Robinson Perkins, January 29, 1907, Box 32, Folder 12
The illustrative process is almost always collaborative. Illustrators are constantly presenting their work to an author or an editor. Getting a second set of eyes on their process art is also a way to catch errors and make sure their image is clear. In this week’s lesson, I want to explore how a change in perspective can inform the art making process.
But what if you don’t have someone to check your work? When you can’t get a second pair of eyes on your work, there are actually some tricks to help you out. This lesson is designed for students working on their own. We are going to explore a checklist system designed to help you look at your work with fresh eyes!
Drawing Exercise
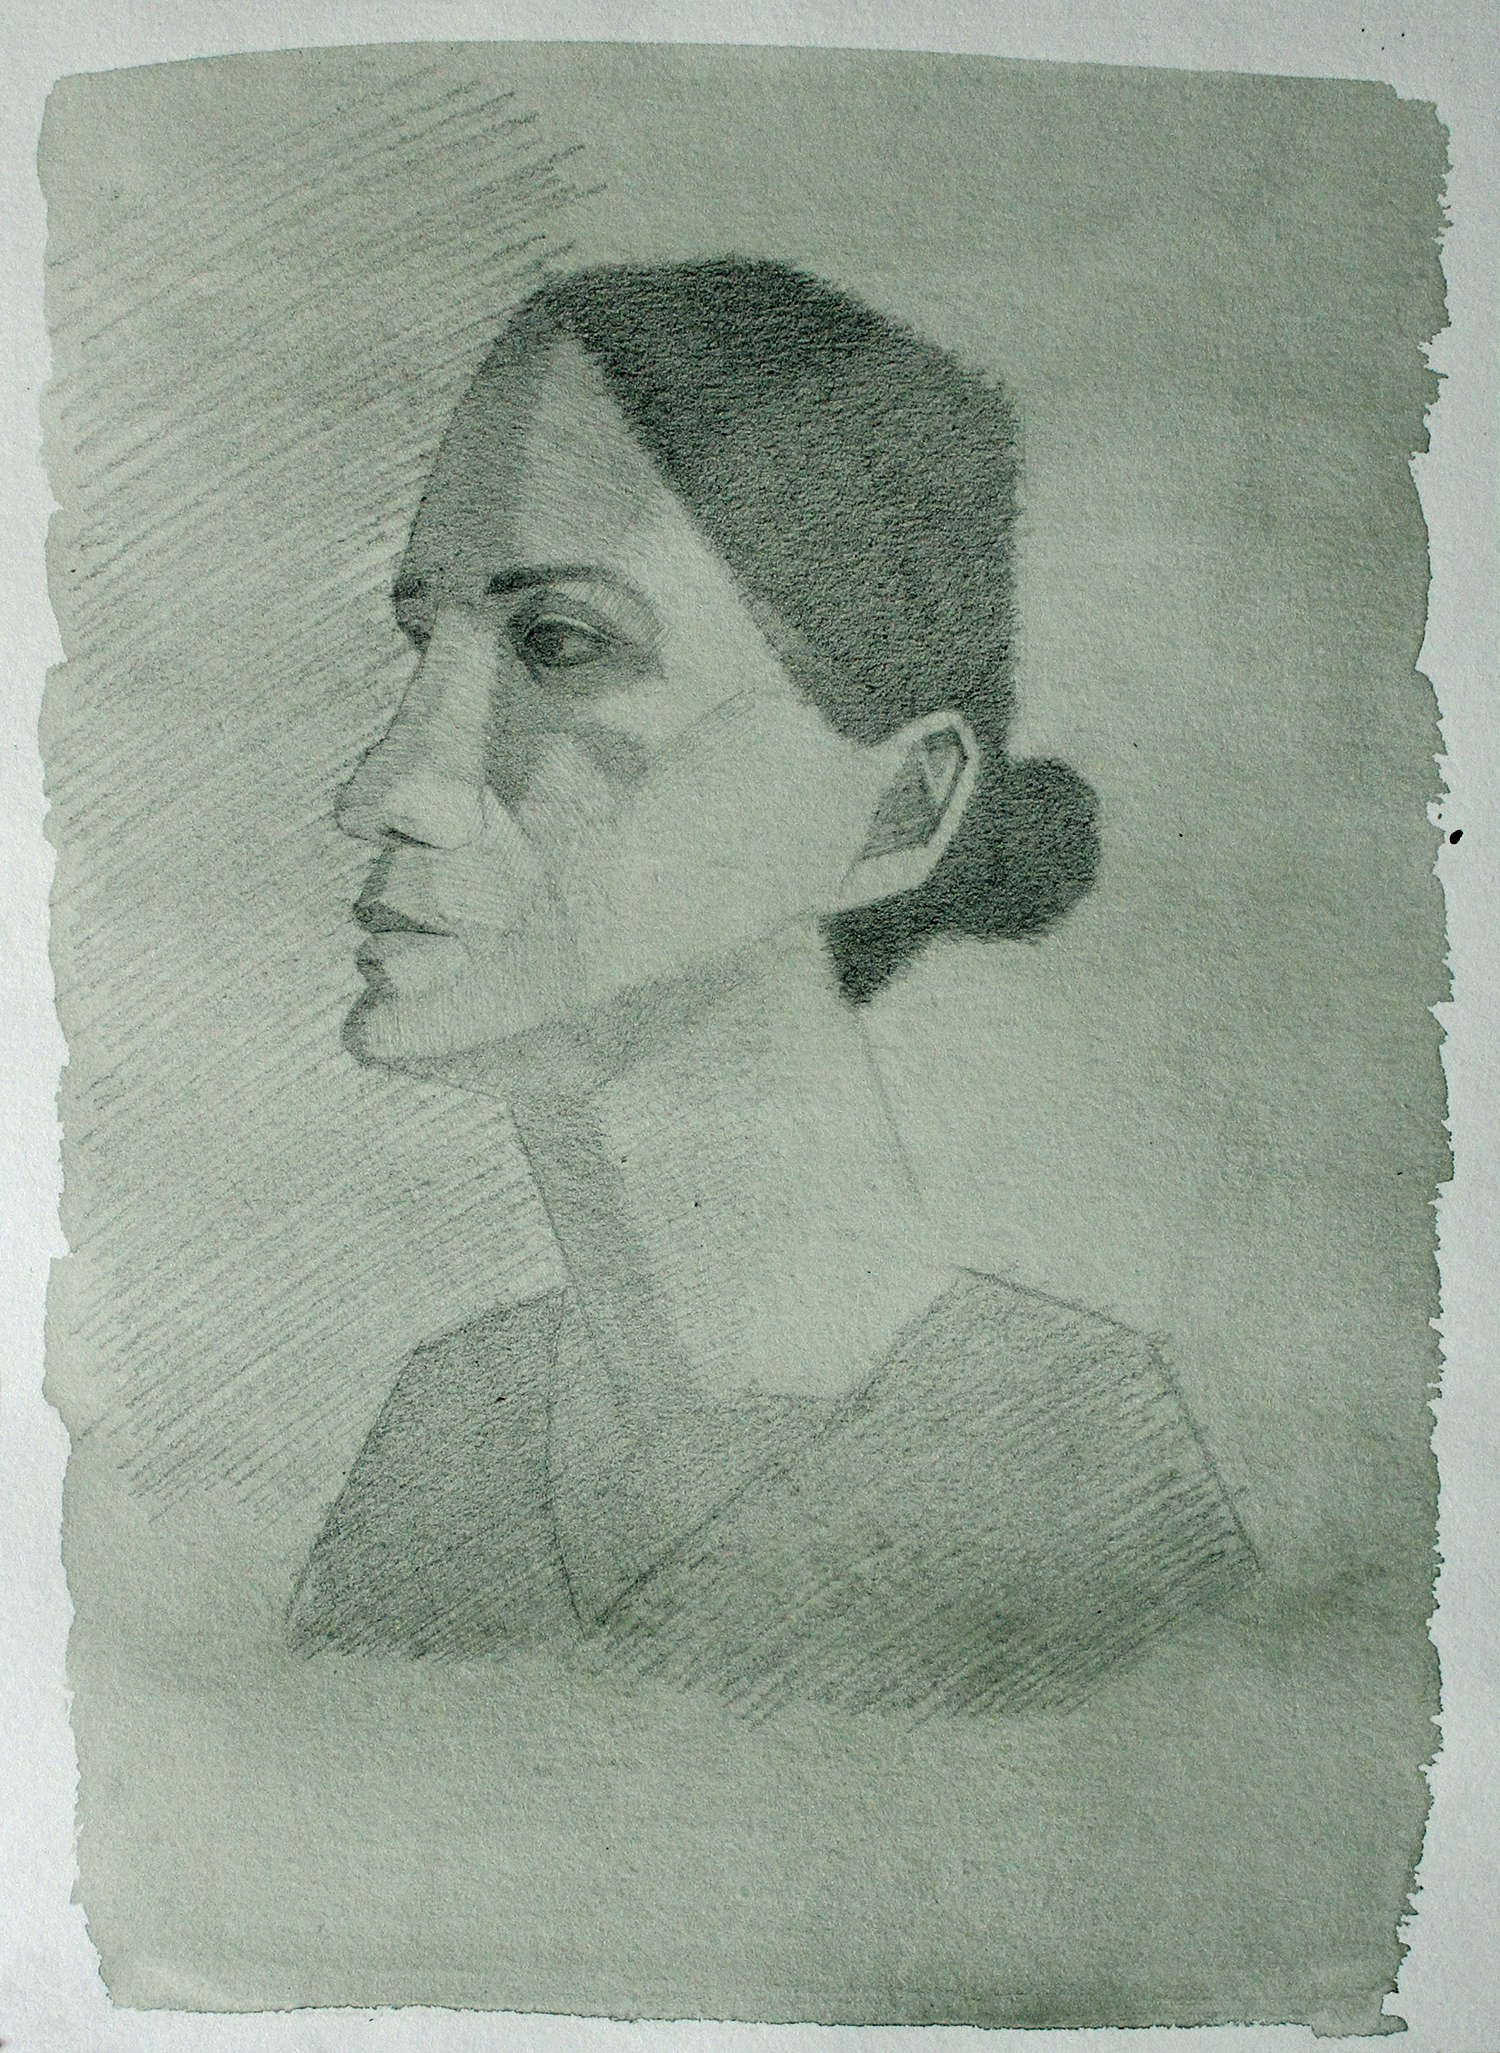
Instead of starting a new drawing I am going to go back to my self-portrait from last week (Week 4). Building on what I did before, I’m going to use a checklist to check the placement and proportions of my portrait.
Note: As you work your way through this exercise, share your work! Be sure to tag @clinton.courtney and @rokebymuseum on Instagram and use the hashtags #RokebyDistanceDrawing and #DrawingWithRachael. Got a question for Courtney? Let us know in the comment section below!
Sketchbook Kit
Pencil and Paper
Same set up as last week: work with a soft pencil (2B or 6B), a kneaded eraser, and a large piece of paper (aim for 10 x 14 in). When you get to the shading step I recommend using a harder pencil like an HB. Make sure to work on a slanted surface, I like to prop a large book against a table edge and use it as a drawing board. Remember to hold your pencil on its side between your thumb and index finger.
Kneaded Eraser
This week we are going to be moving things around. I highly recommend investing in a kneaded eraser. These squishy friends allow you to slowly remove graphite in a variety of different ways.
Model
To check your drawing you will need your model from last week. Set them up in the same position and with the same lighting. Put yourself in a position so that it is easy to compare your drawing to your subject.
Outline
Looking at the drawing, I know something is off. I can feel it. But truth be told I’m not exactly sure what isn’t working. If I had to guess, I would say that the nose is too big.
But Before I make any changes, I am going to do a full check of my drawing. For clarity I’ve made coloured correction lines in photoshop. But I encourage you to make these same lines with a pencil on top of your drawing. After the check you can erase these lines.

I start by checking the overall width of my portrait. I draw a line down the centre of my portrait. In profile the centre is just to the left of the ear. I then draw two more vertical lines at the edge of my forehead and the back of the skull. It’s clear that the back of the head is much smaller than the front of the face. If I check my model those two sections should be even.
I don’t make any changes until I’ve worked through my checklist. For now, I draw a fourth vertical line to indicate where the back of the head should end.
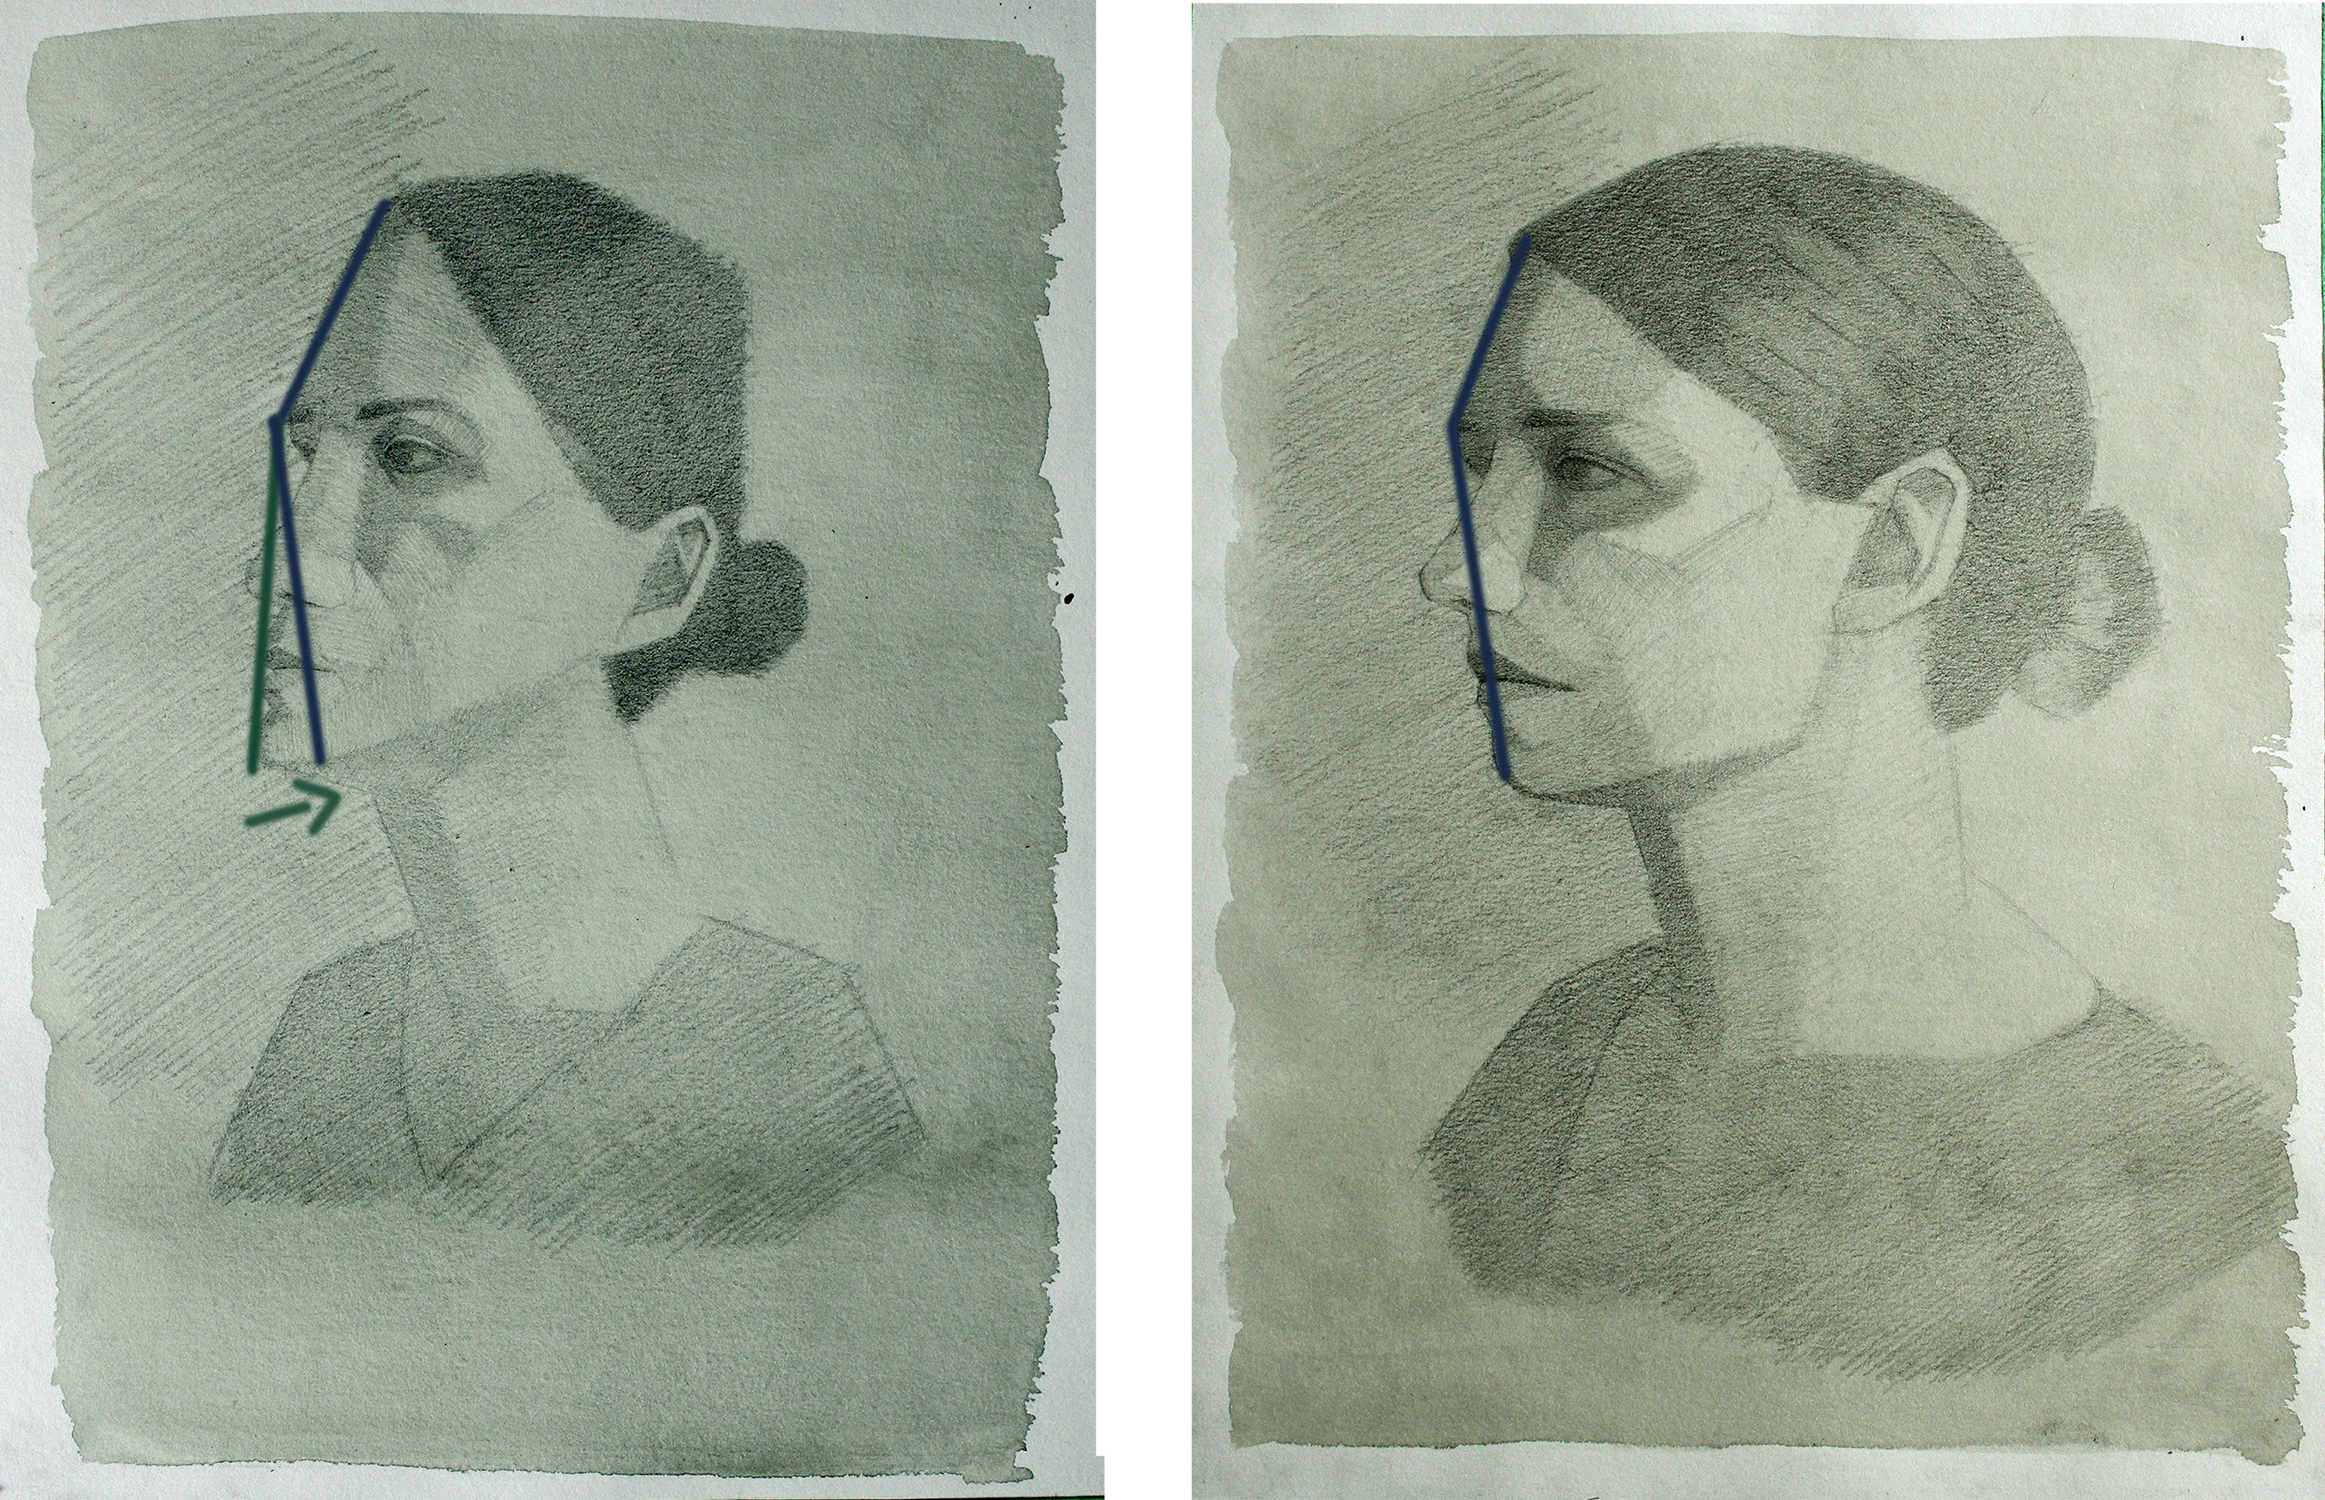
Next I check the angles that define the outline of the face. Looking at my model I measure the angle from the top of the head to the brow. Next I measure the angle from the brow to the chin. If you need a refresher on how to measure an angle check out my blog from Week 3!
The angle of the jaw is off. The jaw should be angling to the right, not sticking out to the left. I mark where the new end of the chin should be. Don’t be afraid to make a big change like this! It’s part of the process.

Finally I check the position of the neck. Looking at my model, I check where the neck intersects with the chin and the back of the head. I can see that the back of my neck was too far forward. In my drawing, it is attached to the jaw not the back of the skull. If I think about it, the neck needs to be pretty far back so it can support the weight of my skull (and all those brains)!
Proportions of the face
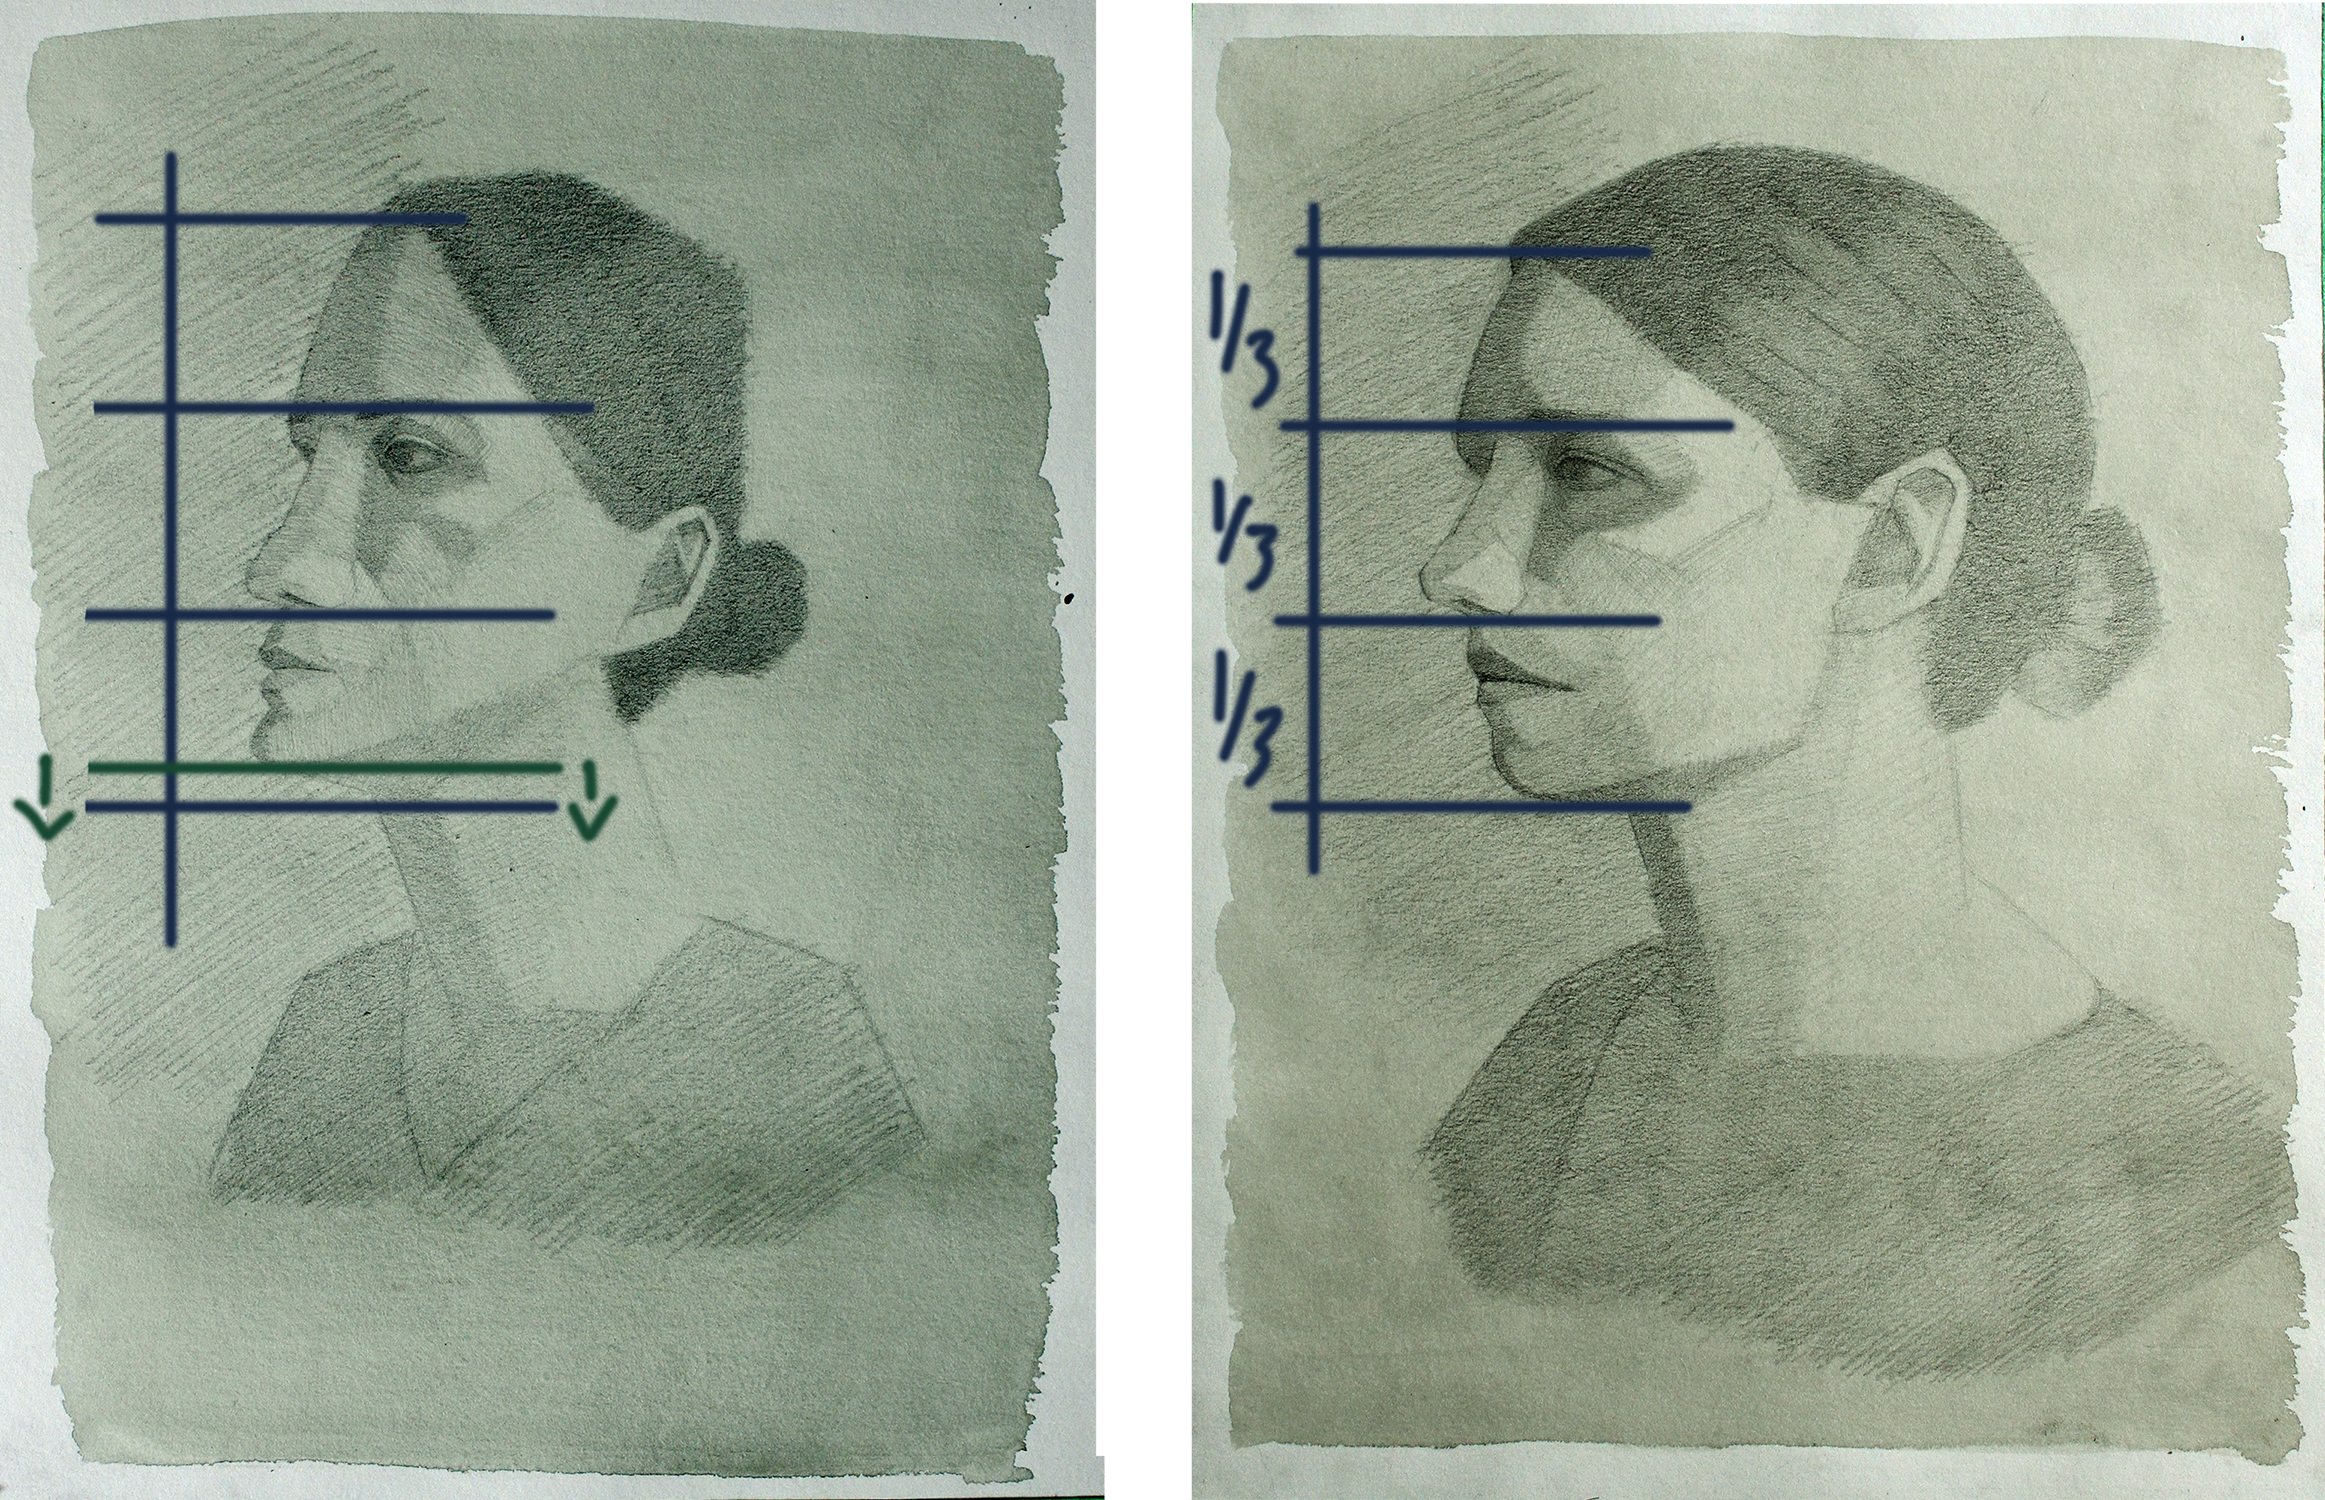
Although each face is unique, they all have the same structure. The placement of the main features is more or less the same on all humans. As a rule you can divide the face into three parts. Hairline to brow; brow to base of the nose; and base of the nose chin.
At this stage, I draw four horizontal lines across my face to check these three sections. The forehead and nose sections are even, but the jaw area is a bit small. I draw another horizontal line to indicate where my chin should end.
Features
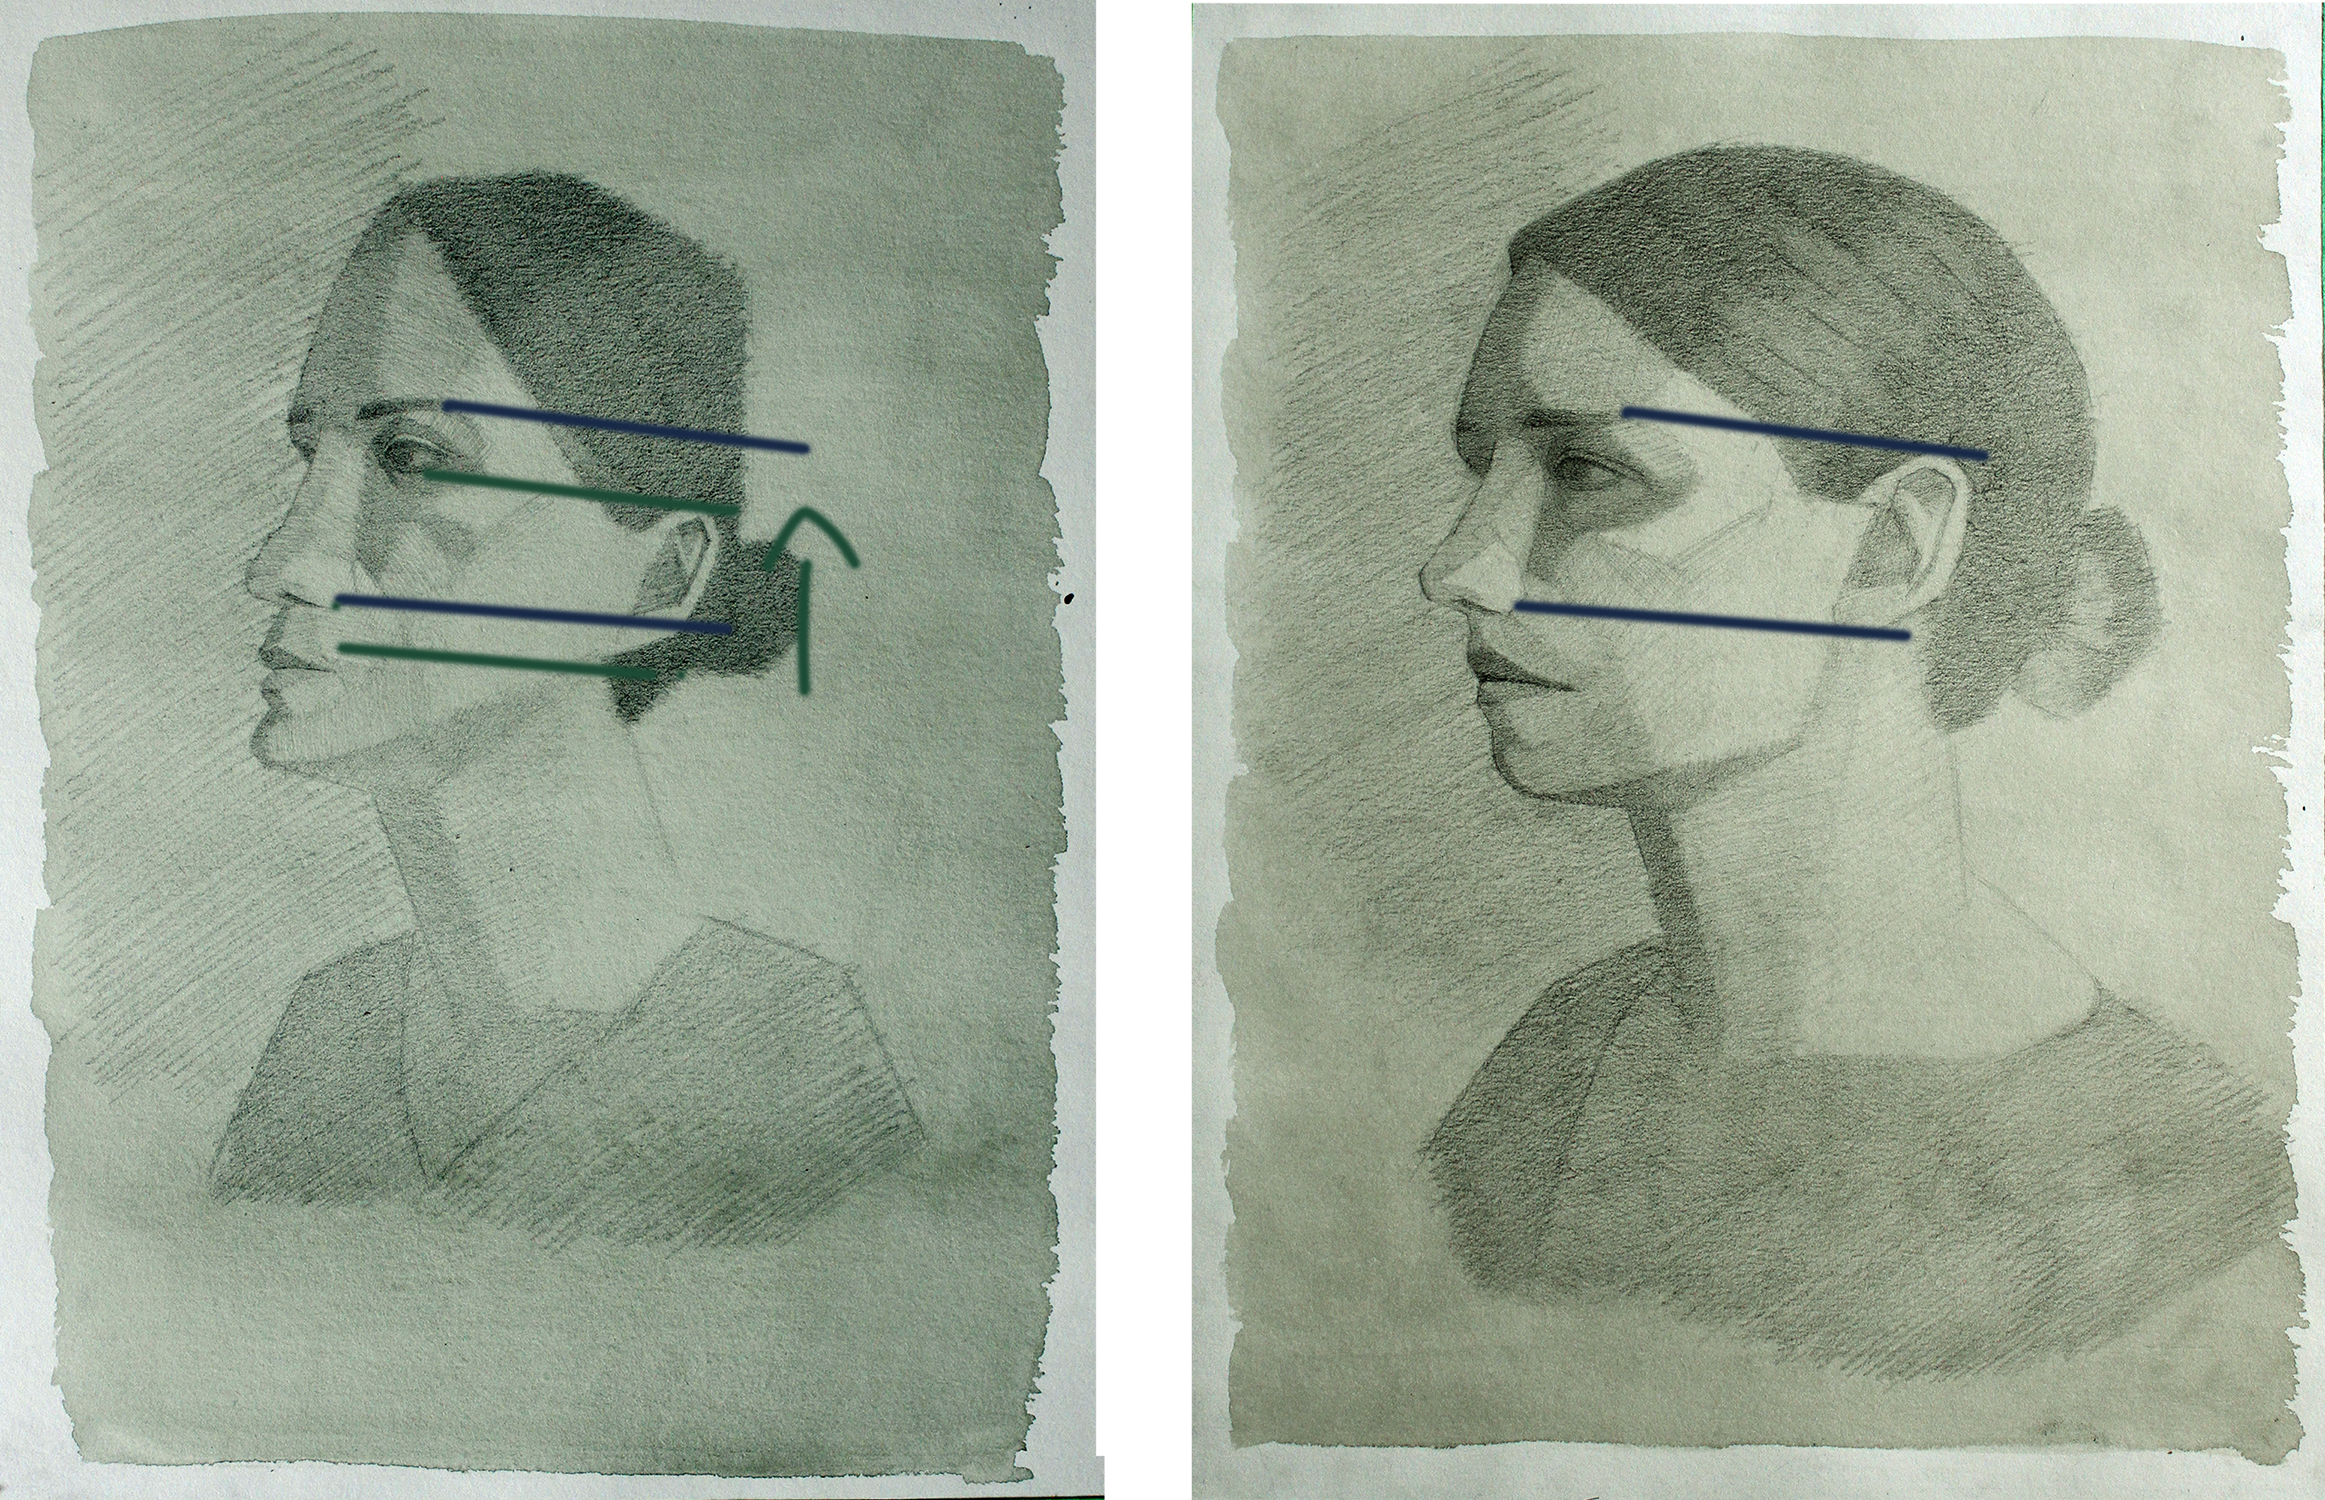
At this stage, I start to check the size and position of different features. Generally the ear will be slightly lower than the brow and end just before the base of the nose. In my case I’ve placed my ear too low!
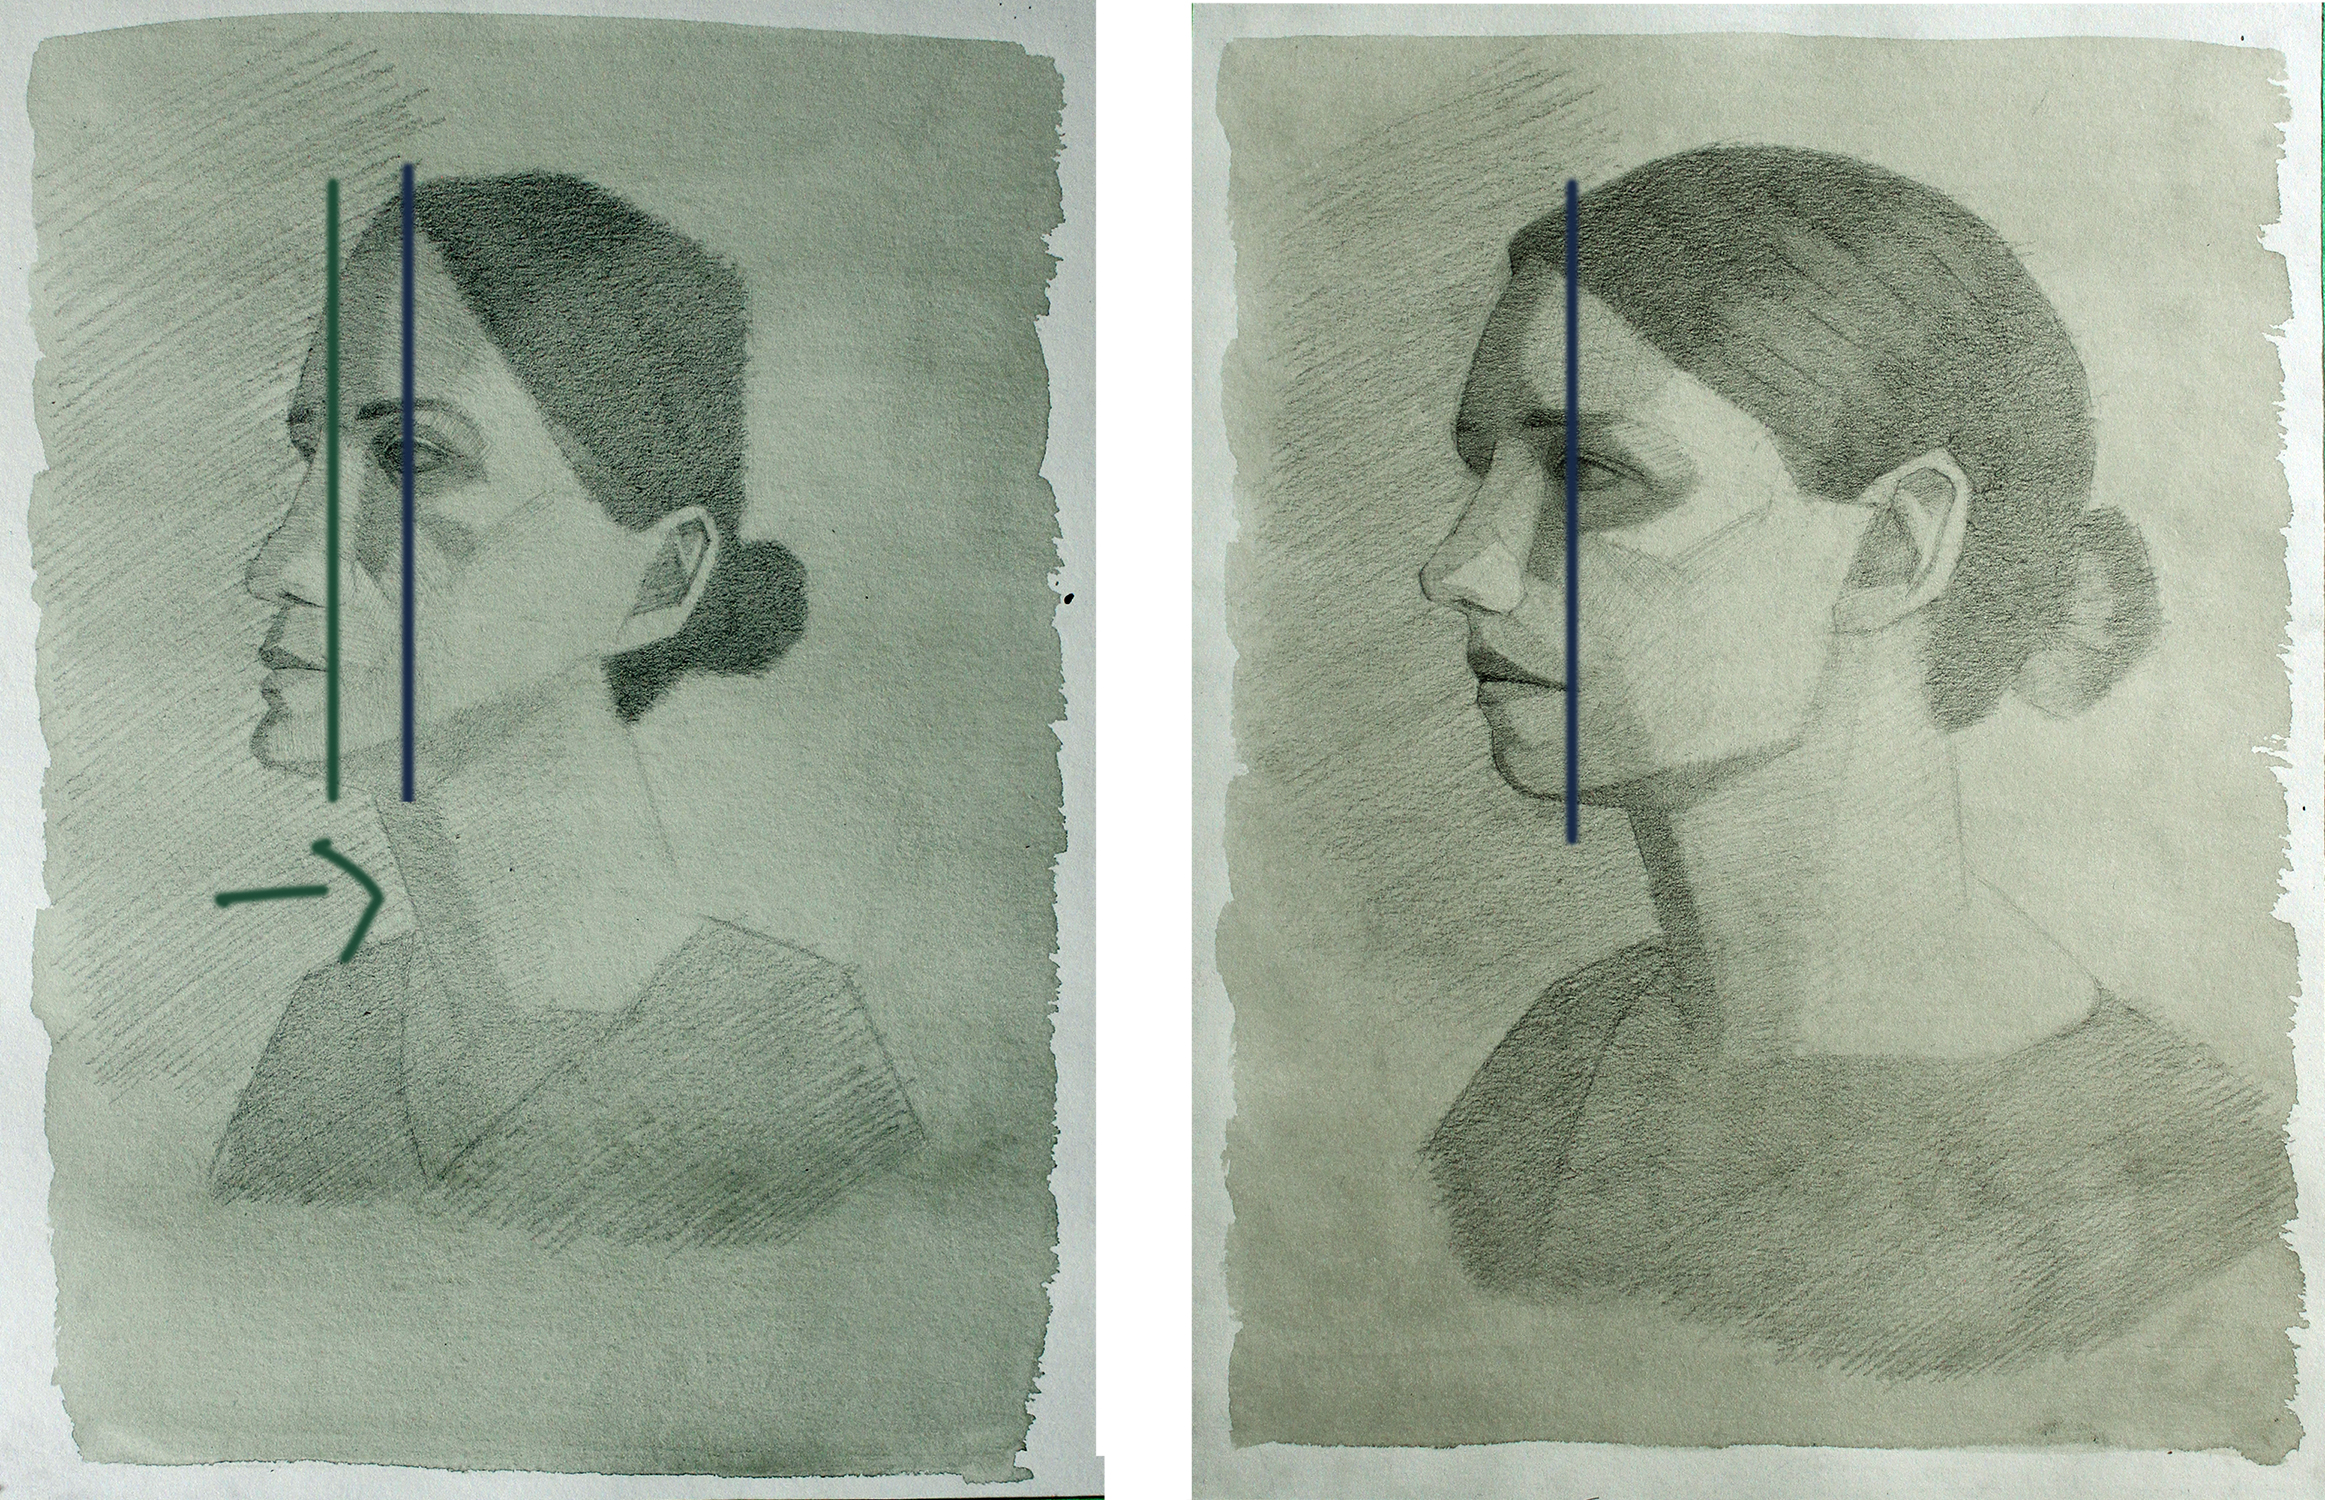
Generally, the corner of the mouth should line up below the pupil of the eye. I compare the two by drawing a vertical line down from the eye. In doing this, I realise I’ve made my mouth too narrow!
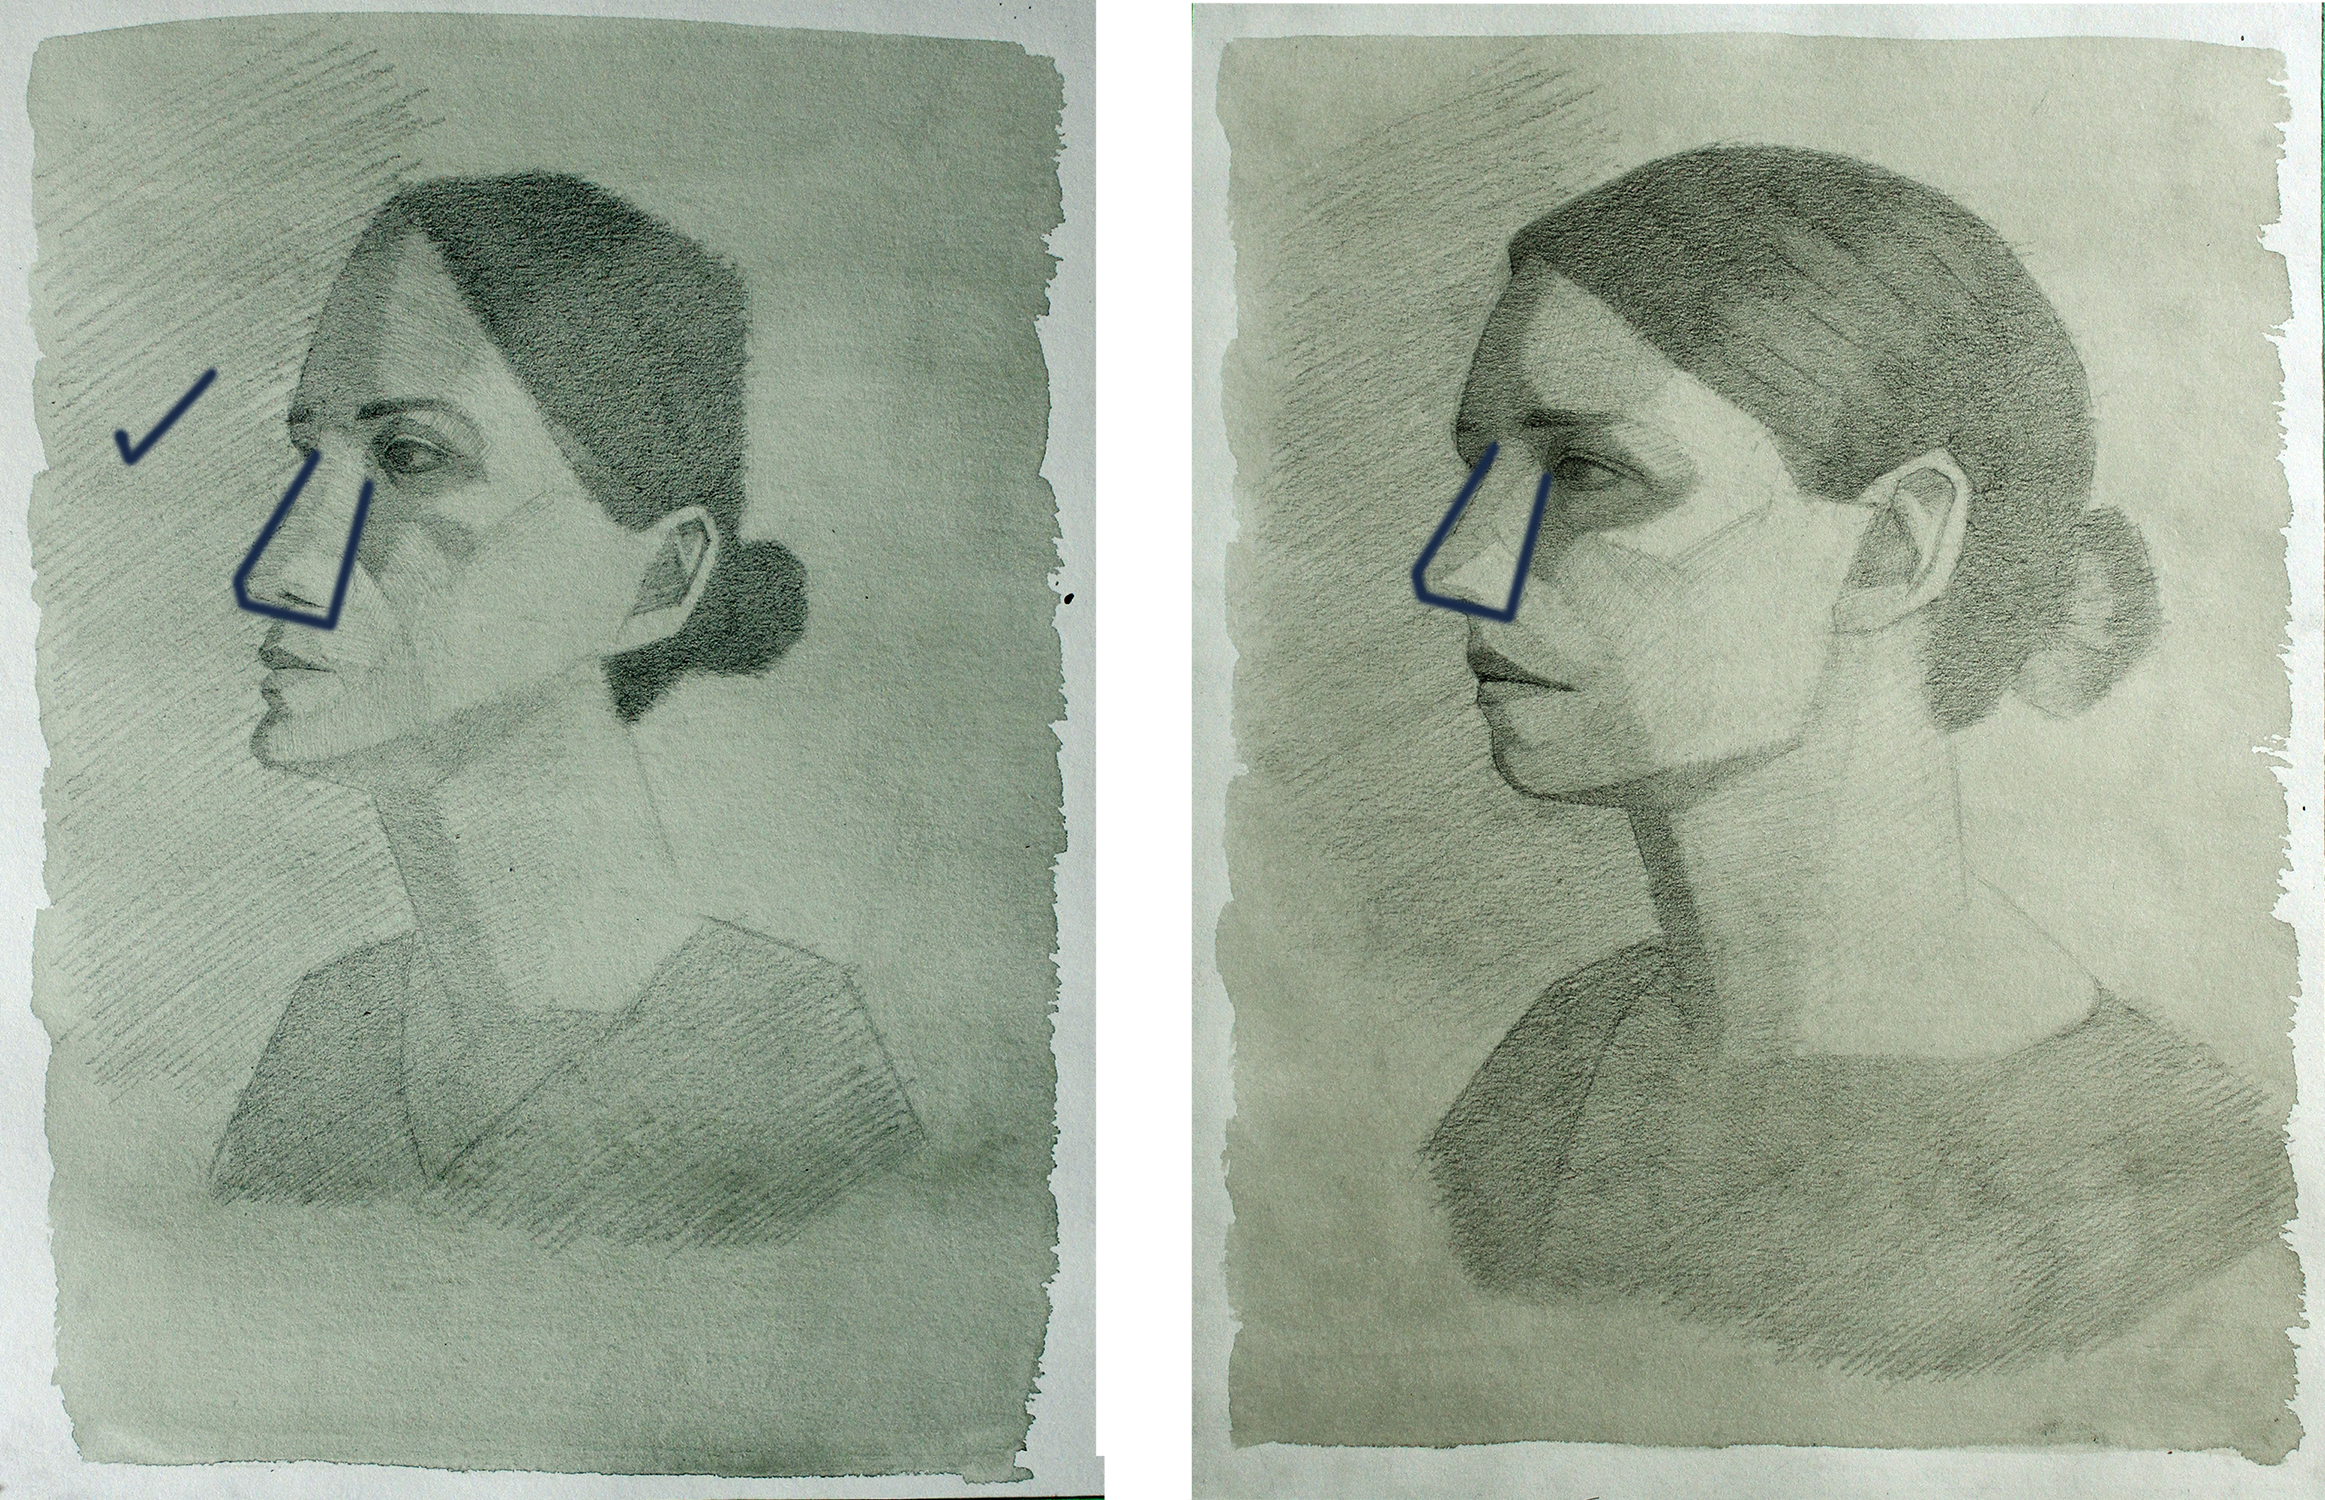
Finally, I check my nose. Remember that big honker of a nose that felt oversized in the beginning? To check the nose I check the angle of the front edge and the angle from the wing of the nose to the corner of the eye. Turns out my nose is perfect! Once I make the needed adjustments, my beautiful nose will fit perfectly onto my face.
Adding Detail
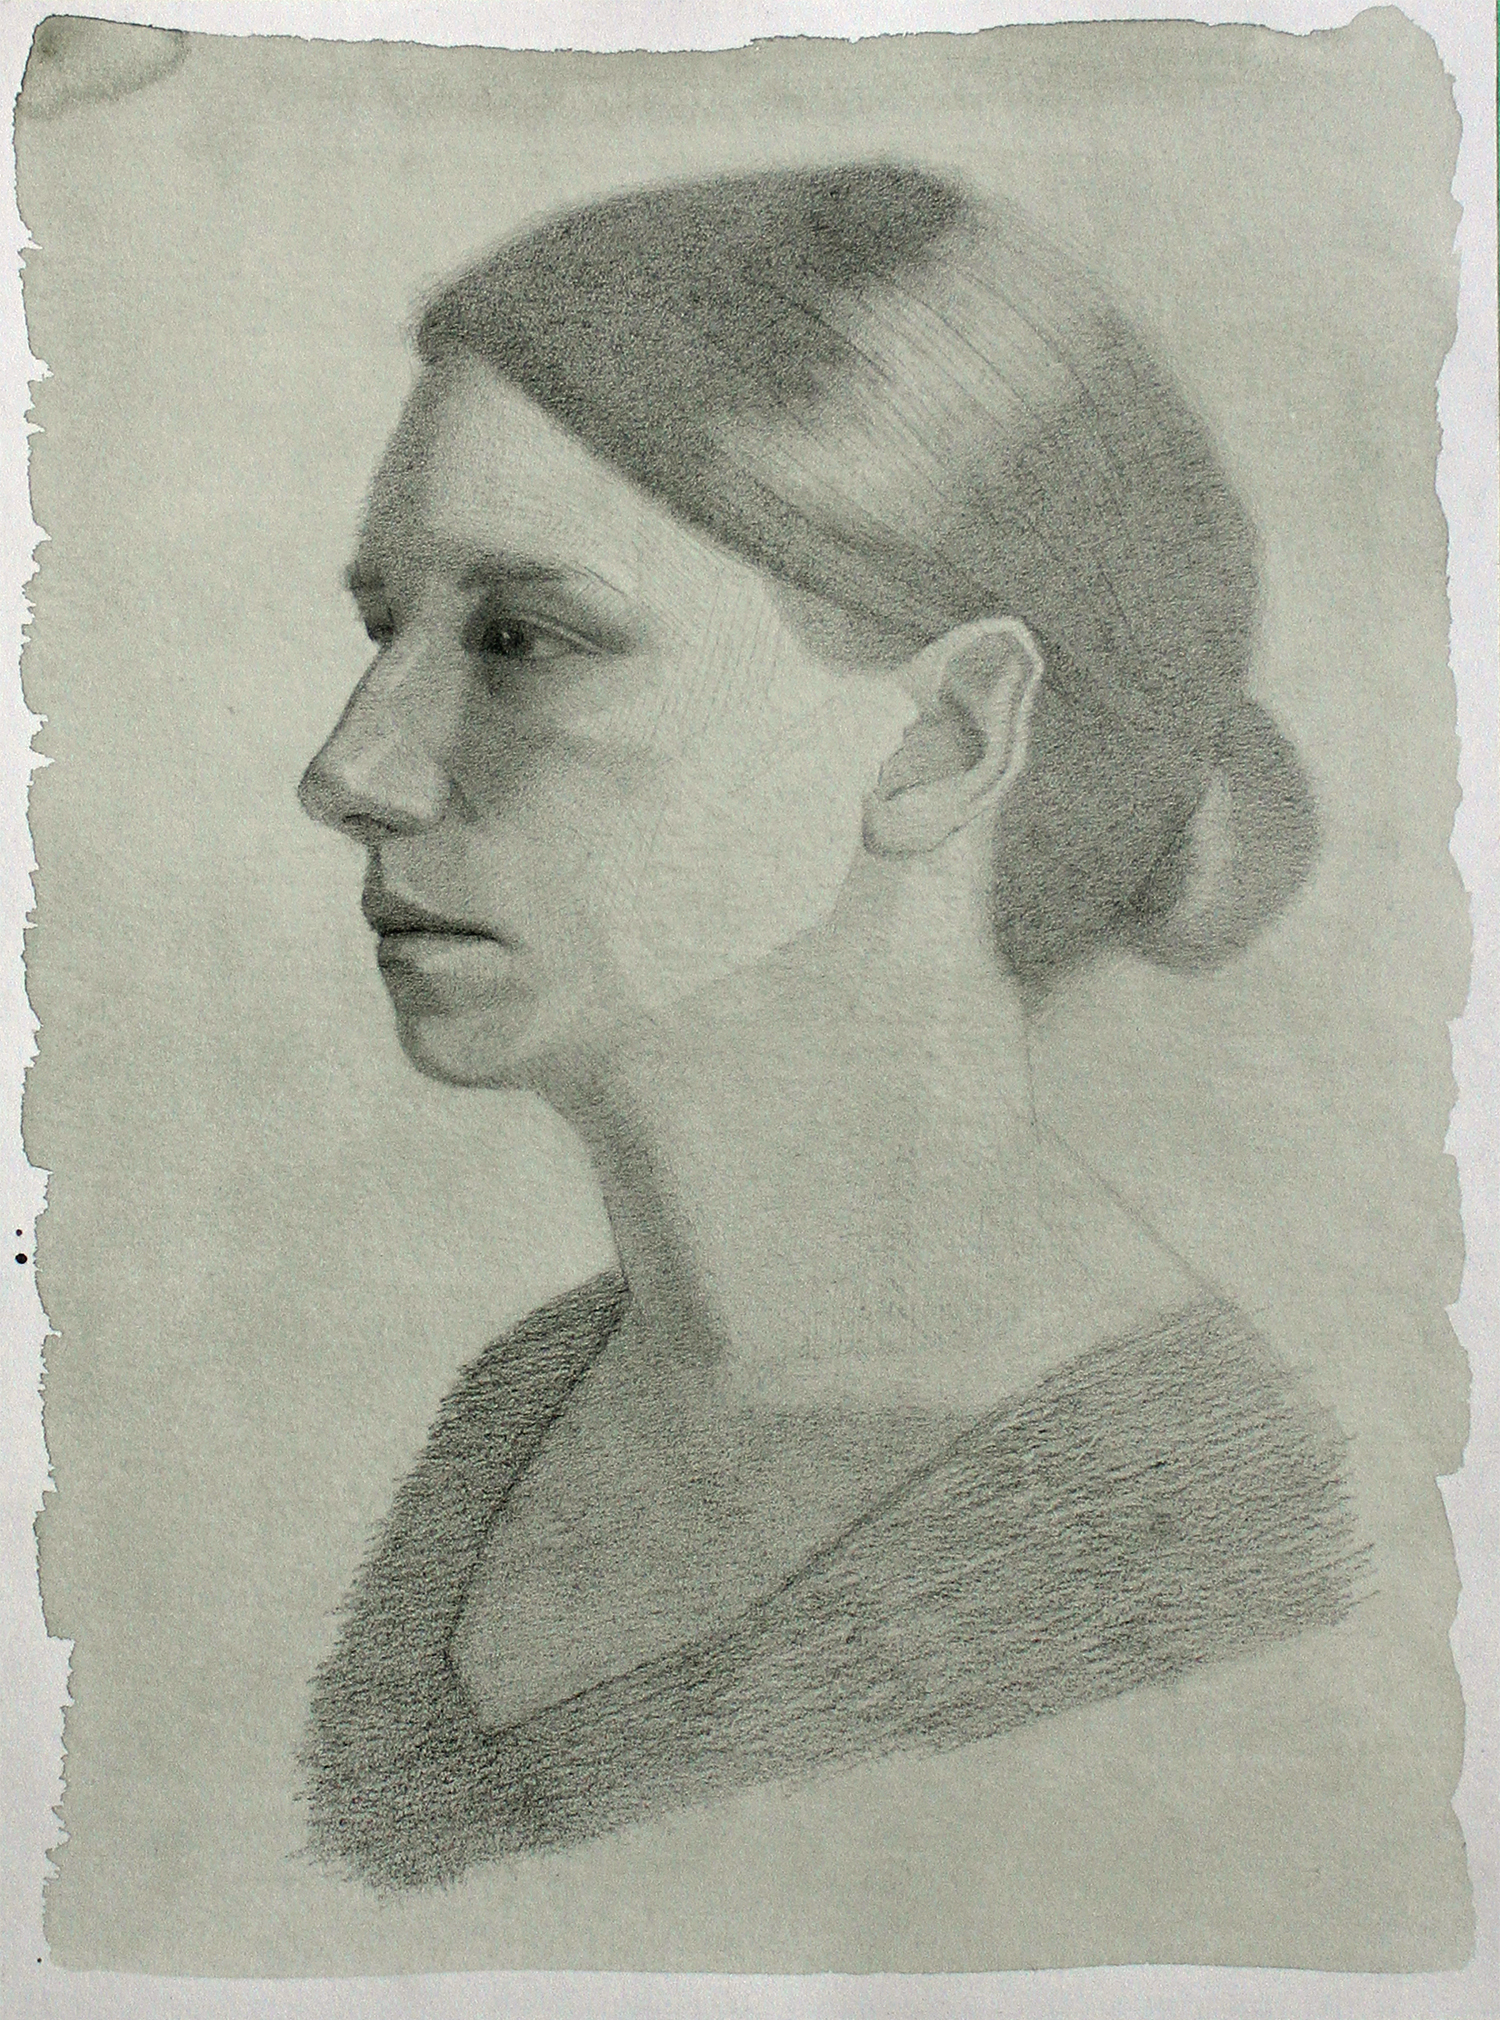
Only, after I have gone through my checklist do I take an eraser to my drawing and start to make changes. I use all of those lines to help make changes. Once I’m happy with the placement and proportions of my drawing I can start to think about detail.
I’m not really adding anything new at this stage. For me this moment is about refinement. I zero in on the different sections of the face and I use shading to soften the edges between the areas of light and dark. Doing this gives the portrait a feeling of roundness.
Signing off
As you work on a drawing, it’s easy to get sucked into the different sections (the eyes, the hair, the nose). In doing so you lose sight of the drawing as a whole. The self-critique checklist asks you to view your drawing anew through the relationships of its parts — how does the position of the eye relate to that of the mouth?
In the same way, Allison’s research aims to broaden our understanding of the past. Both practices require a shift in perspective and an openness to being wrong.
Knowing that women like Rachael and Gabrielle were working and paying taxes decades before they had the right to vote reframes how I think about the suffrage movement. In this context, it doesn’t feel so much like a fight for social change as a demand for respect and acknowledgement of the change that was already occurring.
Art invites us to see past our conception of the world and seek out a kind of greater truth than what our eyes originally accept — so dive in and enjoy watching your world grow!
Very Respectfully yours,
Courtney Clinton
Rokeby Museum is excited to offer this 6-part series from artist in residence Courtney Clinton. Please consider a donation, if you can, to help us continue to offer programs like this.
We acknowledge the support of the Canada Council for the Arts.