Rokeby Museum
Rokeby Museum Distance Drawing Course — Week 4: From Life
WEEK 1 | WEEK 2 | WEEK 3 | WEEK 4 | WEEK 5 | WEEK 6
Inspired by Rachael Robinson Elmer (1878–1919) and taught by Courtney Clinton, Rokeby Artist in Residence
Dear Student,
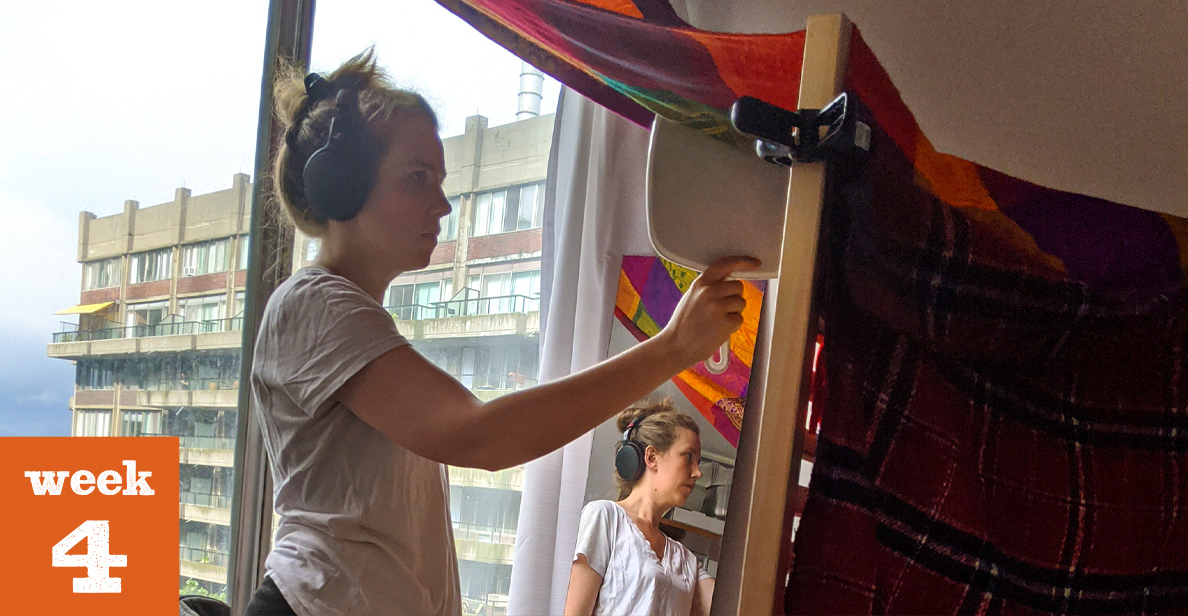
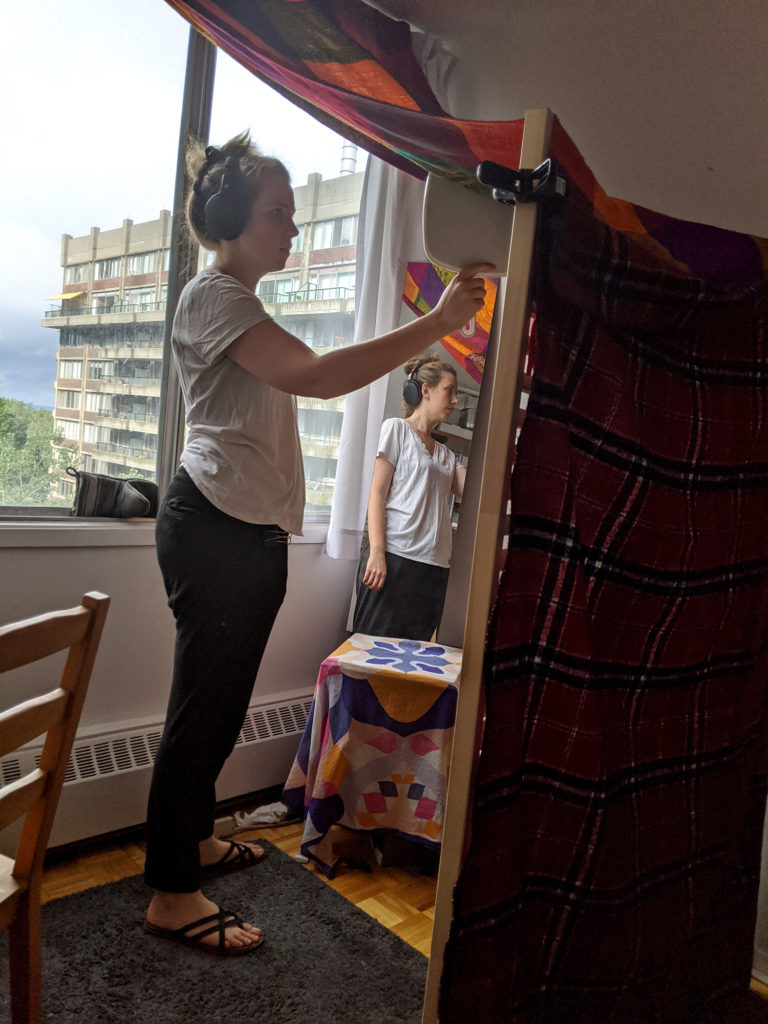
Courtney Clinton here, Artist in Residence at Rokeby Museum. I’m writing to you from a blanket fort that I built especially for this lesson!
The experience of art school is especially hard to translate into online learning and I can imagine the disappointment artists must be feeling this September. In this week’s lesson my aim is to build on our ongoing discussion around self directed learning and hopefully provide a little optimism.
Thanks to the support of Allison Gregory, Education and Interpretation Fellow, I have been exploring the museum’s collection of art by the 19th century illustrator, Rachael Robinson Elmer (1878–1919). I am using this material to research and activate the letters from a historic correspondence drawing course that Rachael took as a teenager.
This week we are going to do our first self-portrait! Building on our Copying Lesson, I will show you how a drawing by a favorite artist can play the role of your teacher and guide you in your drawing process.
I’m going to show you how to draw a self portrait in profile using a wacky two mirror set up. If you prefer to keep the set up simple you can also do a three-quarter self-portrait (which only requires one mirror). Both versions are equally valuable exercises, but by showing you the more complicated profile version, I hope to prove that there are no limits to what we can accomplish on our own with a little courage.
Exploring the Museum’s Collection
In the winter of 1893, Rachael, accompanied by her mother, Ann Stevens Robinson (1841–1920), went to New York to study at Ernest Knaufft’s studio.
I am very glad to hear of your recovery, and delighted to think of being able to criticise your work here in the studio. There is so much that I can tell you that cannot be written and much more that can be shown.
— Ernest Knaufft to Rachael Robinson Elmer, Jan 25, 1893
Rachael continued to visit Ernest’s studio in New York for three years. After highschool, (remember, Rachael was 12 when she started her drawing studies!) Rachael started to attend the Art Students League in New York City.
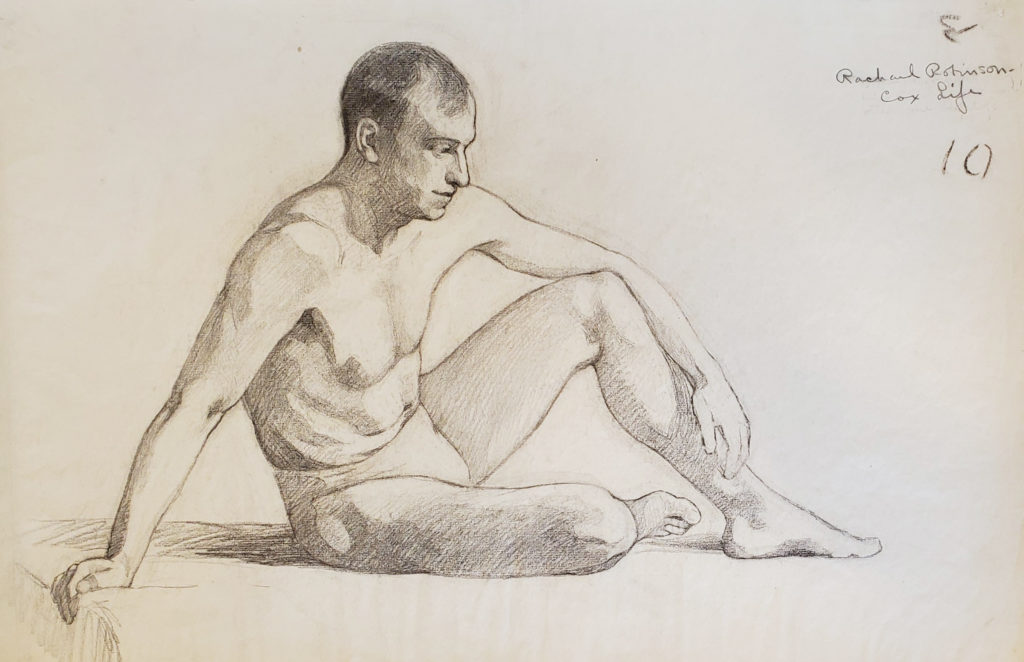
Founded in 1875 by a group of former students of the National Academy of Design, the League (as Rachael called it) was based on the 19th century French Atelier system. There, Rachael studied with renowned teachers including Kenyon Cox (1856–1919), best known for his mural paintings, and Frederick Childe Hassam (1859–1935), an important American Impressionist painter.
Studying with these important artists gave Rachael access to the New York art scene. In her letters home, she describes countless exhibition and studio visits she went on in the big city.
This afternoon I went down to Daniel French’s studio at 4 o’clock to hear Kenyon Cox lecture on Michael Angelo. I was given a ticket by one of the girls who had one, but was unable to go. It was fine! The studio is so interesting — (the place where Mrs. Barston took me.) Mr.Cox has many of his photographs of Michael Angelo’s work pinned up.
— Rachael Robinson Elmer to Robinson Family, March 23, 1899
Copy
One of her most important New York discoveries was made on one of her first visits to the city. While studying with Ernest in New York, Rachael discovered the work of the “Life Magazine” illustrator, Charles Dana Gibson (1867–1944).
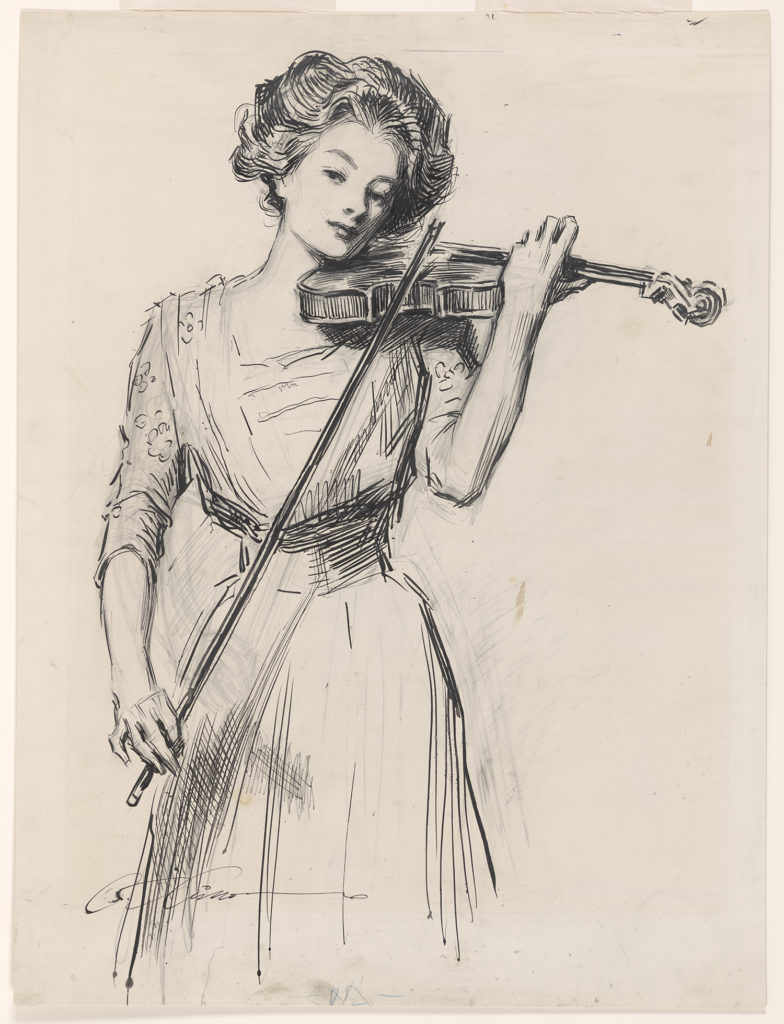
There is a new exhibition of Gibson’s pen drawing a little way from Mr. Knaufft. I have been twice, they are grand. I wish thee could have seen them. Some of them sell for $2.00. They are very large. Some 3 by 2 feet. I should think he is a young man yet. Some of his lines, on faces especially, are so fine you can scarcely see them. They have to be sent to Paris to be reproduced.
— Rachael Robinson Elmer to Robinson Family, March 5, 1893
Charles Dana Gibson was an artist and illustrator known for his “Gibson girl” drawings; these women, modeled after his wife, Irene Langhorne Gibson, represented a modern American vision of womanhood in the 1890s and into the early 20th century. He studied at the Art Students League with Thomas Eakins (1844–1916) and Kenyon Cox, who Rachael would later study with. During his career, he worked for “Life” magazine, “Collier’s Weekly”, illustrated books, and created satirical drawings of “high society.” By the end of his life, Gibson was a member of the National Institute of Arts and Letters, the National Academy of Design, and the Society of Illustrators.
Although there is no record of Rachael meeting the famous artist, it’s clear by the similarities in their styles that he had a strong influence on her early work.
I go to see Gibson’s pictures nearly every day.
— Rachael Robinson Elmer to Robinson Family, March 8, 1893
Through his art, the “Life” magazine artist acted like a kind of mentor for a young Rachael.
Reading Rachael’s account of the Art Student League, it’s easy to envy her experience. Art school is such a creative and colourful experience and Rachael had the opportunity to study at one of the best schools of her day!
But her connection to Charles Dana Gibson’s work is a reminder of how little is needed to take up the study of art. Throughout history, artists have learned art theory by studying the work of old masters. When Rachael first studied through a correspondence course, Ernest taught her how to expand her knowledge through the study of old master drawings.
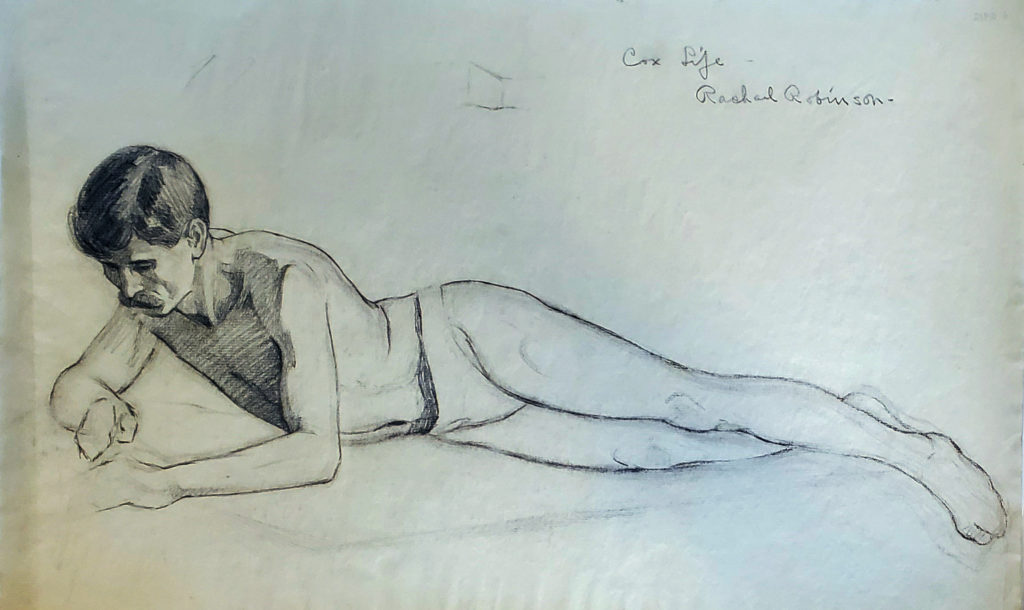
I am sending you, now, some of my very best plates by the great masters of drawing, and I want you to thoroughly appreciate them which cannot be done by merely copying them. The way to do it is to make a drawing from life of a somewhat similar pose and then you can see, thoroughly, how the artist has gotten his effect.
— Ernest Knaufft to Rachael Robinson Elmer, May 5, 1892
For this week’s drawing exercise, we are going to take up Ernest’s challenge and do a self-portrait drawing that mimics the pose and the lighting effect from a portrait Rachael did of her mother Ann. Rachael’s drawing will act as a guide and inform our work from life!
Drawing Exercise
In today’s exercise, I’m going to walk you through making a copy, setting up your model, and doing the first stages of a portrait drawing. Next week we are going to come back to our portrait to do a self-critique and finish the work.
I challenge you to take this week nice and slow. That means keep your shading simple and no detail! Try to hold back and really focus on the first two stages of your drawing. Remember next week we are going to move things around!
Note: As you work your way through this exercise, share your work! Be sure to tag @clinton.courtney and @rokebymuseum on Instagram and use the hashtags #RokebyDistanceDrawing and #DrawingWithRachael. Got a question for Courtney? Let us know in the comment section below!
Set up
Pencil and Paper
Just like last week, we are going to work with a soft pencil (2B or 6B), a kneaded eraser, and a large piece of paper (aim for 10 x 14 in). As always, we want to work on a slanted surface, so prop a large book against a table edge and use it as a drawing board. Hold your pencil on its side between your thumb and index finger.
Copy
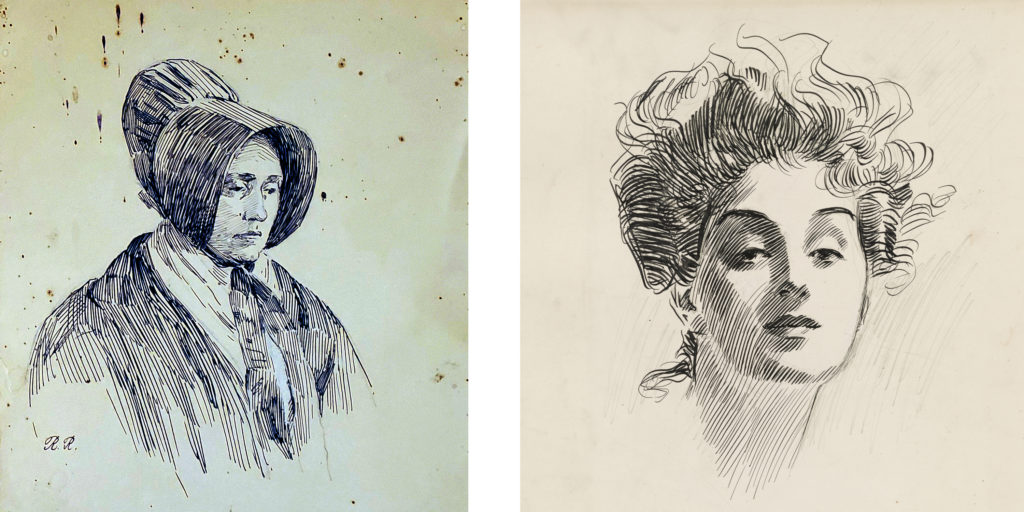
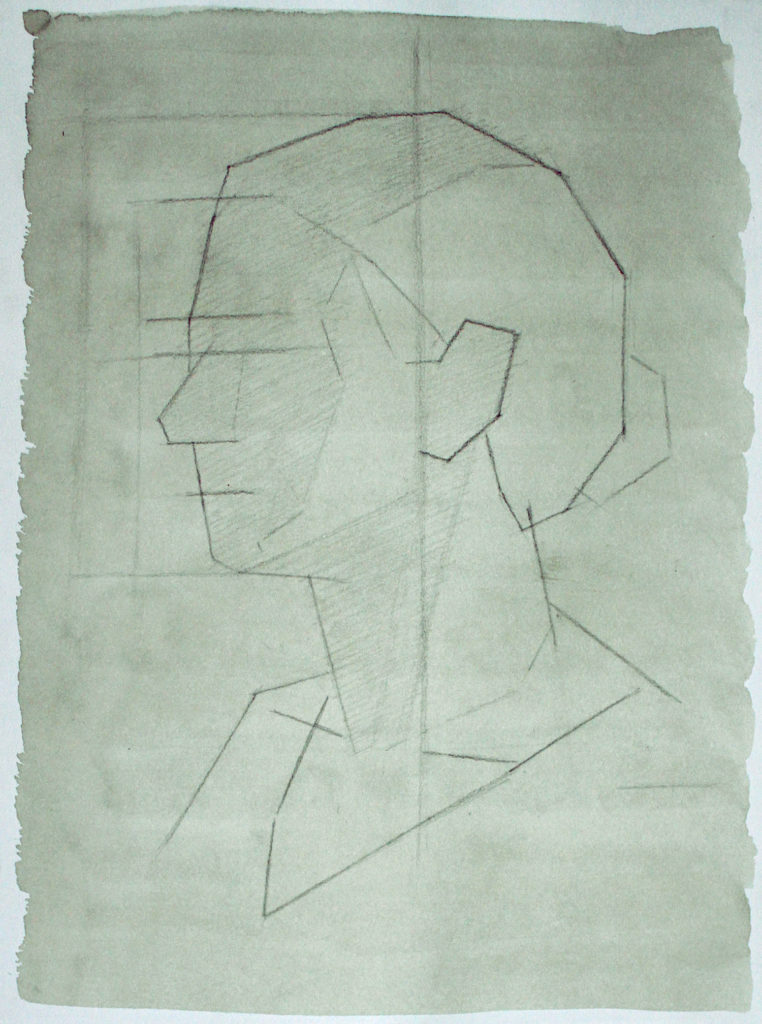
Before I attack reality, I want to study the portrait by Rachael. This means making a copy of the drawing. In making this copy, my aim is to better understand Rachael’s subject. For a refresher on the three steps to make a copy check out lesson 2, Copying.
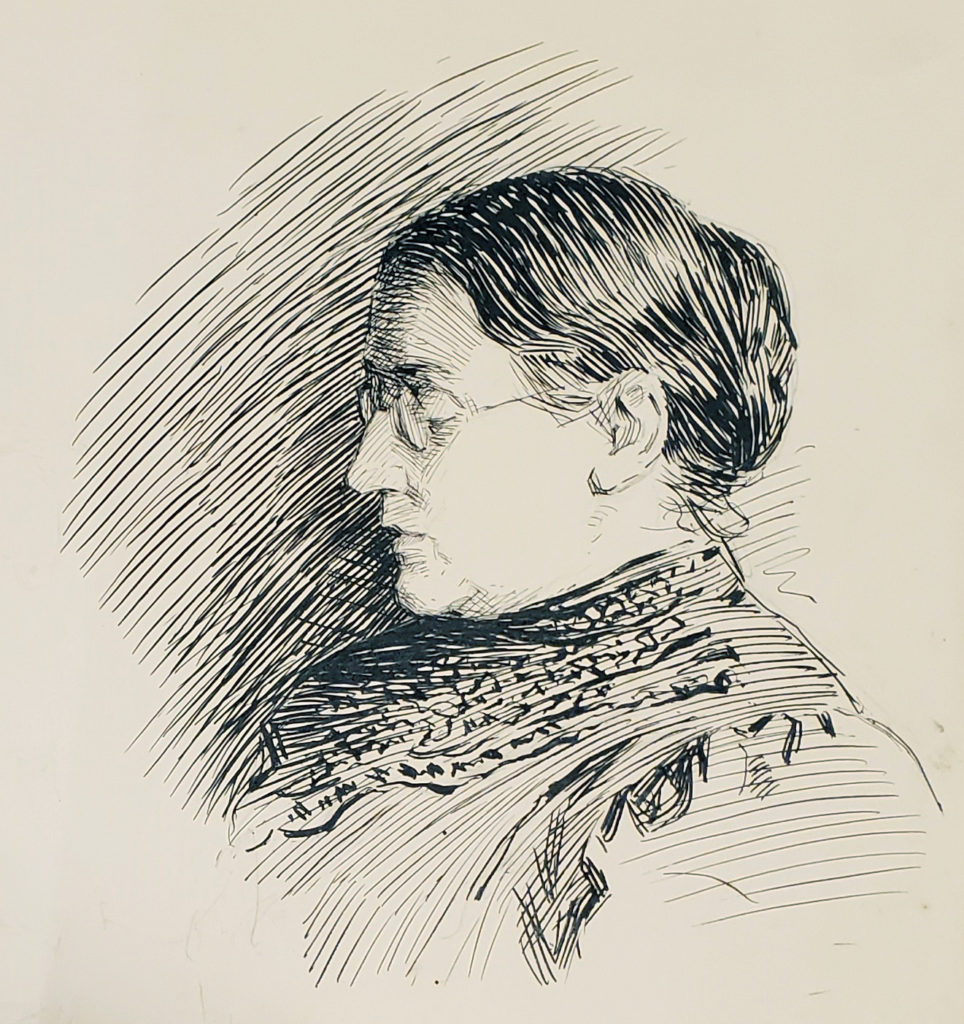
As I draw, I want to identify the pose of the sitter and the position and direction of the light source.
Ann, Rachael’s subject, is in profile. I can only see one part of her face. Notice that I said part and not side. I can actually see two sides of her face. The shadow shapes communicate this information to me. The front of Ann’s face is in shadow, the right side, facing the viewer, is in light.
With this information, I can reverse engineer the position of the light source. If the right side of the face is in light I know that the light must be coming from the right.
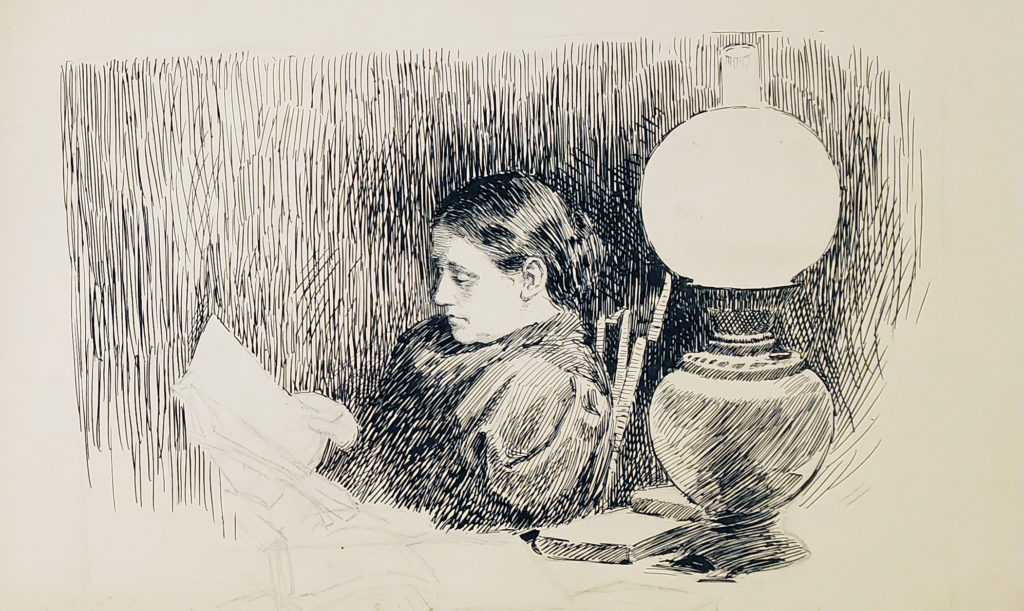
I actually have a second drawing by Rachael that confirms my hypothesis of the light. With this information, I am ready to set up my portrait.
Self Portrait Set Up
Posing the Model
If possible, I recommend that you have someone in your family pose for this exercise. You will need someone to sit for a minimum of 45 minutes. I recommend that you have them sit for three 15 minute intervals with 5 minute breaks in between.
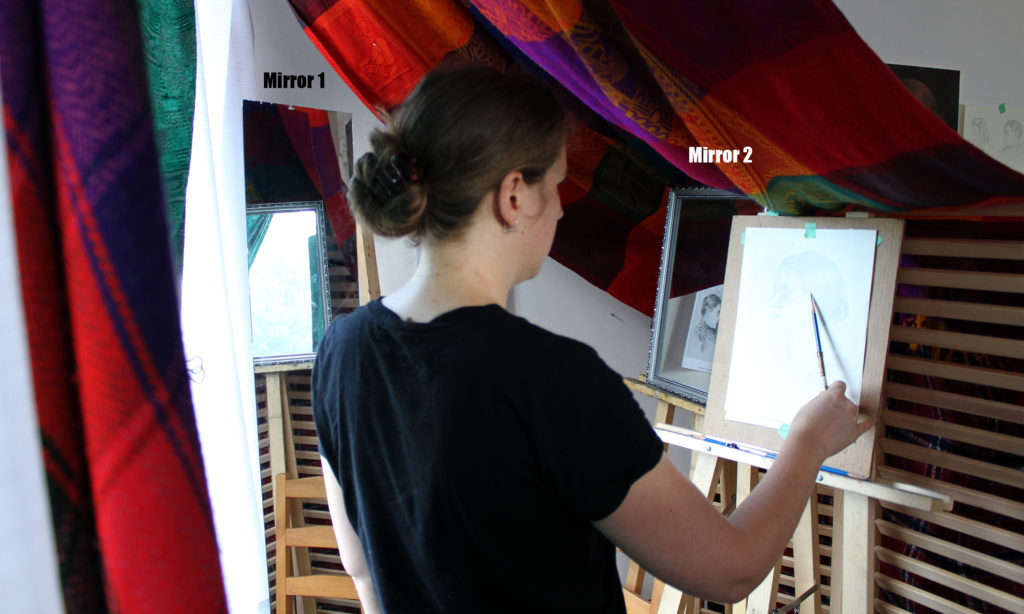
It’s not always possible to find a model, so I’m going to show you how you can do this exercise as a self portrait. Because the portrait is in profile, I will use two mirrors. First I place one mirror against a wall beside me. I take a second mirror closer to my drawing surface and I angle it so that it is facing the first.
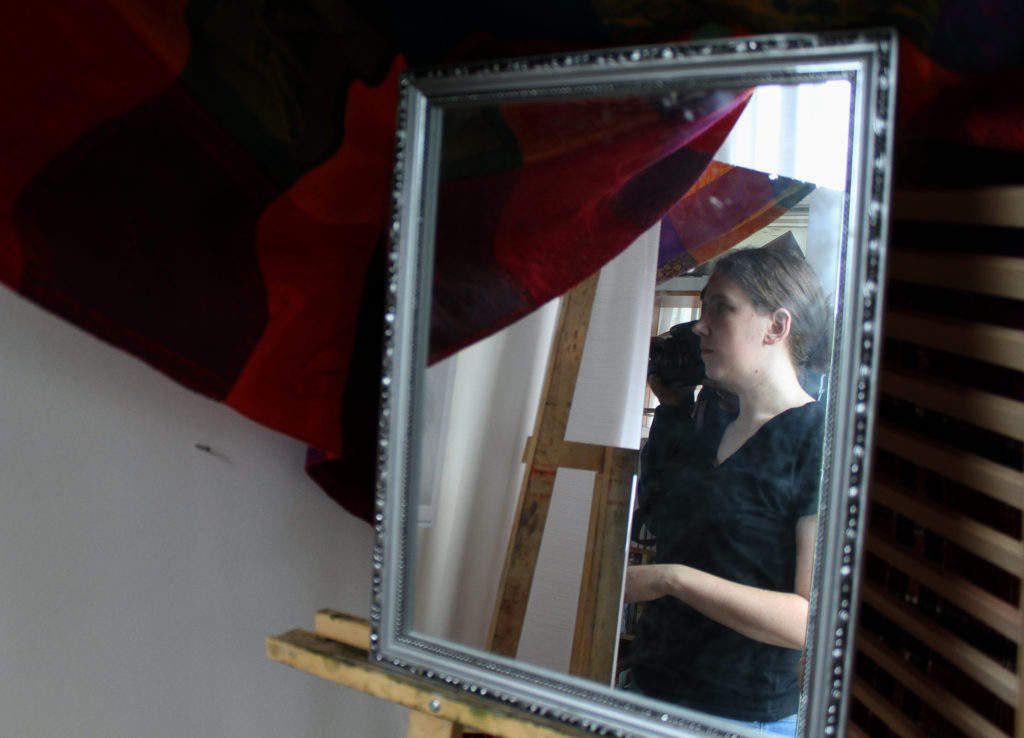
The idea is that when I look into the second mirror, I don’t see my immediate reflection. Instead I see my reflection in the first mirror which is in profile. It takes a while to position the mirrors correctly (the first time I tried it took a good 45 minutes — no shame).
Tip: If you don’t have a model and you only have one mirror then set yourself up in a three-quarter angle and focus on matching the lighting from the drawing. The important thing is to make a drawing — who cares if you break a couple rules!
Lighting
Recreating Rachael’s drawing means mimicking the light condition she described in her image. This means I need one strong light source directed at the right side of my face. My goal is to match the shadow shapes (forehead, eye socket, front of face) on Rachael’s drawing.
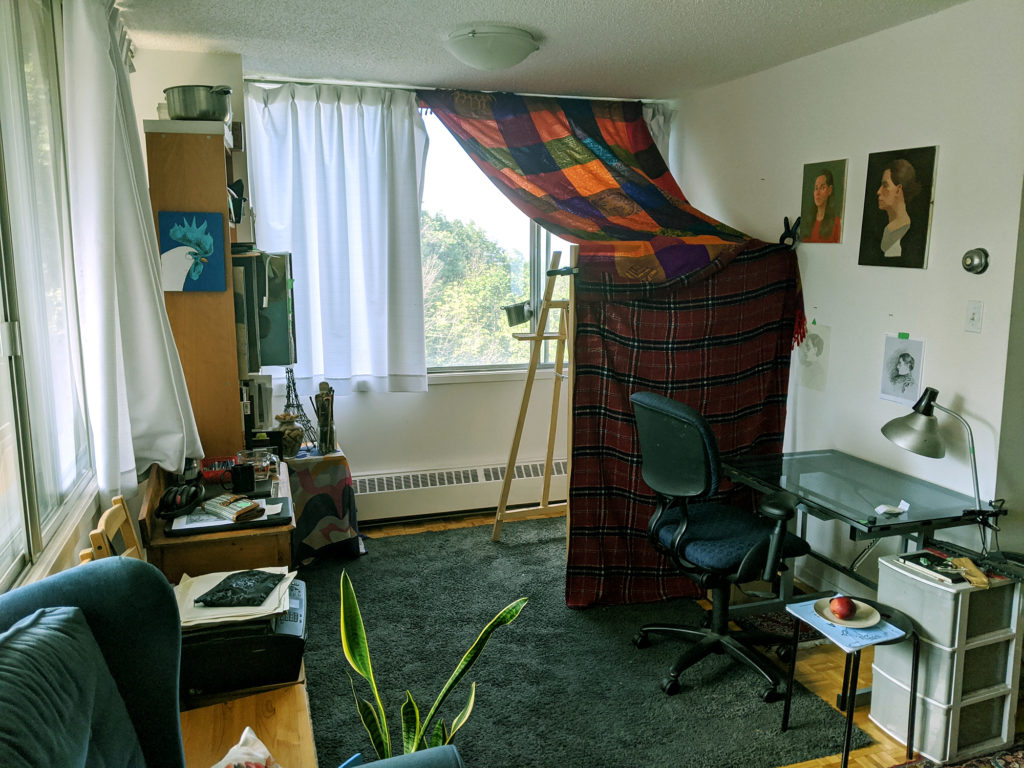
If you have a dark corner in your house away from large windows or if you work at night, you can use a lamp as your main light source.
I used the light from a window as my main source. Controlling ambient light ensures more visible shadow shapes. I was feeling especially motivated so I built myself a blanket fort to block out the light coming from other sources!If you are doing a self portrait and working from two mirrors the lighting set up can feel slightly more confusing.
To see yourself in the profile position you look into the mirror on your right. In that mirror you should see the reflection of your reflection from the left mirror. So you see the left side of your face. Your main light source should also be on the left.
Portrait
Portraits have a psychological quality. We get drawn into the eyes of the sitter and we start to wonder at and interpret their thoughts. For the viewer this is what makes a portrait exciting, for the artist IT’S A TRAP! It’s so easy to spend all your time on the features and forget about the rest of the head and face. As a rule of thumb, I try to delay adding the eyes and the other features for as long as possible.
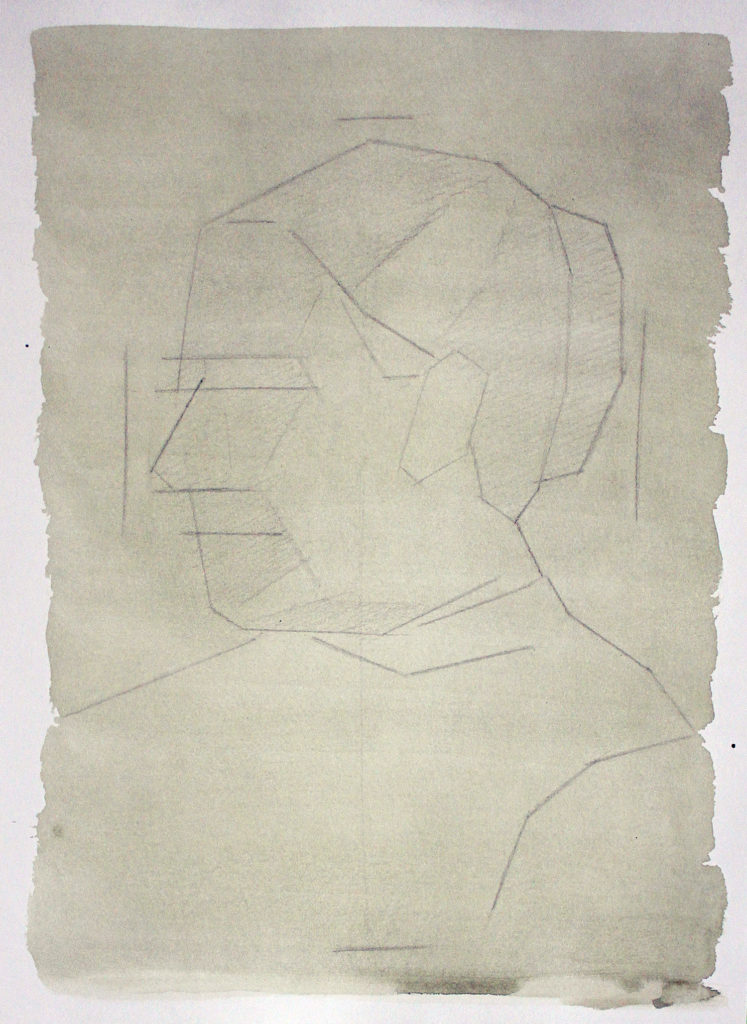
I start my drawing by blocking the outline of my head. I use a series of straight lines to carve out the main shape. At this stage my main concern is getting the right width and height of the head.
Next, I indicate the placement of my features. For now I use a simple dash line to indicate the hairline, the top of the brow, the eyes, the base of the nose and the part of the mouth. I allow myself a very general block-in of the nose and the ear. Pay special attention to the relative placement of these features.
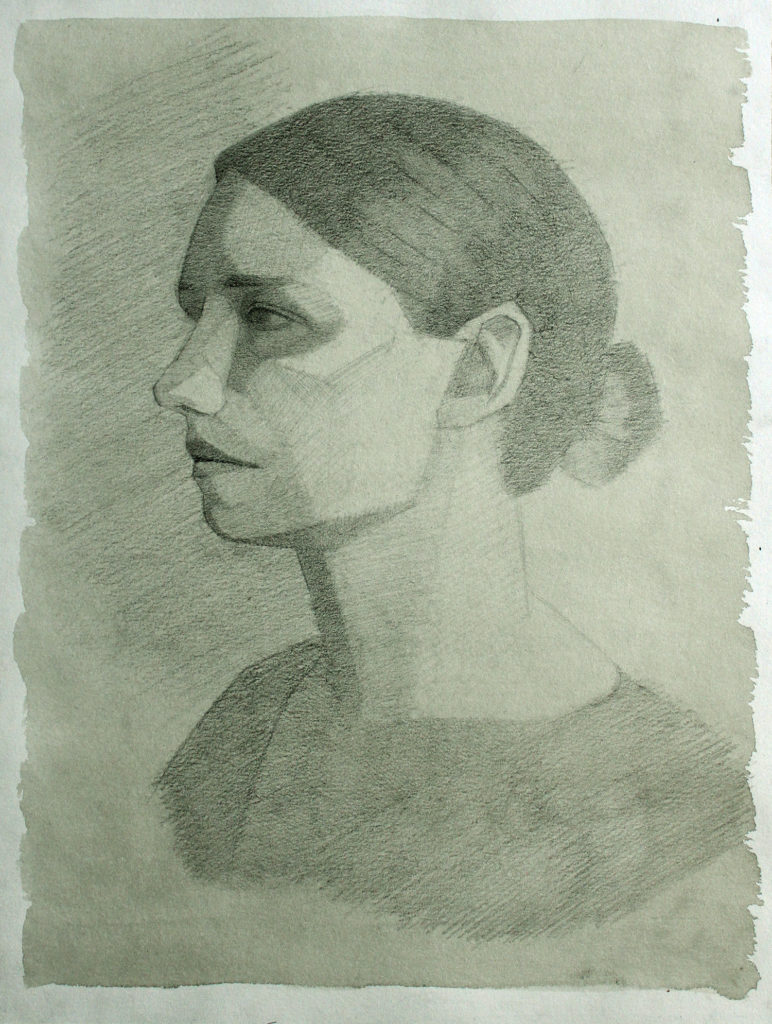
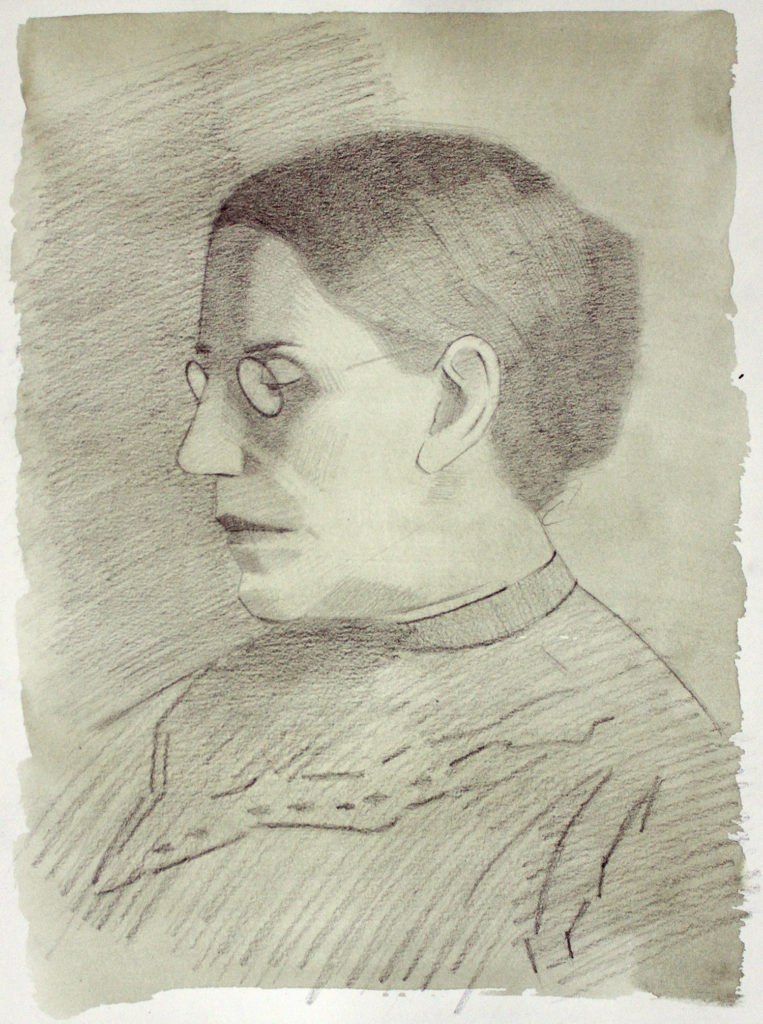
Next, I define the shadow shapes. If I look at Rachael’s drawing, I can see that some areas of the shadow are darker than others. For now I want to make a very general distinction between the areas in light and shadow. Using straight lines, I block out the shape of my shadows and fill them in with a loose graphite layer. This is my favorite stage in a drawing. Even without eyes the drawing is already recognizably a portrait!
In the next step, I start to describe the features. Remember our goal isn’t to finish the portrait this week. Notice how loose and sketchy I’ve kept my drawing.
Try and think about the structure of the features. In our last lesson we looked at a diagram of the nose Rachael’s teacher drew for her.
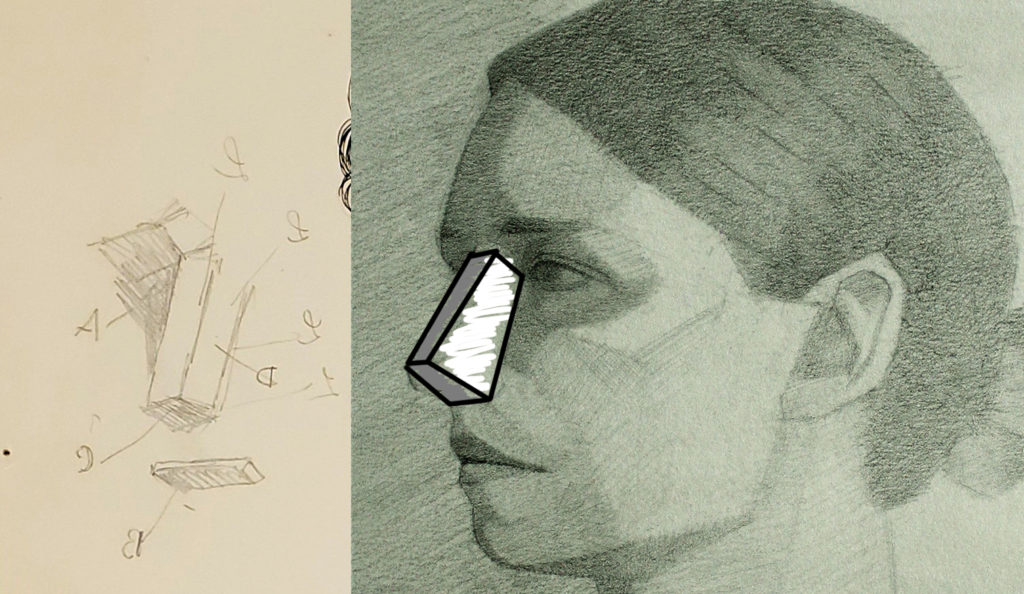
Think about how that block applies to our drawing. Notice that the side of my nose is in light, while the area surrounding it is in shadow. The front of my face is in shadow because it faces away from the light but the side of my nose is facing the light source just like the right side of my face.
At this stage I’m also thinking about the main values of the portrait. An important secret I learned through my studies is that actual value doesn’t matter as much as relative value. As I put down shading I compare the value of each section to my darkest and lightest section.
What is the darkest area of the portrait? What is the lightest area? In my case, the shadow on the top of my head is the darkest value and the lightest area is the right side of my face. The side of my hair is in light but it’s still darker than my face. The shadow on my forehead and cheek are darker than the shadow on the area around my mouth.
I keep shading loose and light. I also keep my shadow shapes flat (no gradation). Next lesson we are going to do a check of our drawing and we want it to be easy to erase and move things around. For now don’t commit to any dark shading or lines.
Signing off
As I draw my self portrait, I keep the drawing by Rachael taped to the wall. When I feel lost or get stuck, I turn to Rachael’s drawing and consider her approach.
Through this back and forth, Rachael’s drawing informs my portrait. At the same time, by comparing her drawing to a live subject, I gain a deeper understanding of her art and the different choices she made.
These conversations with Rachael’s art are the soul of this project. Through this kind of deep engagement with her art, I feel like I have gotten to know Rachael. I wonder if you feel the same way?
Although Rachael and I are separated by time and place, I feel connected to her through her art. For me, the great joy of art is this feeling of intimacy and connection the work evokes.
Very Respectfully Yours,
Courtney Clinton
Rokeby Museum is excited to offer this 6-part series from artist in residence Courtney Clinton. Please consider a donation, if you can, to help us continue to offer programs like this.
We acknowledge the support of the Canada Council for the Arts.