Rokeby Museum
Rokeby Museum Distance Drawing Course — Week 2: Copying
WEEK 1 | WEEK 2 | WEEK 3 | WEEK 4 | WEEK 5 | WEEK 6
Inspired by Rachael Robinson Elmer (1878–1919) and taught by Courtney Clinton, Rokeby Artist in Residence
Dear Student,
Courtney Clinton, Rokeby Museum Artist in Residence, here, writing to share my ongoing research and a new drawing exercise!
Since our last letter, Allison Gregory, Education and Interpretation Fellow, and I have been busy going through the museum’s archive looking for images and correspondence. Our research centres around the original letters (dated 1891–1893) from a correspondence drawing course that one of the Robinson daughters, Rachael Robinson Elmer (1878–1919), took as an adolescent.
Because I’m in Montreal, Canada, and can’t visit the museum, Allison acts as my eyes and ears on the ground. In a lot of ways our research process mimics the form of Rachael’s drawing correspondence course; Allison and I have never met in person, but through our correspondence we’ve built a friendship.
Another new friend is Rachael. Obviously it’s impossible for me and Rachael to meet (barring Tesla launching a solar-powered time travel machine!) but I’ve been getting to know Rachael by studying her art. For this week’s exercise, I am going to show you how to study art by making a master copy!
Exploring the Museum’s Collection

Rowland Evans Robinson
As an art student, Rachael was asked to make careful copies of the work of famous and accomplished artists. The artist with the greatest impact on Rachael’s development was her father, Rowland Evans Robinson (1833–1900).
Rowland was the son of Rowland Thomas Robinson (1796–1879) and Rachel Gilpin Robinson (1799–1862). His parents were ardent Quakers and abolitionists . Rowland Senior was a founding member of the Ferrisburgh Anti-Slavery Society and took in fugitives from slavery, aiding some on their journey to freedom, and when work was available, hiring others to work and live on the farm for wages.
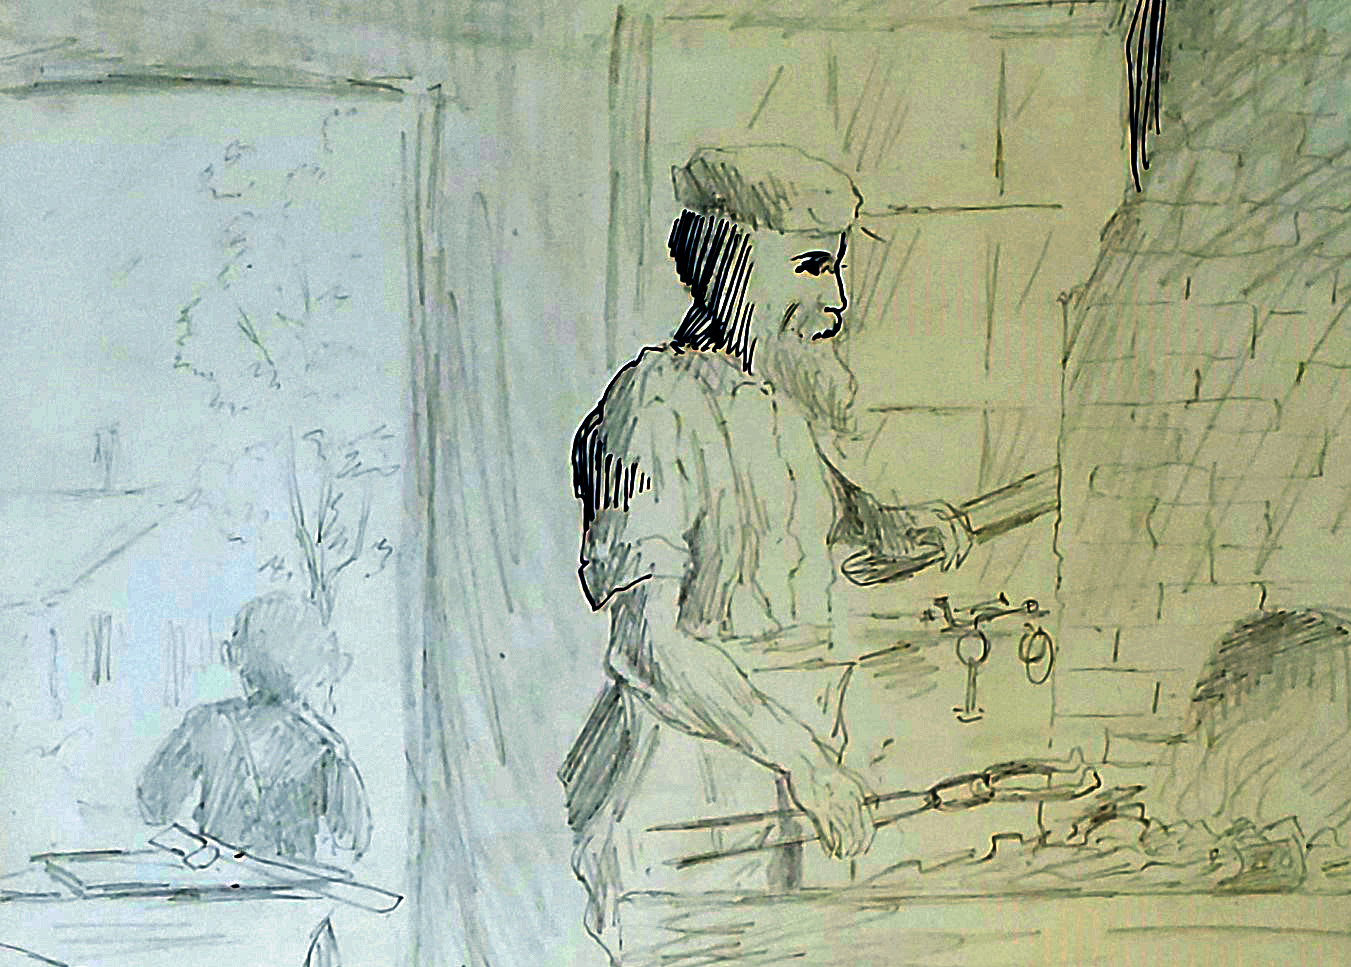
Growing up on the family’s Merino sheep farm, Rowland sketched his surroundings. As a young man he built a career as an illustrator for agricultural papers including Moore’s Rural New Yorker and the American Agriculturist.

Rowland, always having problems with his vision, started rapidly losing his sight around 1886. A few years later, he was completely blind. As a result, he was unable to draw and continue his career as an illustrator. His wife, Ann Stevens Robinson (1841–1920), encouraged him to write about his interests: Vermont history and nature, and the people who populated Vermont.
In 1887, he completed his first full length book, Uncle Lisha’s Shop. Rowland used a writing aid, consisting of a piece of paper on top of corrugated cardboard to keep his work legible. Despite his blindness, and with the help of his family, Rowland continued to publish books up until his death in 1900, with more books posthumously published in the few years following his death.
Father Daughter Relationship
As a teenager, between 1895 and 1897, Rachael attended Goddard Seminary in Barre, VT. During this period, Rachael and Rowland often exchanged letters.
In their letters, the two bonded and exchanged ideas on art. Despite his seniority, Rowland treated his young daughter as an artistic peer and encouraged not only her studies but also her career as an illustrator. Rowland would often submit drawings by a teenage Rachael as cover designs for his books.
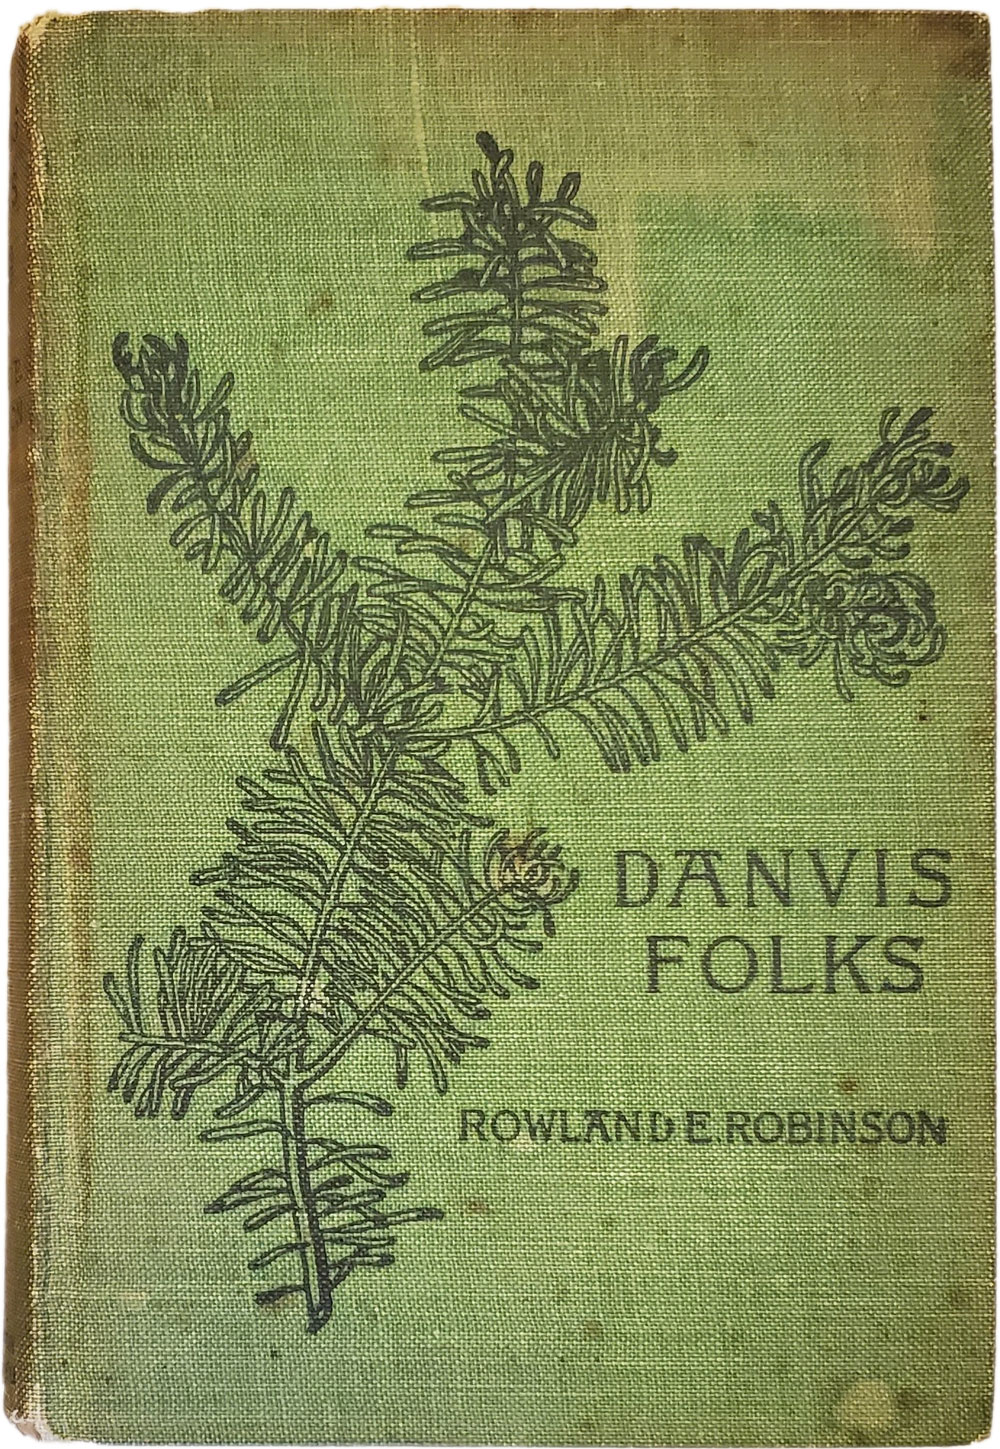
Rowland: I am delighted to have thy design the cover of “Danvis Folks”, and all admire it. When thee was a little tot I used to dress thee, and now that I am old my little girl dresses me in Evergreens
—Rowland Evans Robinson to Rachael Robinson Elmer, October 15, 1895
As for many artists, success didn’t come easily, and in the beginning Rachael’s work was often rejected.
Rowland: I am sorry they didn’t use thy pictures.
— Rowland Evans Robinson to Rachael Robinson Elmer, November 14, 1895
But through the submission process, Rachael learned the ins and outs of the illustration industry.
Rachael designed the cover artwork for many of Rowland’s books throughout the 1890s. As we can see from the letters, Rowland guided both the design and submission process. In many ways, Rowland provided his daughter with an early apprenticeship that helped prepare her for her career as a New York book illustrator.
Rowland: Mr. Hatfield says when thee sends any drawings to magazines or papers try to have two or more lines or a little story about the pictures. It helps wonderfully about settling them.
—Rowland Evans Robinson to Rachael Robinson Elmer, November 24, 1895

Drawing Exercise
In the same way that Rachael learned to work with magazines by emulating her father’s career, she learned art theory (proportions, shading, and line quality) by copying the works of accomplished artists.
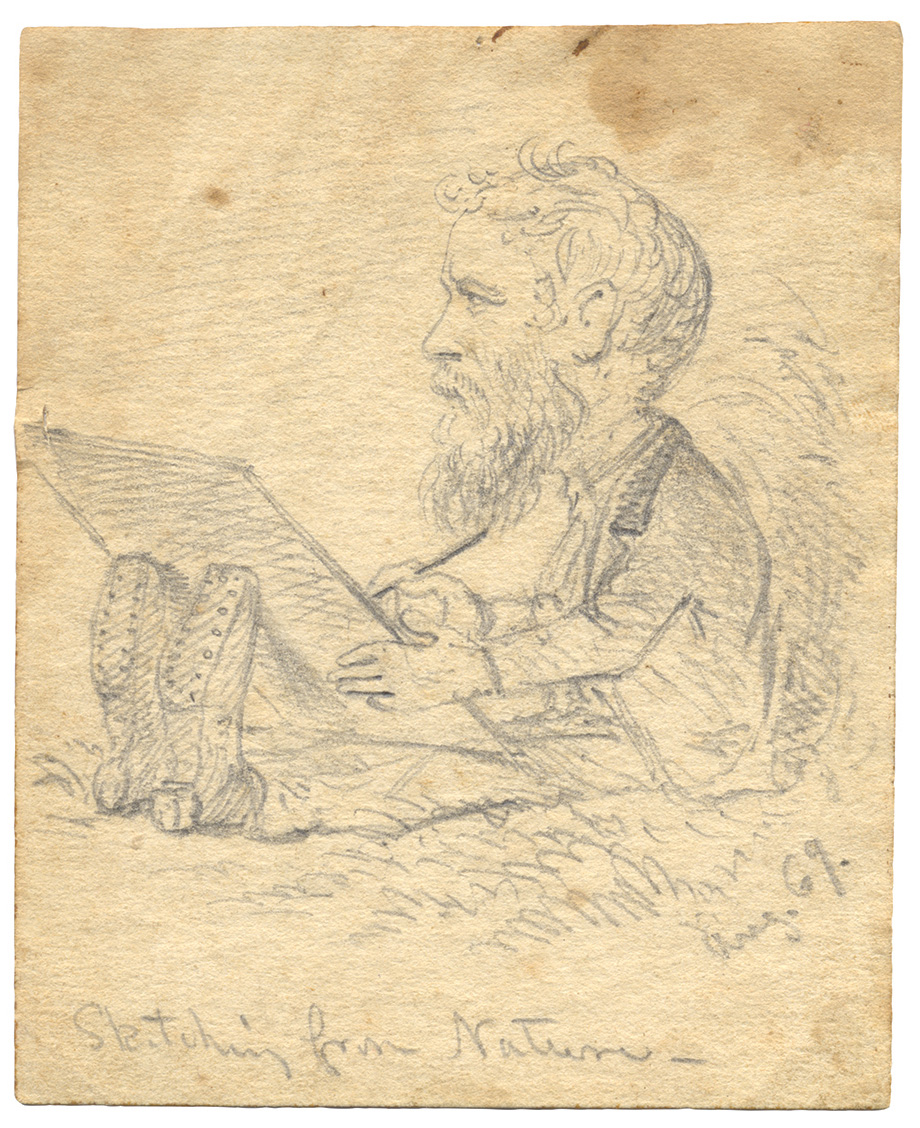
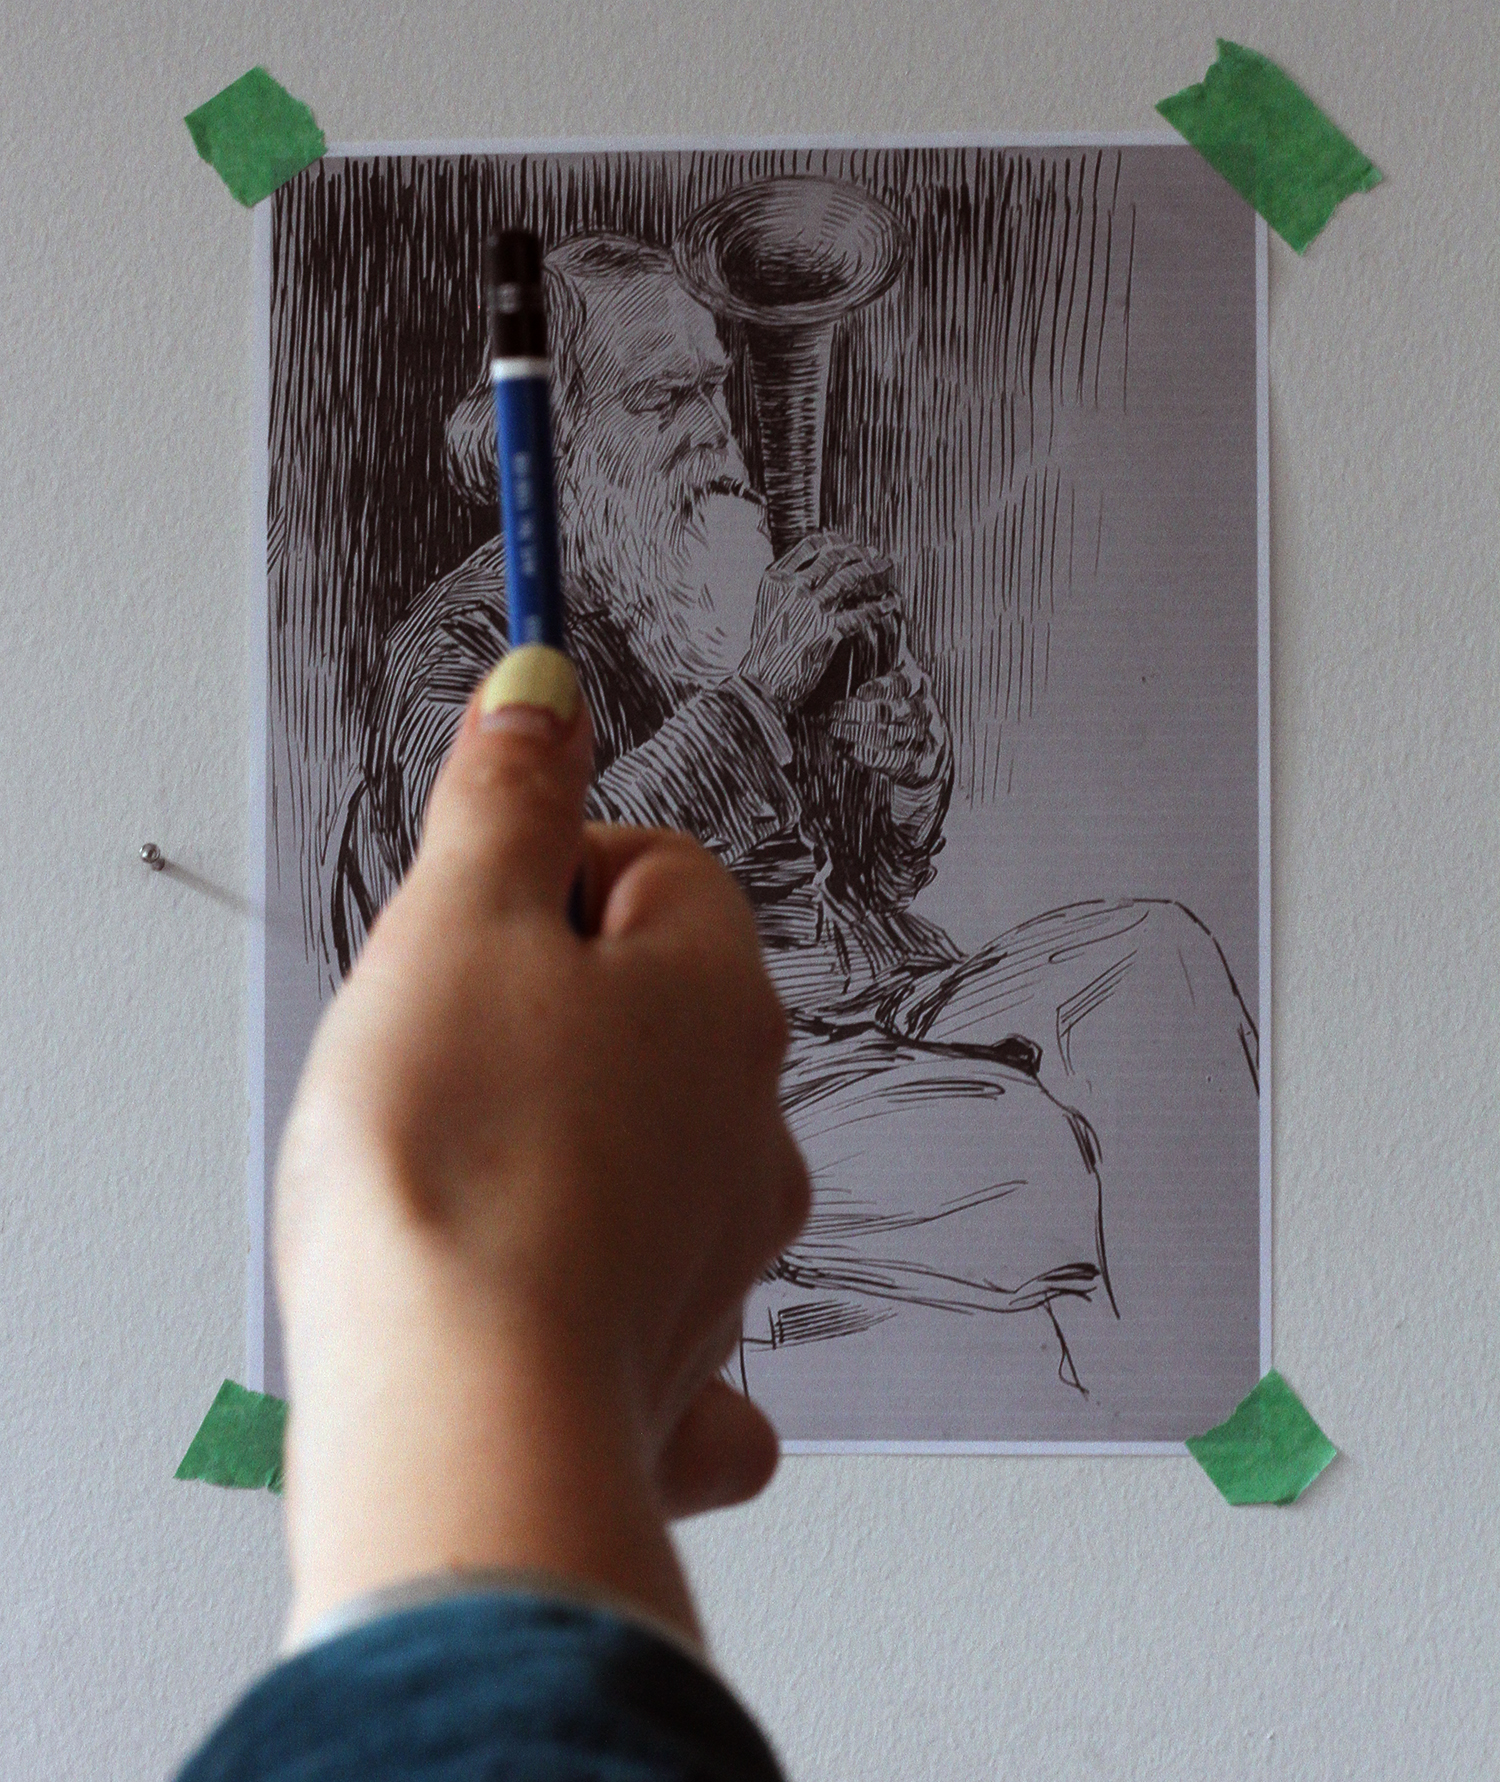
Rachael learned her craft well and there is a lot we can learn about the academic drawing tradition by copying Rachael’s work. For this week’s exercise, I invite you to copy this drawing of Rowland by Rachael.
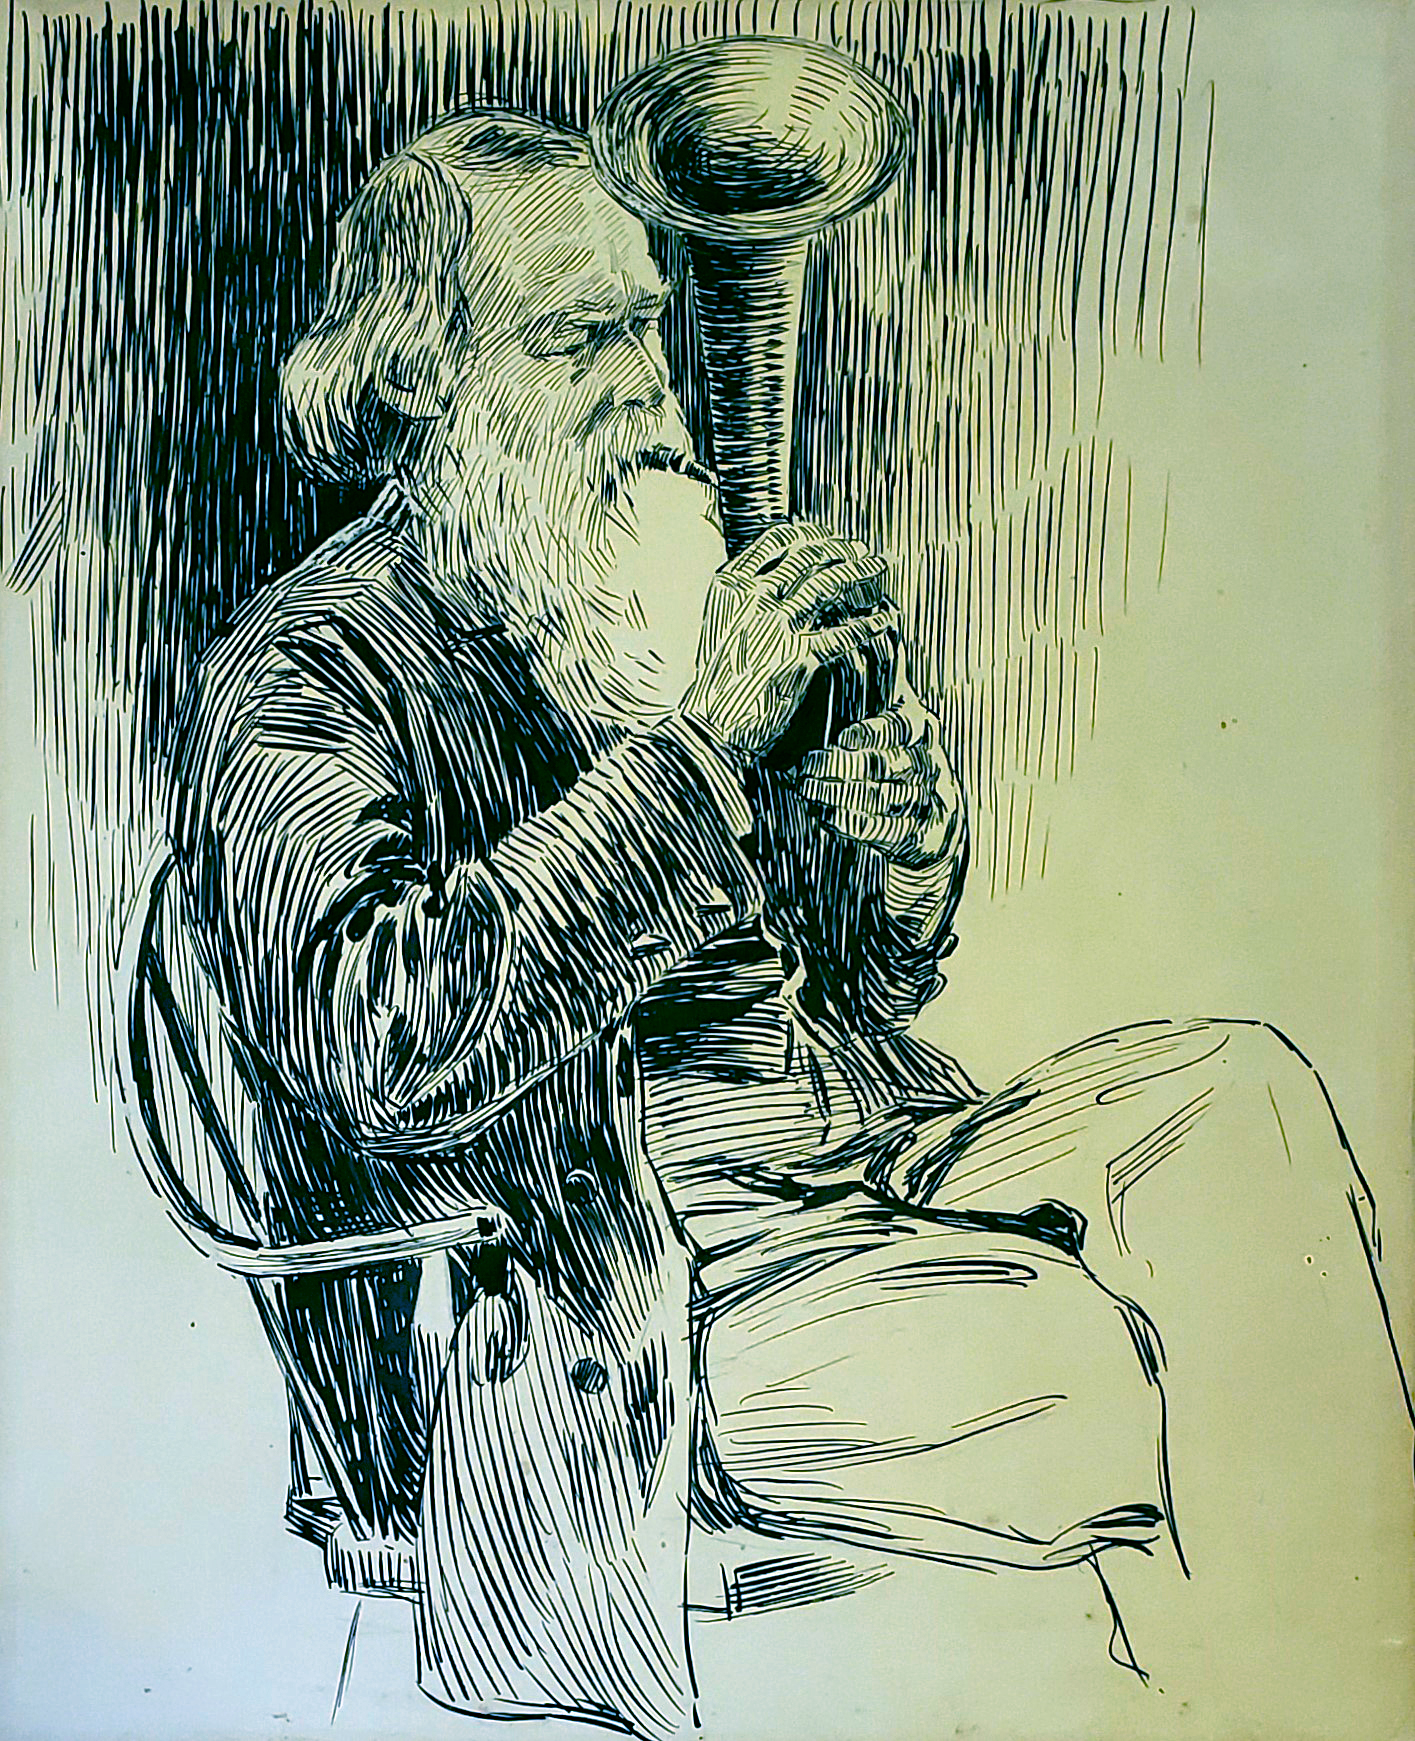
Rachael’s drawing is done in pen and ink, but before she used a pen she would have done a preparatory drawing in pencil. Only after she worked out the proportions and the shading in pencil would she do a second version in pen. For this week’s exercise, we are going to limit ourselves to the preliminary pencil drawing. Our goal with this study isn’t exact likeness. Instead, we want to try to understand Rachael’s drawing process.
If this is your first time doing a master copy, don’t panic! I’ve outlined a three step process with images to guide you through the copy. Let’s get started!
Note: As you work your way through this exercise, share your work! Be sure to tag @clinton.courtney and @rokebymuseum on Instagram and use the hashtags #RokebyDistanceDrawing and #DrawingWithRachael. Got a question for Courtney? Let us know in the comment section below!
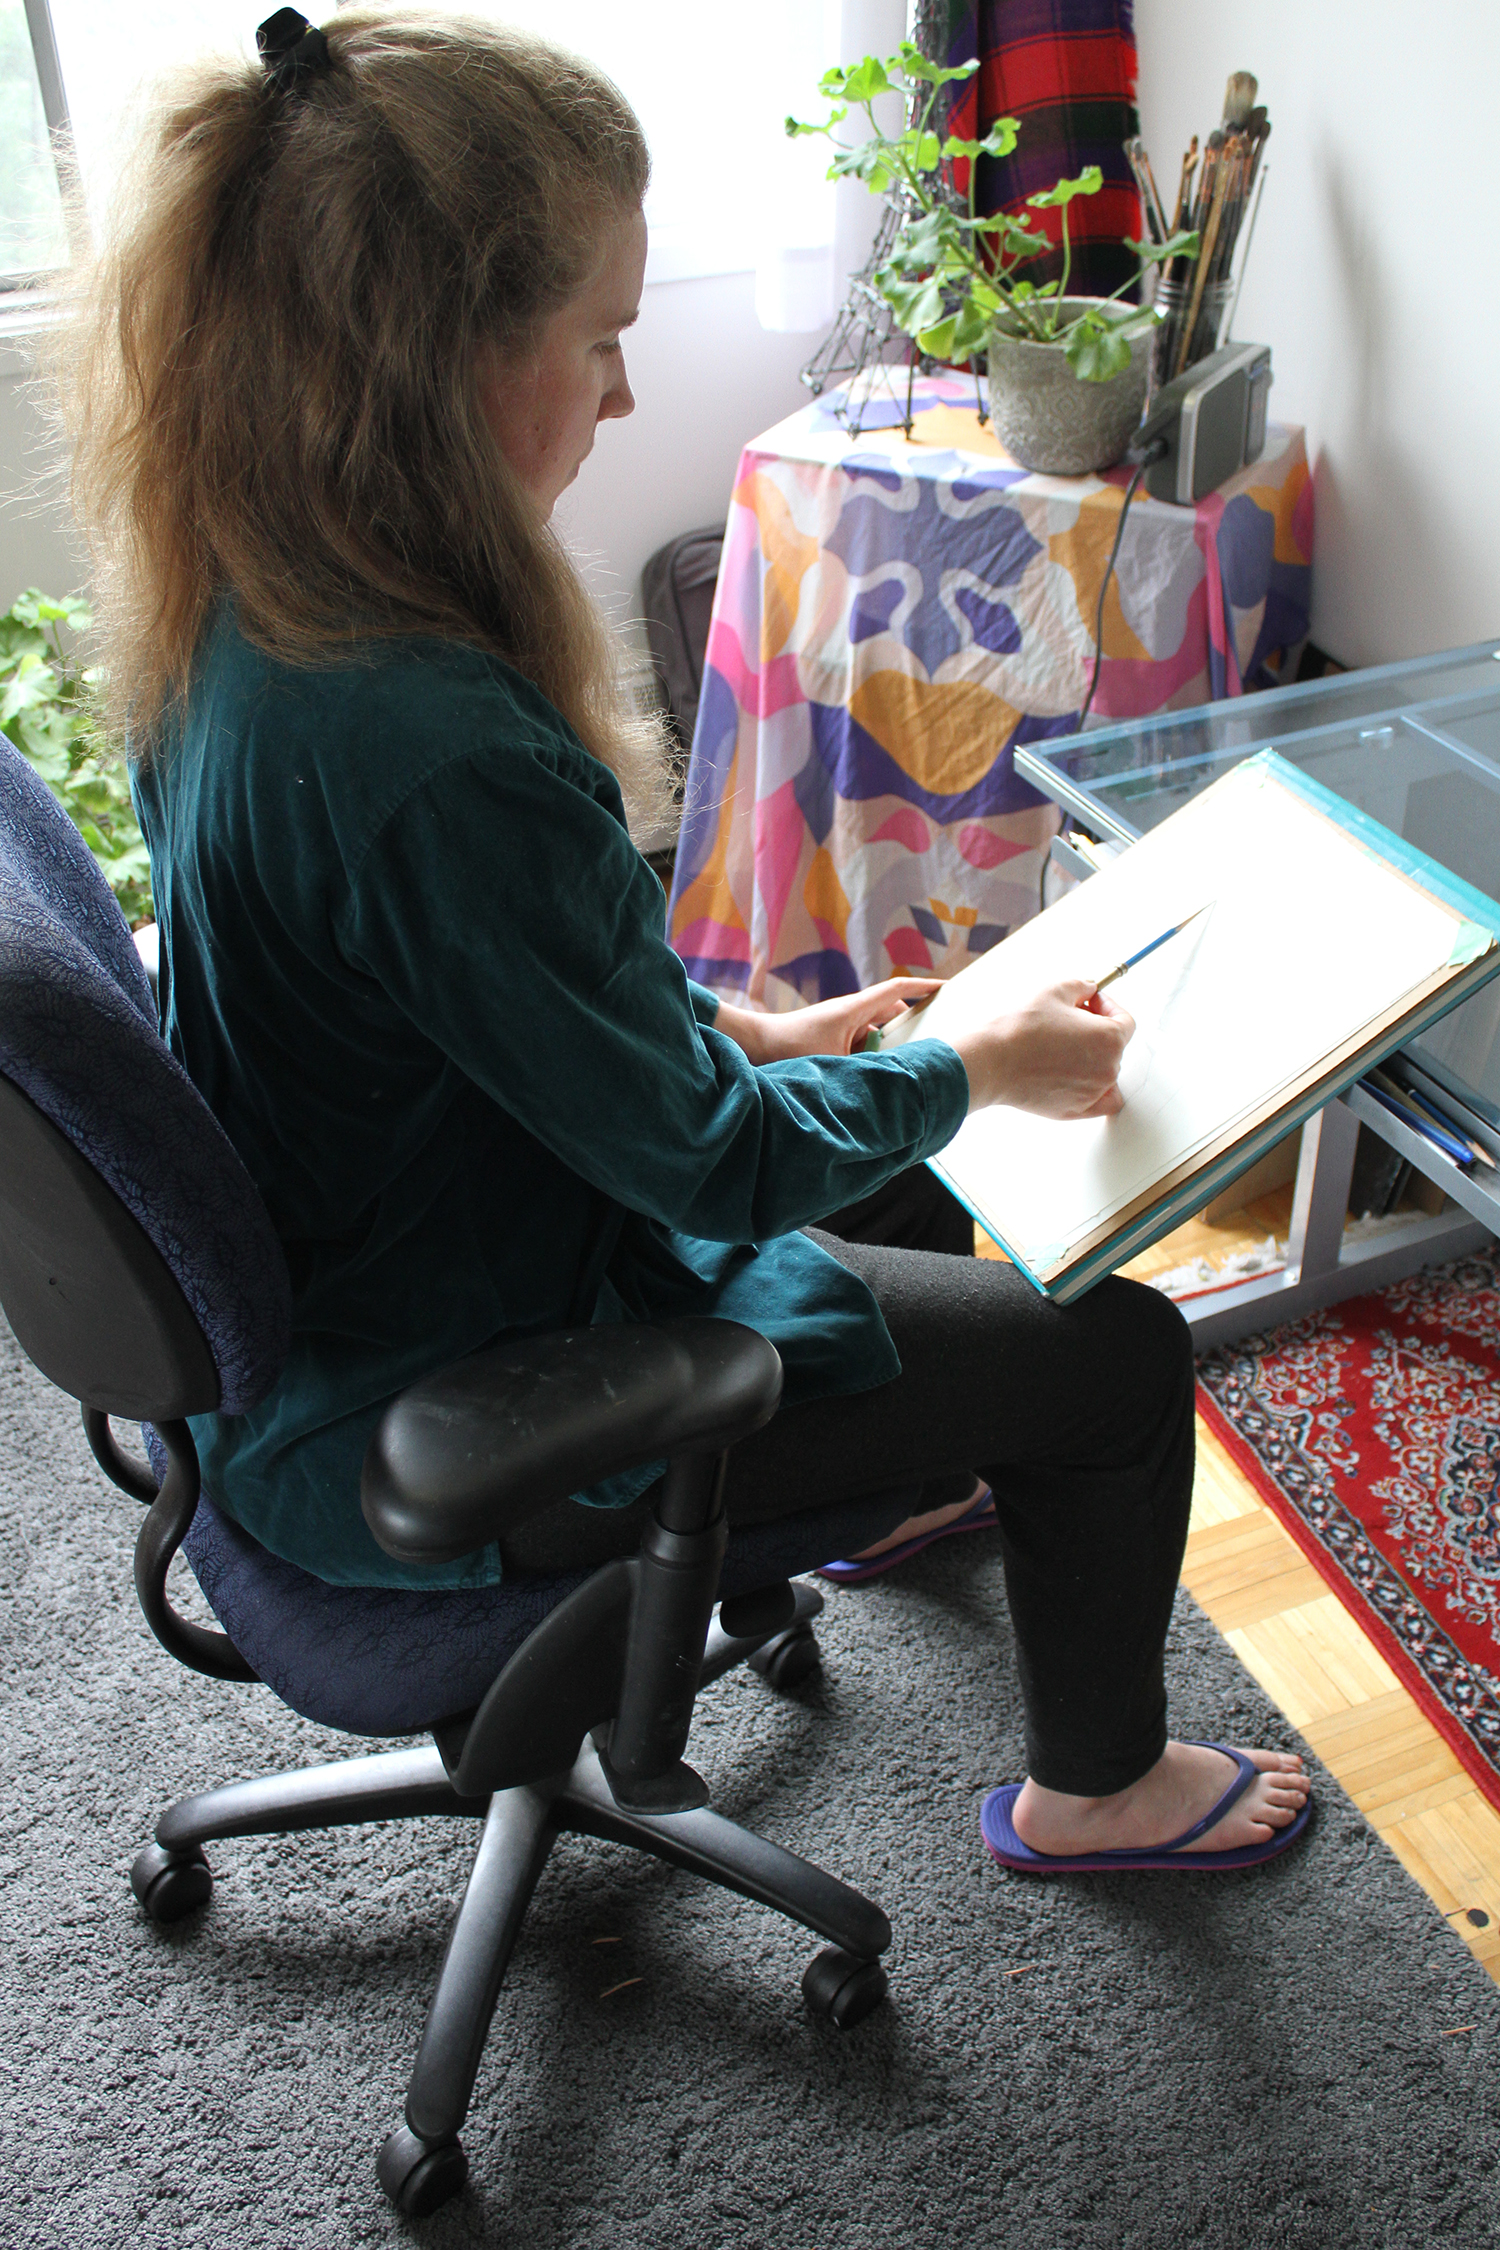
Drawing Setup
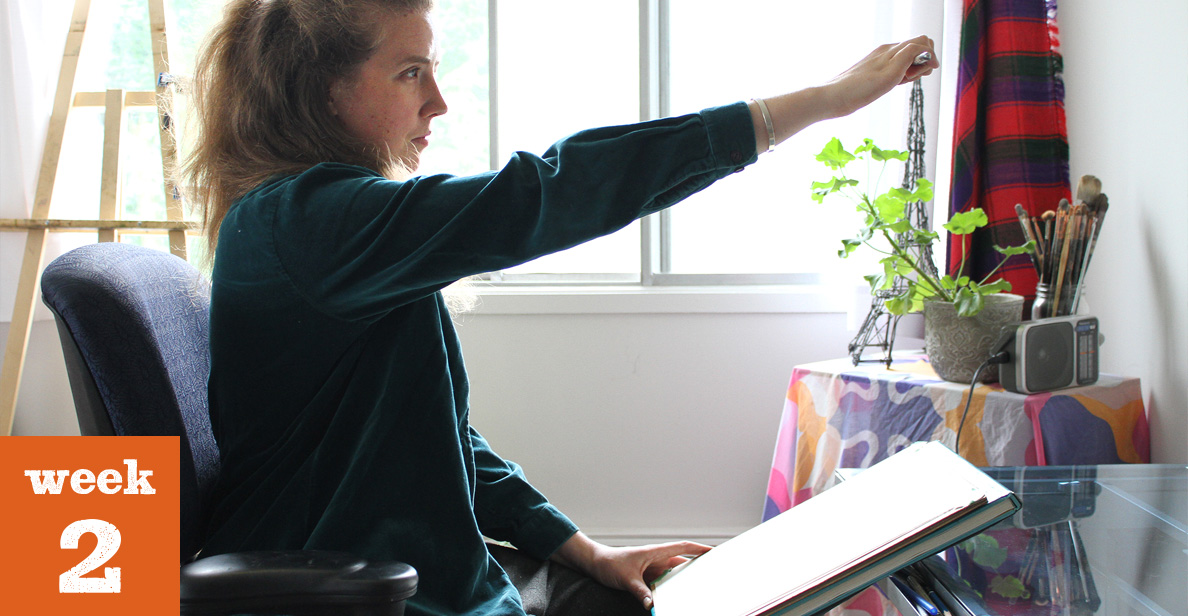
Not all of us can afford a studio space, but I will let you in on a secret: an art studio is not a physical space, it’s a set up. I’m going to show you how to recreate the studio atmosphere right at your kitchen table.
Image
You can work from your computer or you can save the image to your computer and print it out. If you print out your image, make sure to tape it to a wall directly in front of your drawing table. To avoid distortion from perspective, we want to face the image directly (not on an angle). The drawing should be at least an arm’s length away so that we can take measurements and angles.
Drawing Board
You will need something that you can lean against a table so that you can draw on an inclined surface. I like to use a large coffee table book. You can also buy a drawing board from your local art store.
Drawing on a flat surface means you are looking across your piece of paper and seeing your drawing in perspective. Perspective distorts the way we see reality and it will make the drawing process more complicated. Drawing on an angle allows the artist to look directly at their sheet of paper.
Paper
I want you to work big. The minimum size of your paper should be an A4 sheet of printer paper. Ideally you should work on a page 9 x 12 inches or even 10 x 14 inches. It’s much easier to work out the details of the drawing when you are working big! And don’t forget to use the whole page!
Pencil and Eraser
I recommend that you use the same 6B pencil that we used in our first exercise. This soft pencil allows us to make both dark and light lines by simply varying our pressure.
For an eraser I recommend using a kneaded eraser (these are the squishy putty balls you find on artists’ desks, not the big pink ones from school). Make sure to squish it into a ball before you start to use it. When you get to the shading step, you can pat your drawing with this eraser to slowly lift up layers of graphite if you make a mistake.
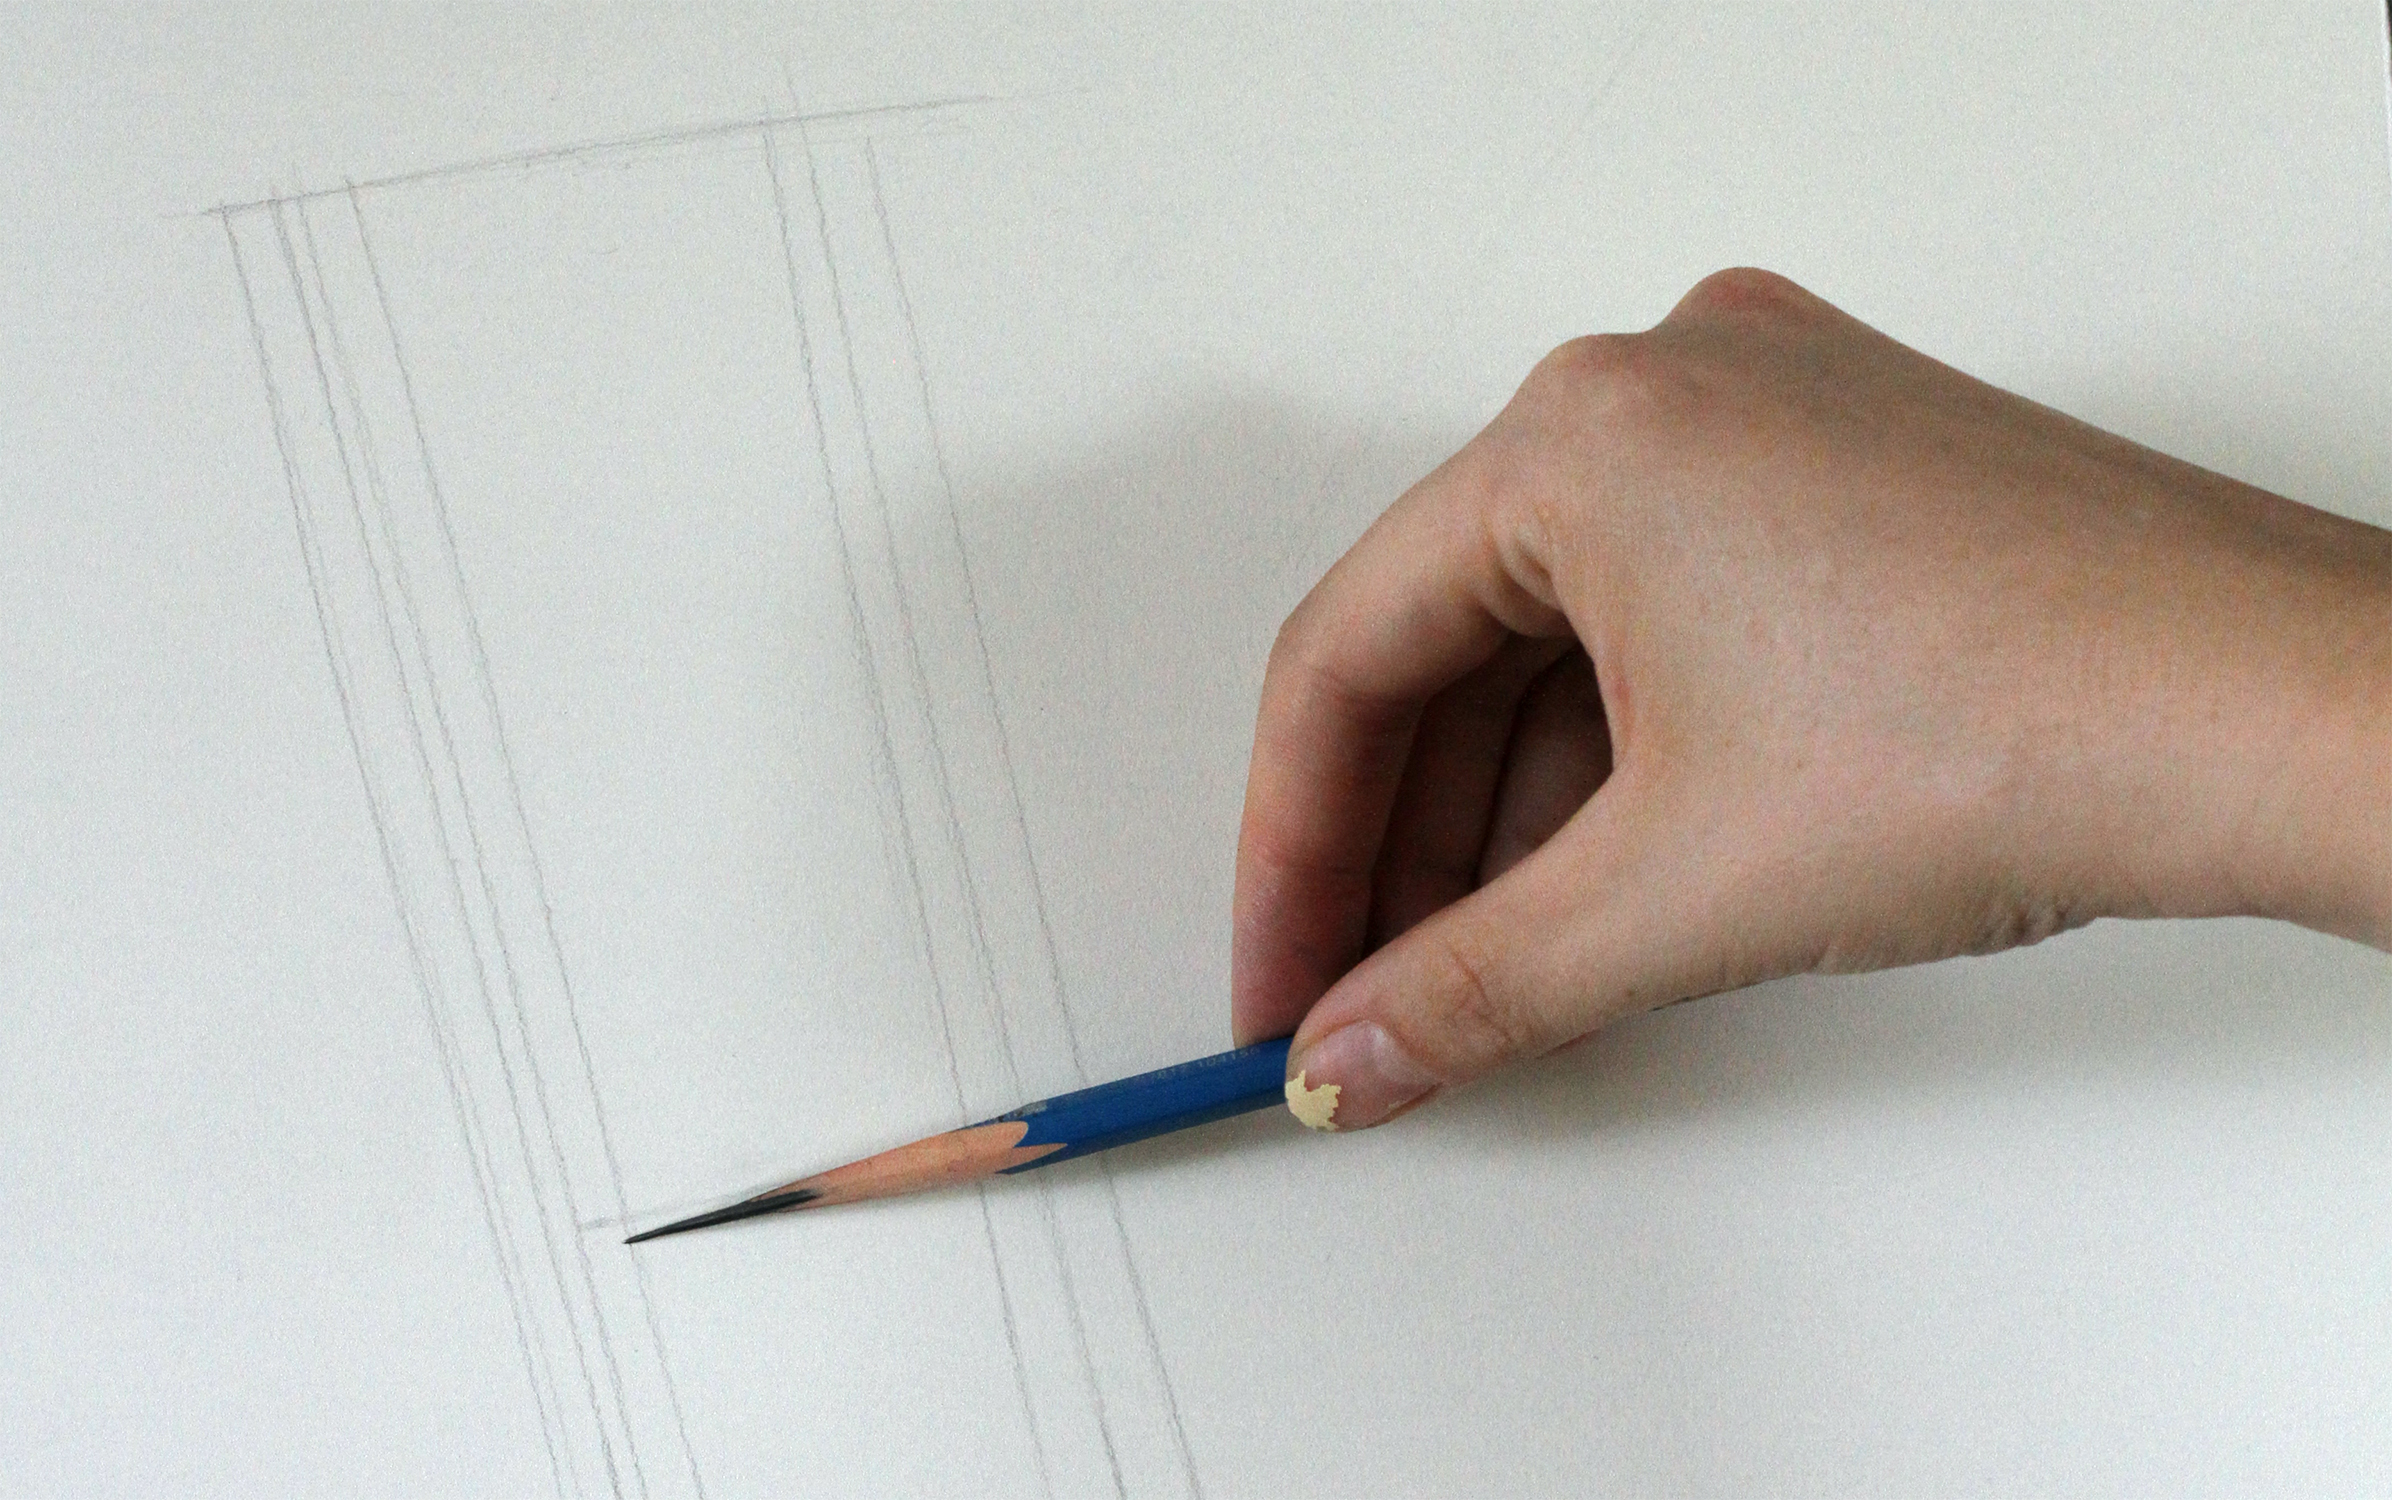
Holding Your Pencil
For this drawing, I want you to start holding your pencil like an artist. When artists draw we don’t move the wrist, we move the shoulder. We hold the pencil higher up, closer to the middle. Instead of the usual grip, hold it between your thumb and index/middle fingers. Holding it like this takes some practice, but over time you will see that it makes it easier to draw confident lines.
Starting Your Drawing
Looking at Rachael’s drawing of Rowland, there is so much detail! It can feel very overwhelming and hard to know where to start. Don’t worry, every drawing has a starting line.
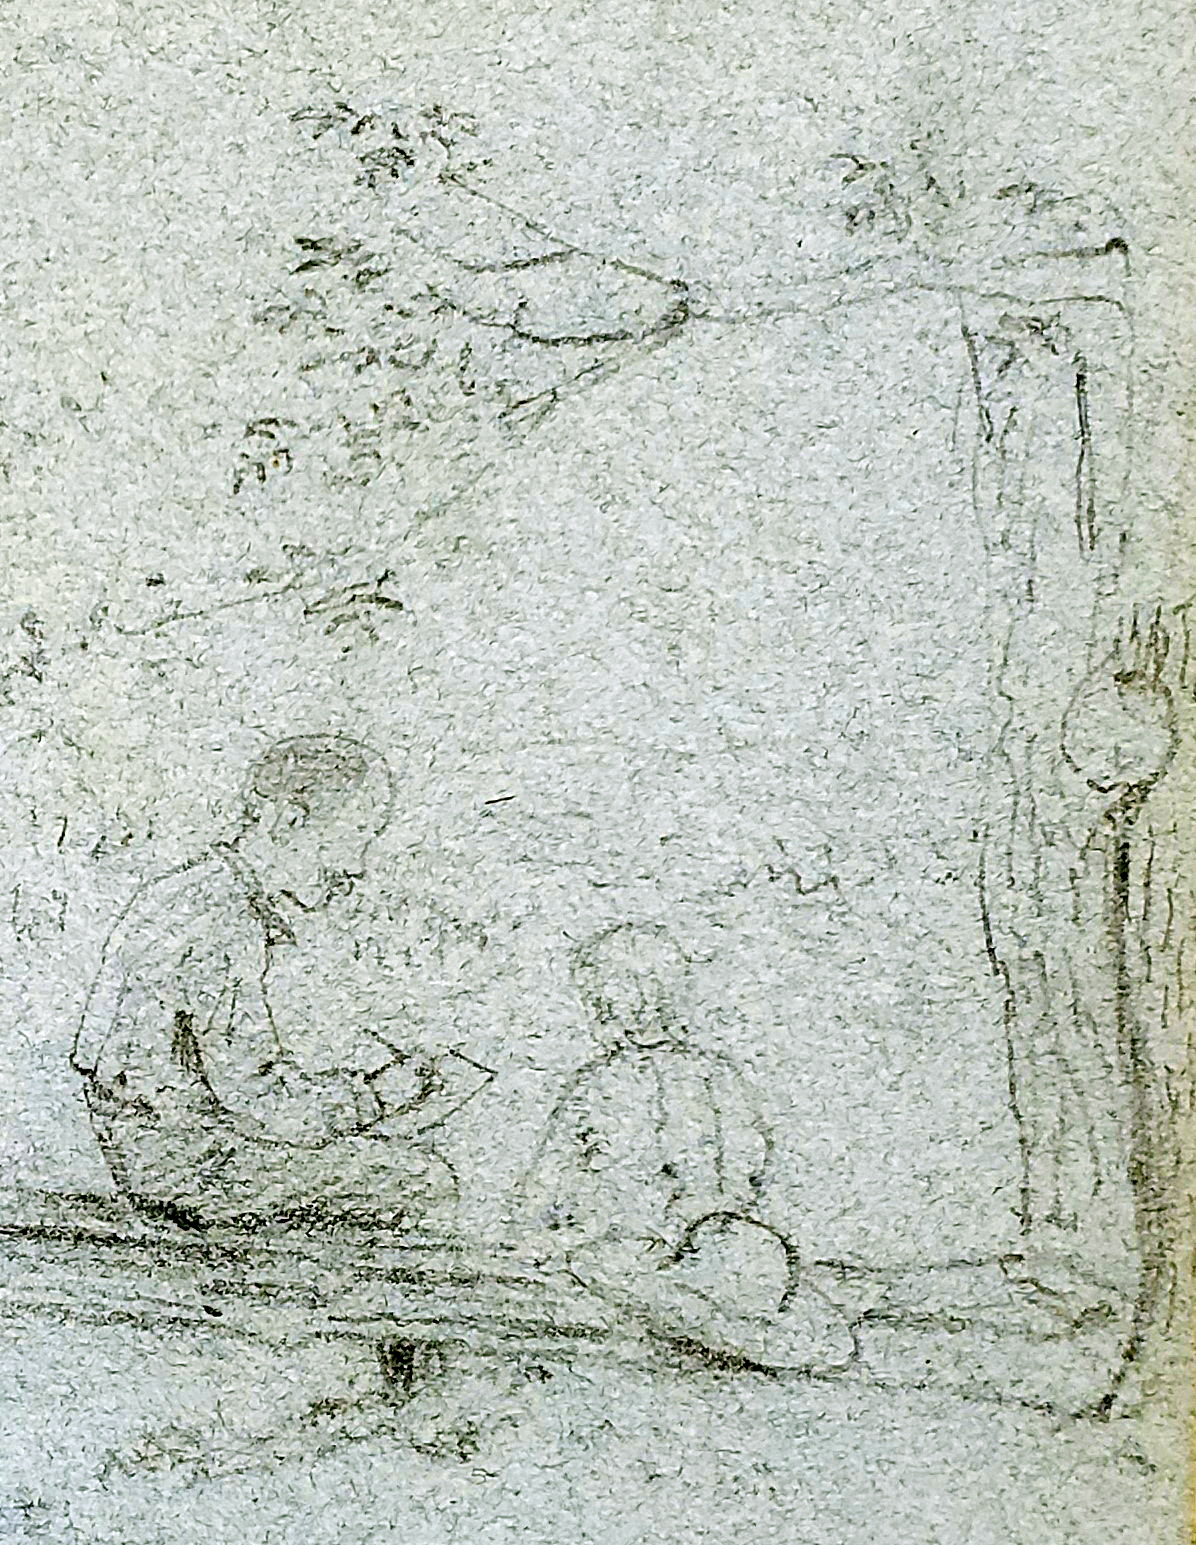
To begin, I mark the top and the bottom of my drawing with two short lines to indicate the total height and placement of my drawing. I also use the same process to indicate total width. Next, I draw a vertical line to mark the centre of my drawing.
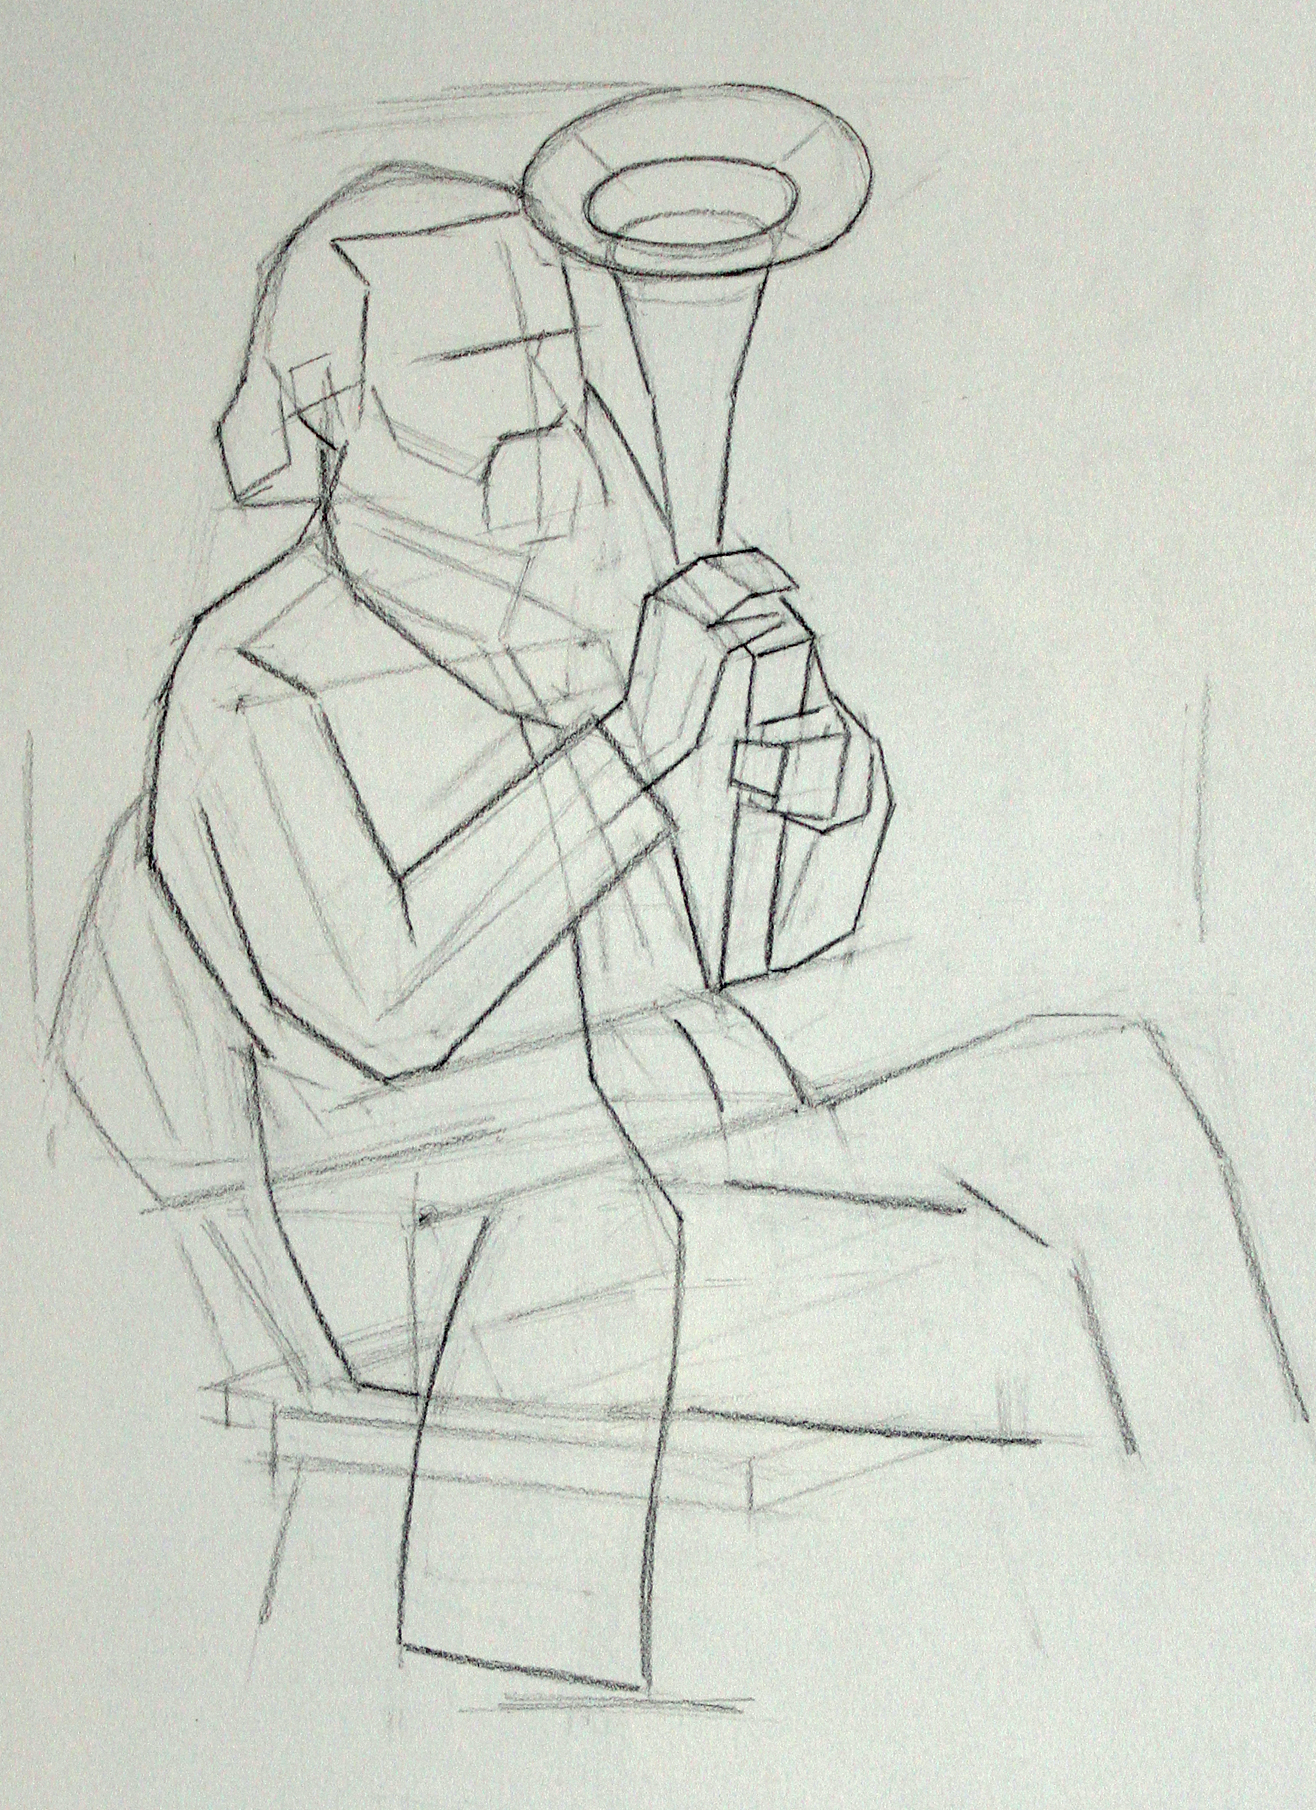
With my placement worked out, I slowly develop the main shape of my drawing. Notice that I use almost exclusively straight lines (not curved). At a later stage, I will add the detail of these curved lines. For now, I want to indicate the main sections (top of the shoulder, forearm, bent leg) in the simplest terms possible.
Look at how I drew the head. To make sure that I’m making the head large enough, I indicate the back of Rowland’s skull. I also draw his neck attached to his torso. Eventually both of these sections will be covered by hair (and beard). But at this stage to help me get the placement and the proportions right, I show the underlying anatomy.
Refining the Drawing

Before I start to add detail, I check the main proportions of my drawing. By sticking my arm out straight, closing one eye and using my pencil like a ruler, I can take measurements of Rachael’s drawing.
First, I mark off the height of Rowland’s head (top to bottom of his beard) and I compare it to the height of his body. If I compare the two, I see that I can fit one and a half heads into Rowlands body. Next, I take the same measurements on my own drawing. If they are different I make adjustments. I do a similar comparison (using my head as a unit of measurement) to check the shoulder width and the length of his left leg and arm.
Once I feel confident about my proportions, I start to add detail to my lines and block in the main shadow shapes. At this stage, we put down a very light and loose layer of shading in the shadow areas.
It’s important to note that shadow and darks are different. Overall Rowland’s coat is much darker than his skin or his pants. However, only his chest and the lower right portion of his coat are in shadow. Similarly, his face is one of the lightest areas of the drawing but if we look carefully we see that most of his face is actually in shadow.
Adding Detail

When putting down value it is useful to start with your darkest darks. As you move into your middle greys, ask yourself ‘is this closer to my darkest dark or my lightest light?’
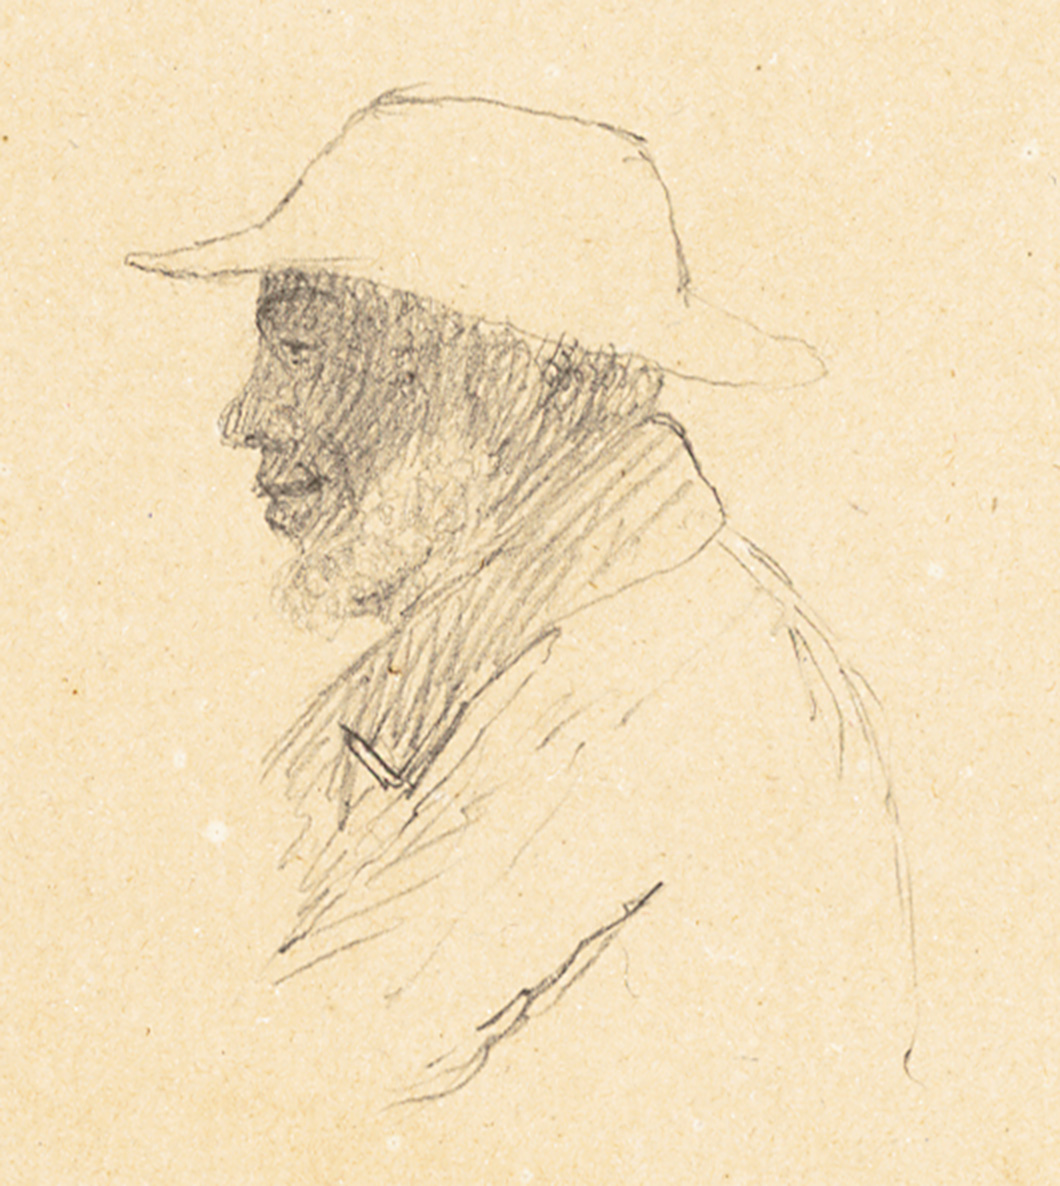
In Rachael’s drawing, there is a beautiful sense of light. We feel a glow of the light hitting the right side of Rowland’s face. Rachael creates that lighting effect through contrast. She shades her background with her darkest dark. She uses her light grey for the shadow on Rowland’s forehead, cheek, and nose. The white of the page (which is maybe a little yellow after a hundred some years!) is used to express the light on the right side of Rowland’s face. It’s the strong contrast between the background and the white of the page that creates a sense of light — pretty cool, right!?!
Signing Off
I think about copying as a kind of apprenticeship. When Rachael designed book covers for her father, he gave clear directives of what to draw and how. But this early control didn’t stop Rachael from finding her unique voice. Rachael went on to be an innovative artist — celebrated for creating the first American fine art postcard series. By giving over some creative control in those early projects, Rachael made space to learn from her father’s experience.
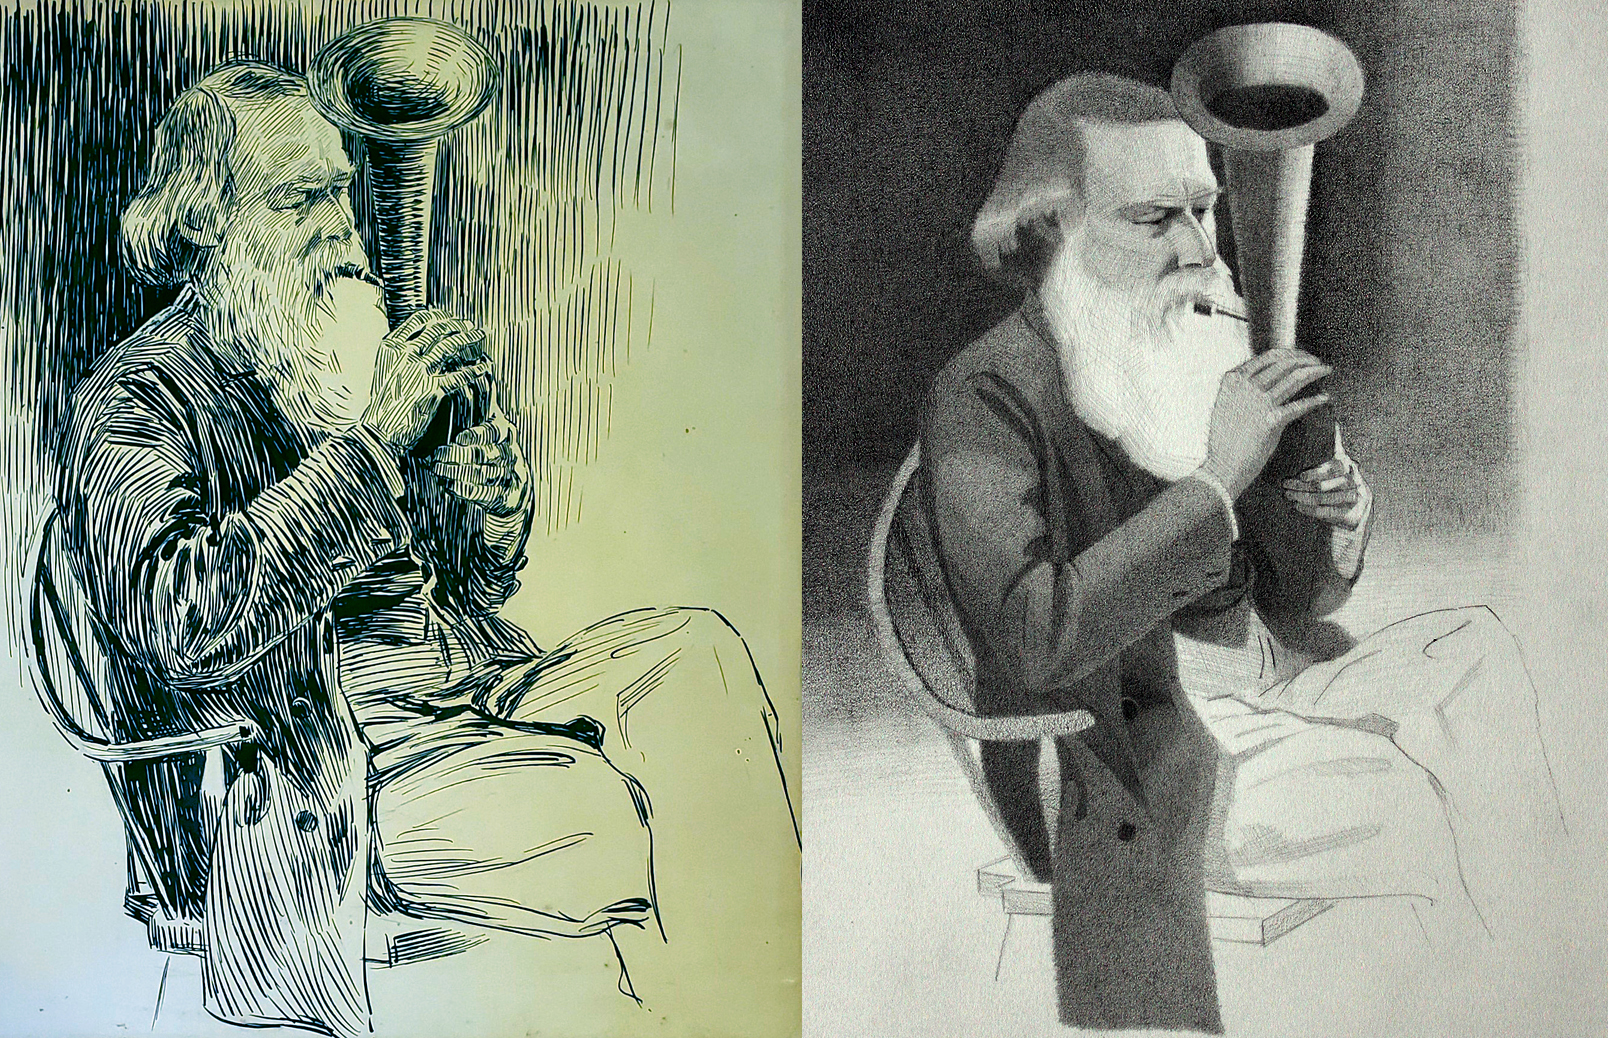
Many young artists are hesitant to make copies because they fear it will make them unoriginal in their artwork. If we compare my drawing to Rachael’s, we can see that they were done by two very different artists. Even though I’m using the same approach, my own style comes through in the drawing.
Don’t spend too much time fretting about originality. Your personal style is much stronger than you think.
Very Respectfully Yours,
Courtney Clinton
Rokeby Museum is excited to offer this 6-part series from artist in residence Courtney Clinton. Please consider a donation, if you can, to help us continue to offer programs like this.
We acknowledge the support of the Canada Council for the Arts.